Welcome to instaNDT Documentation page
Getting Started with instaNDT
To begin using instaNDT, sign in to your account by following the guide below:
- Sign In
- Verify Email — Verify your email address to enable media uploads.
After signing in, you can create an organization, create projects, upload media, and start managing your DICOM data.
Workspace
- Organizations — Create and manage organizations.
- Projects — Create projects within an organization.
- Folders — Create folders and subfolders according to your workflow.
Media
- Media — Upload and manage DICOM and non-DICOM media.
- DICOM Explorer — Browse DICOM studies, series, and instances using the DICOM hierarchy.
Sharing
- Folders — Share folders with other users.
- Sharing with External Users — Grant secure access to users without an instaNDT account.
Permissions
- Permissions — Manage organization and folder permissions for users.
instaNDT Infrastructure
instaNDT can be run either in AWS, Azure or fully on-premise. So, refer to the relevant documentation on this page to deploy it in your infrastructure.
AWS
Azure
On-Premise
instaNDT User Guide
Sign In
Before accessing instaNDT, you must create an account by signing up. Registration is required to verify your identity and to access the system.
Step 1: Create an Account
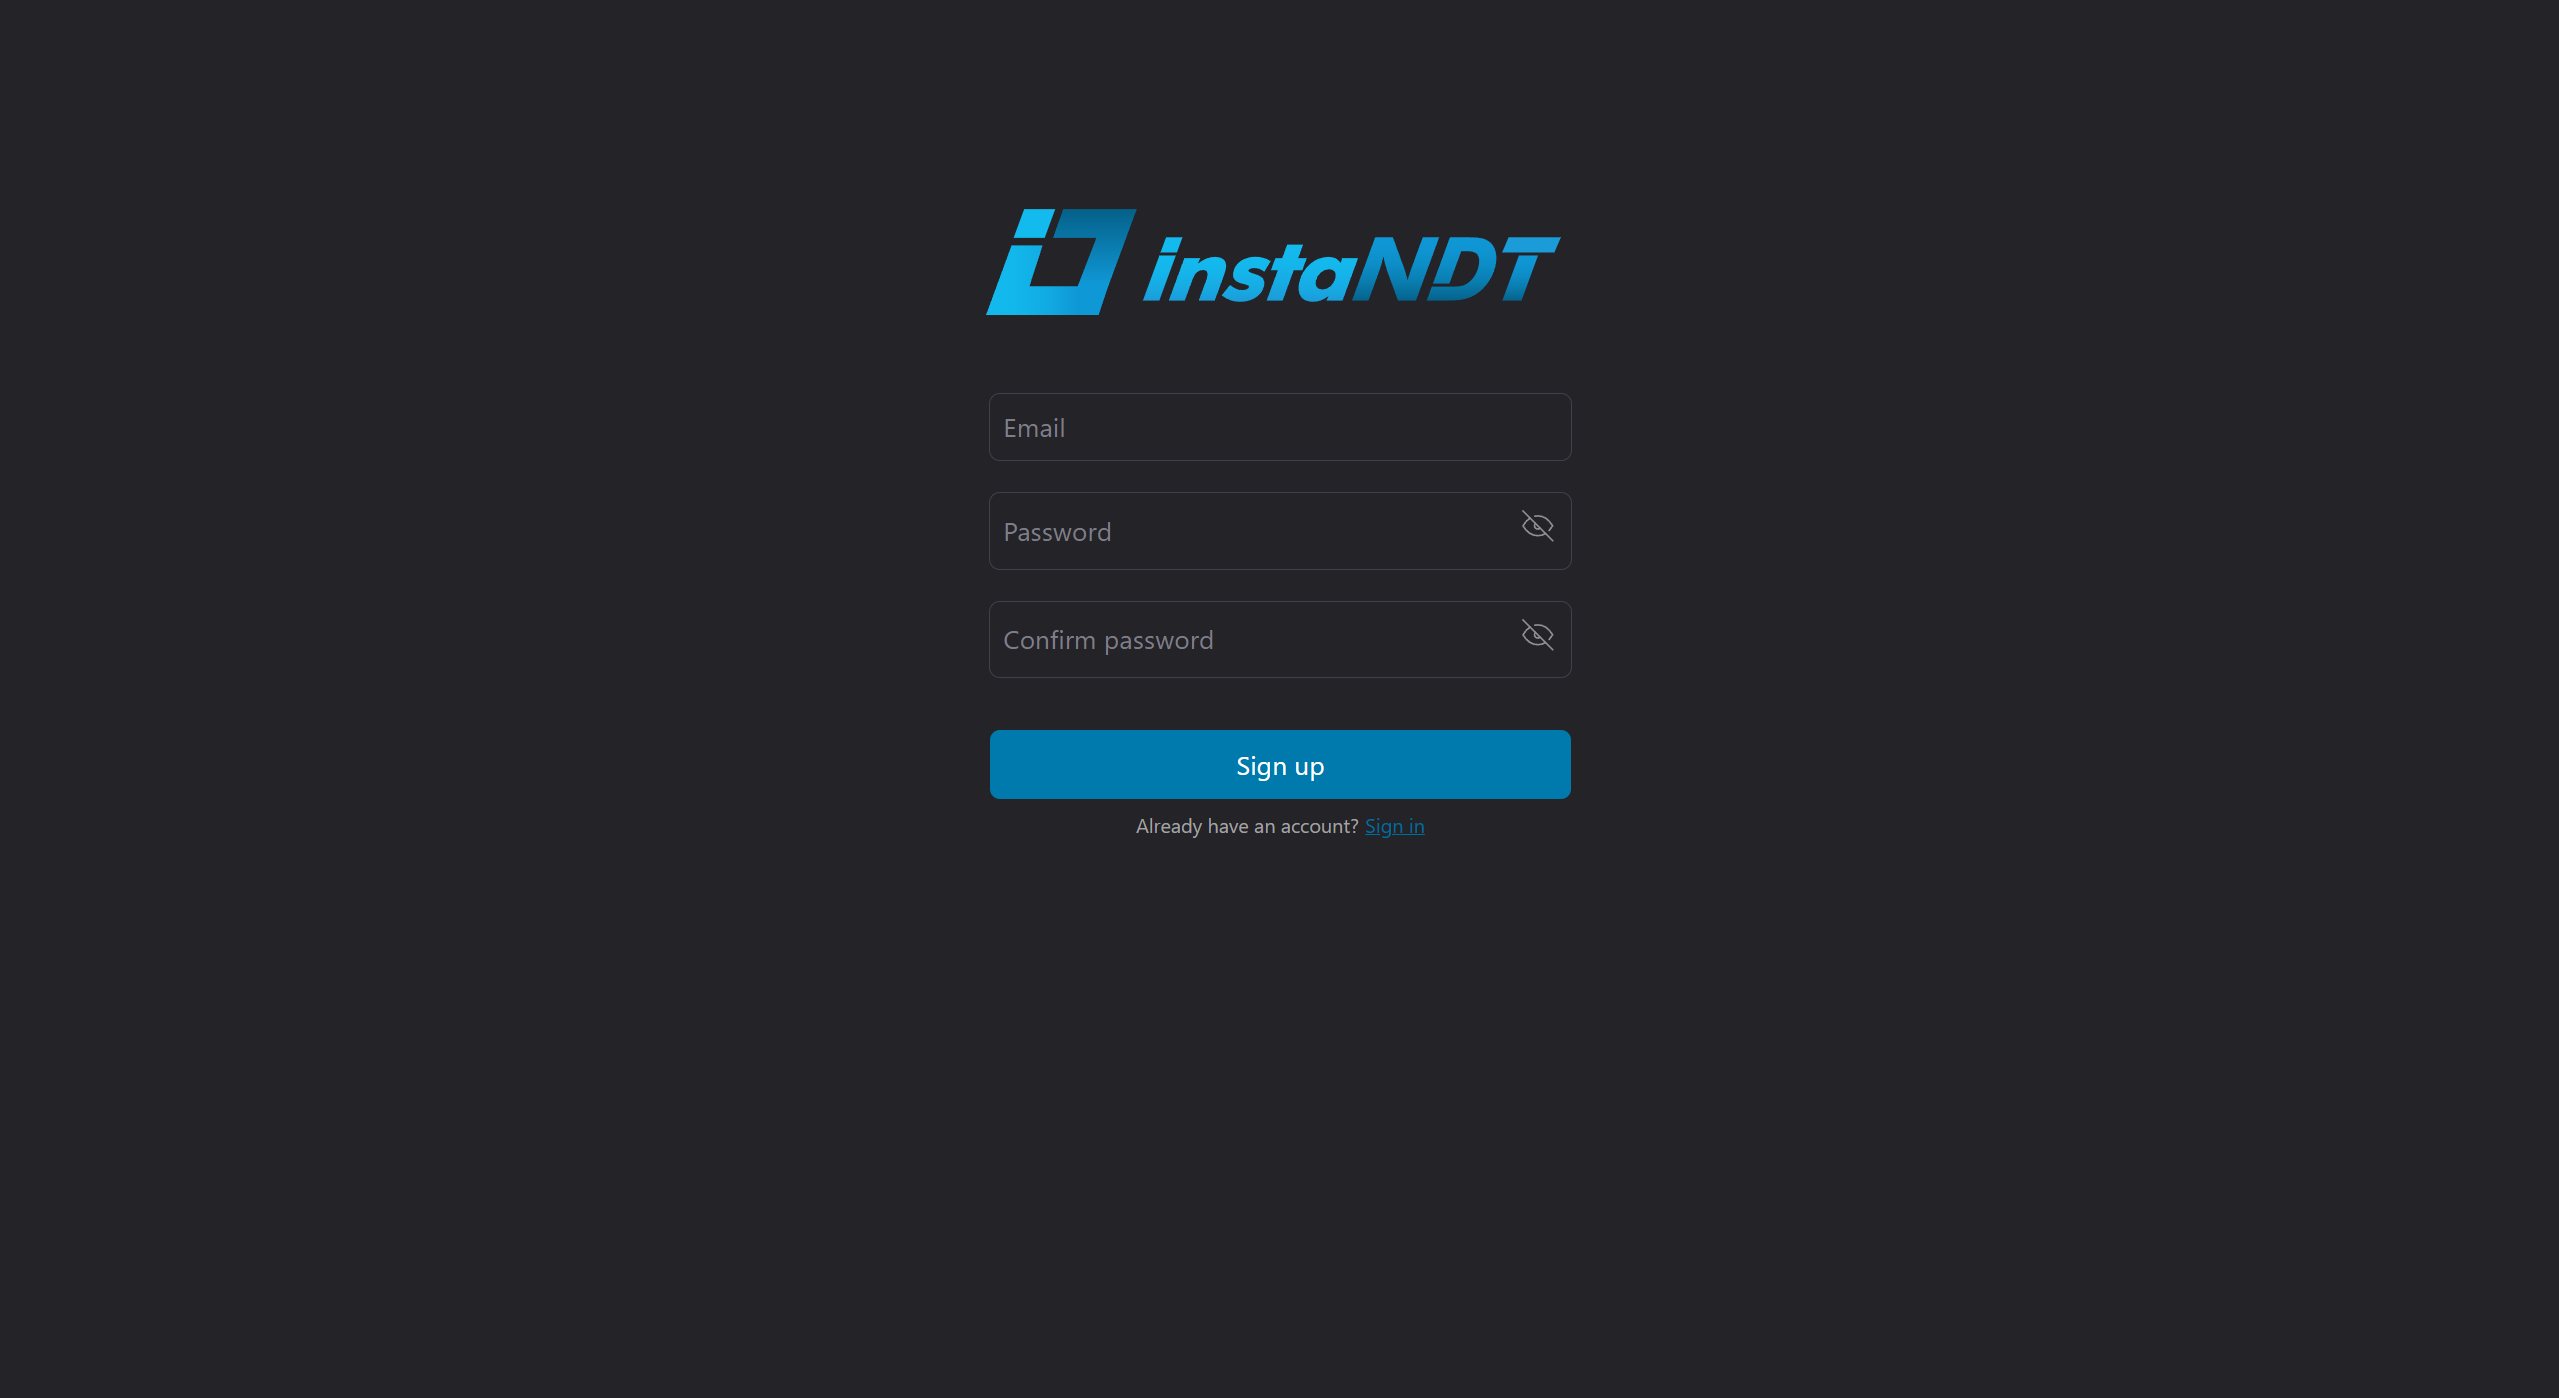
- Navigate to the Sign Up page.
- Enter the required information, including email address and password.
- Click Sign Up
Once your account has been successfully created, you can proceed to sign in.
Step 2: Sign In
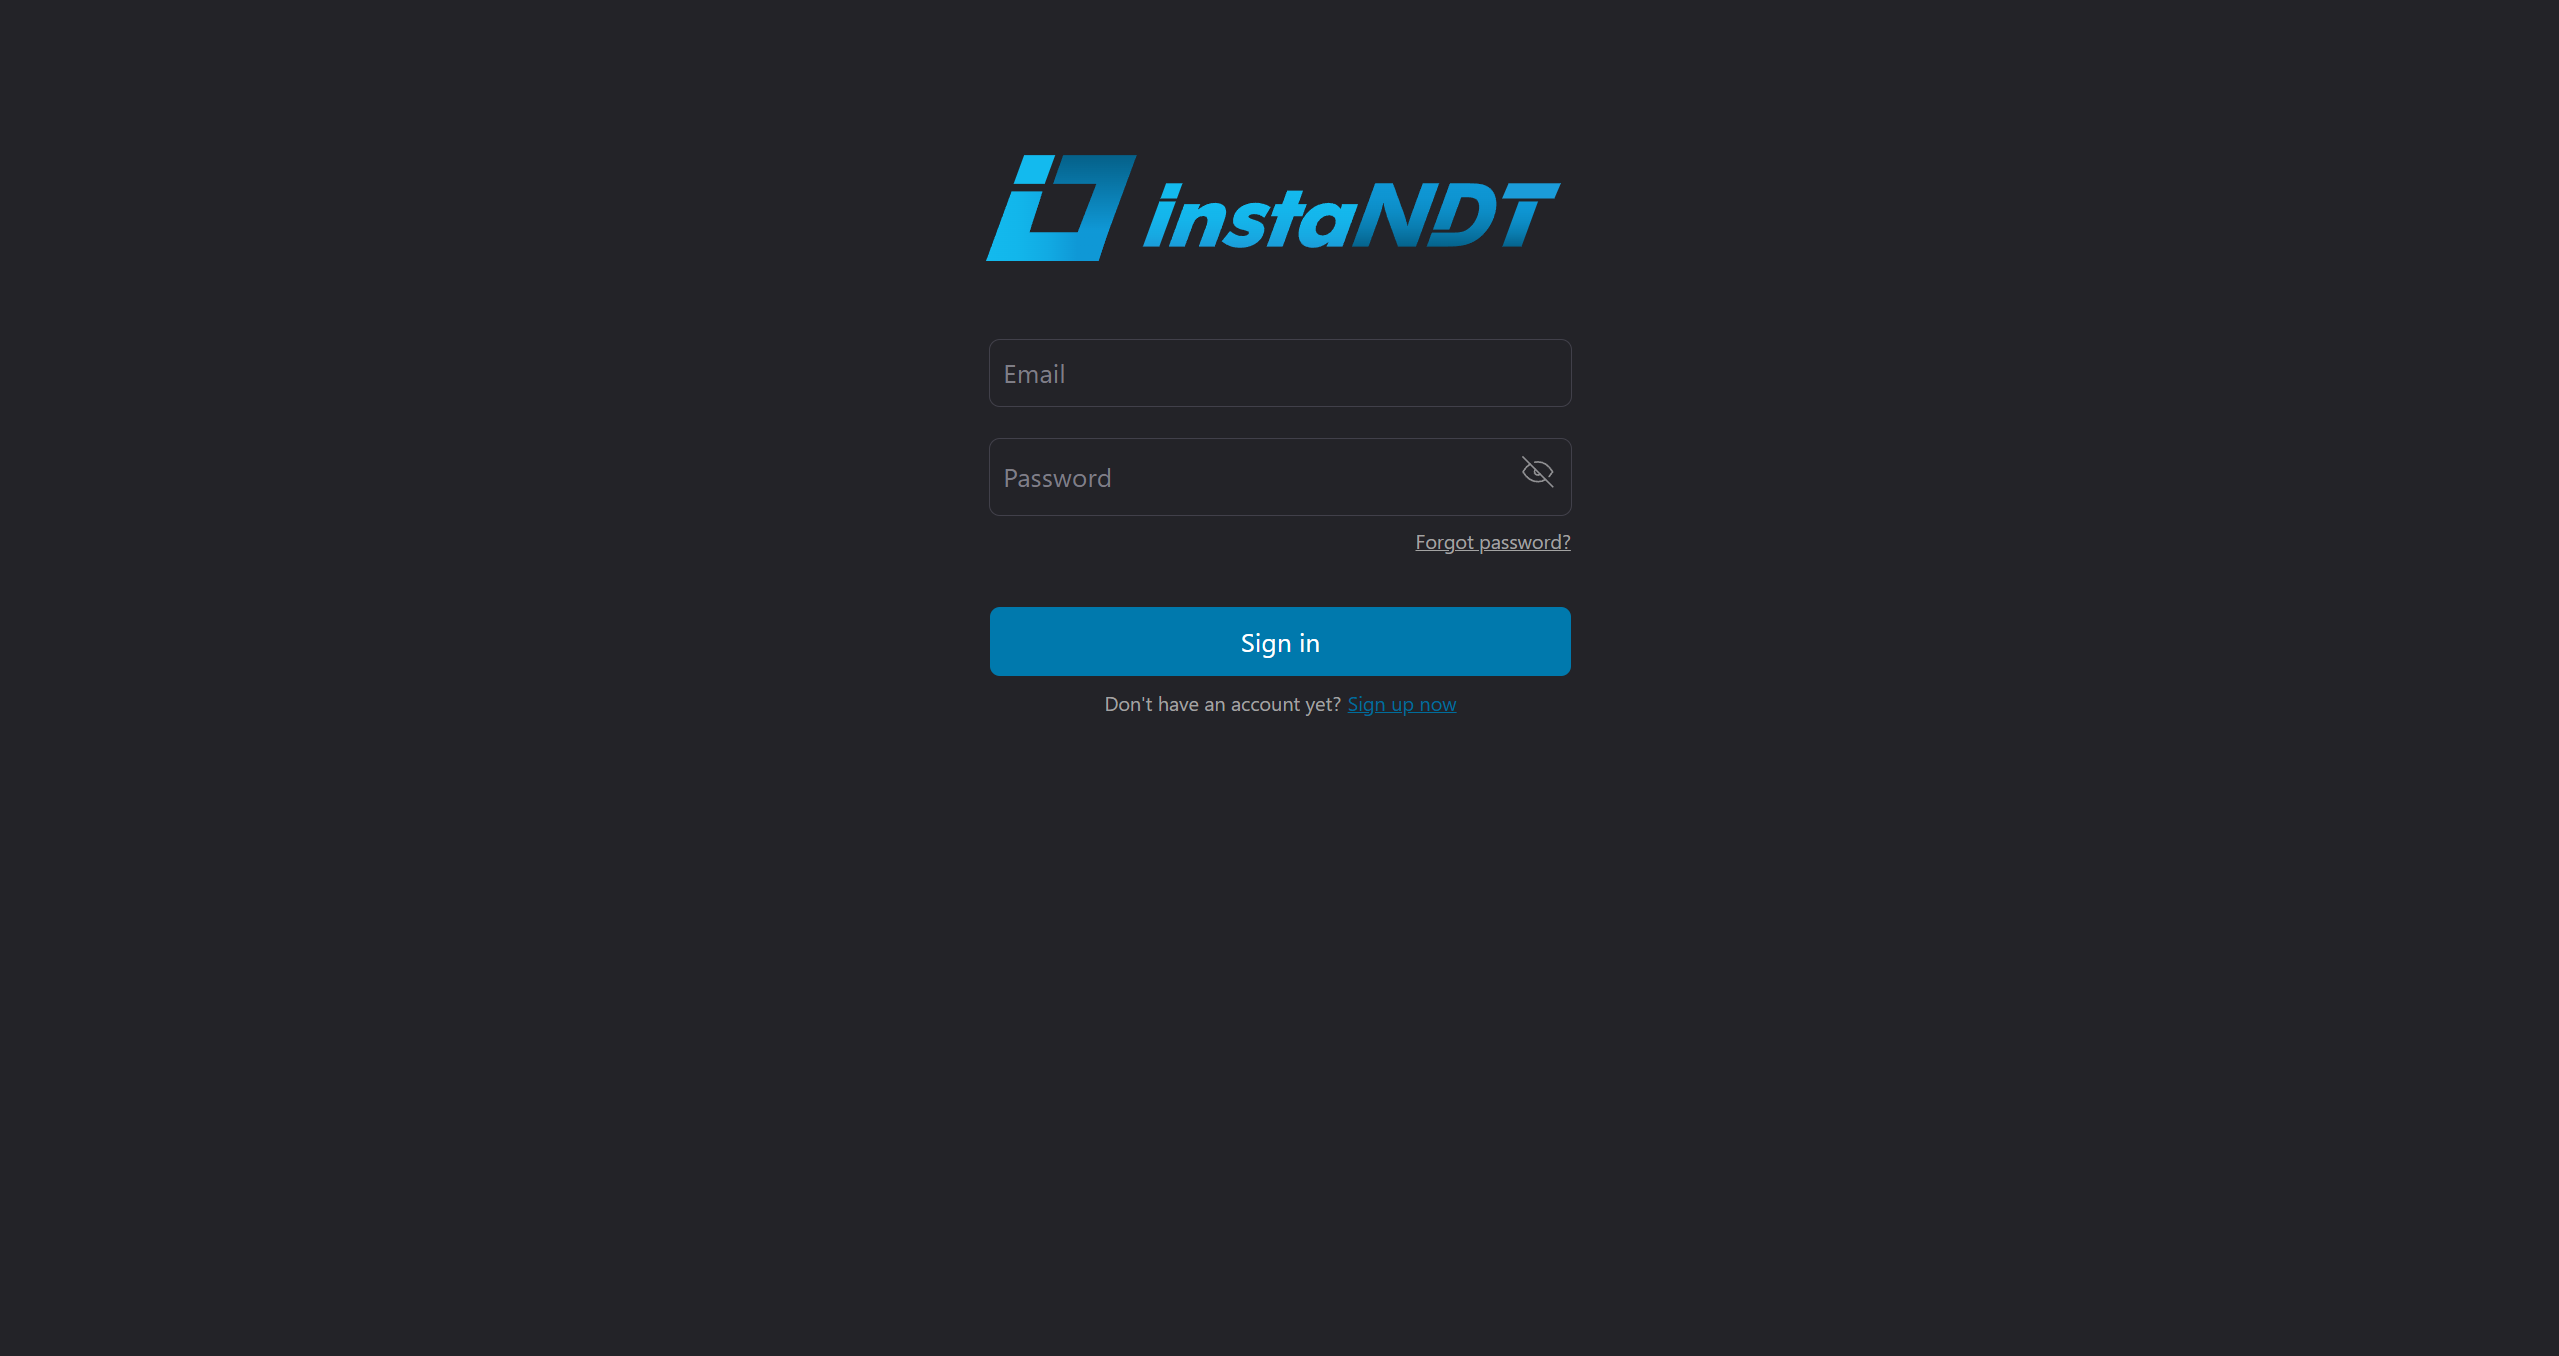
- Navigate to the Sign In page.
- Enter your registered email address and password.
- Click Sign In to access instaNDT
If your credentials are valid, you will be redirected to the application's dashboard.
Troubleshooting
If you are unable to sign in, consider the following:
- If you have forgotten your password, click Forgot Password and follow the instructions to reset your password.
- If you continue to experience issues, contact your system administrator or support team for assistance.
Verify Email
Before you can upload media to instaNDT, you must verify your email address.
If your email has not been verified, a notification banner is displayed at the bottom of the application prompting you to complete the verification process.
To verify your email:
- Click Verify Email in the notification banner.
- A verification email is sent to your registered email address.
- Open the email and click the verification link.
- Once the link has been opened successfully, your email address is verified and you can begin uploading media.
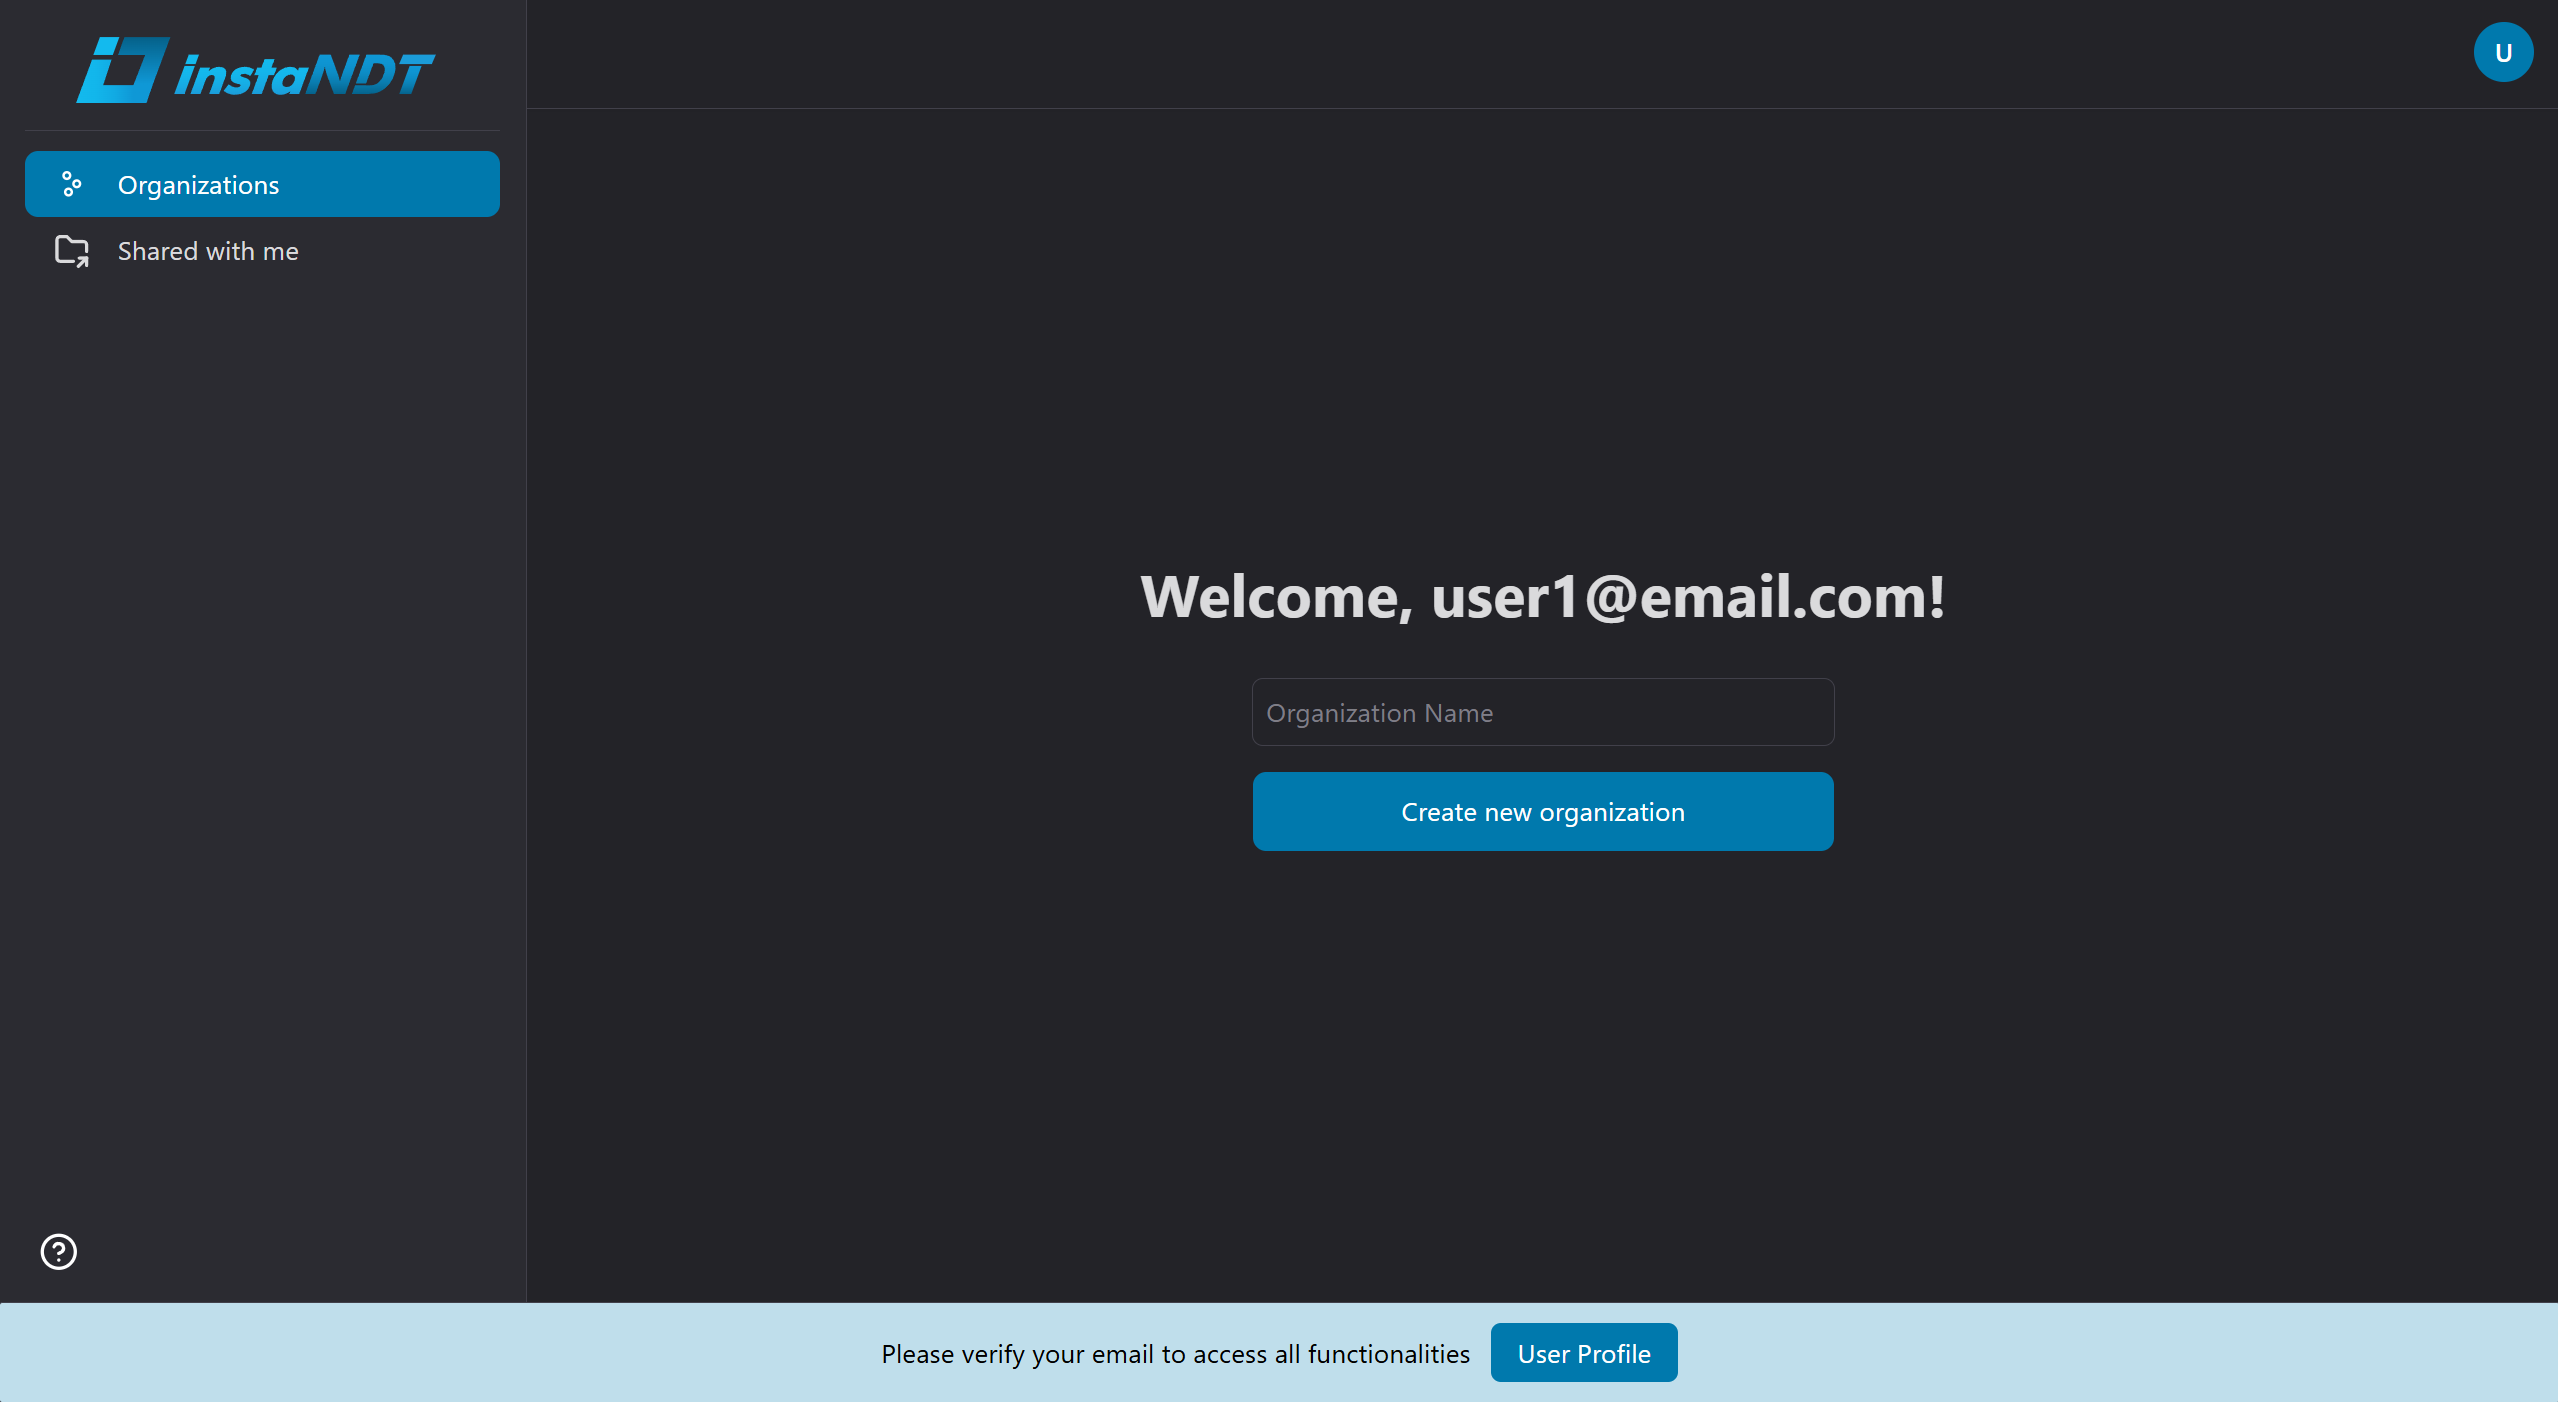
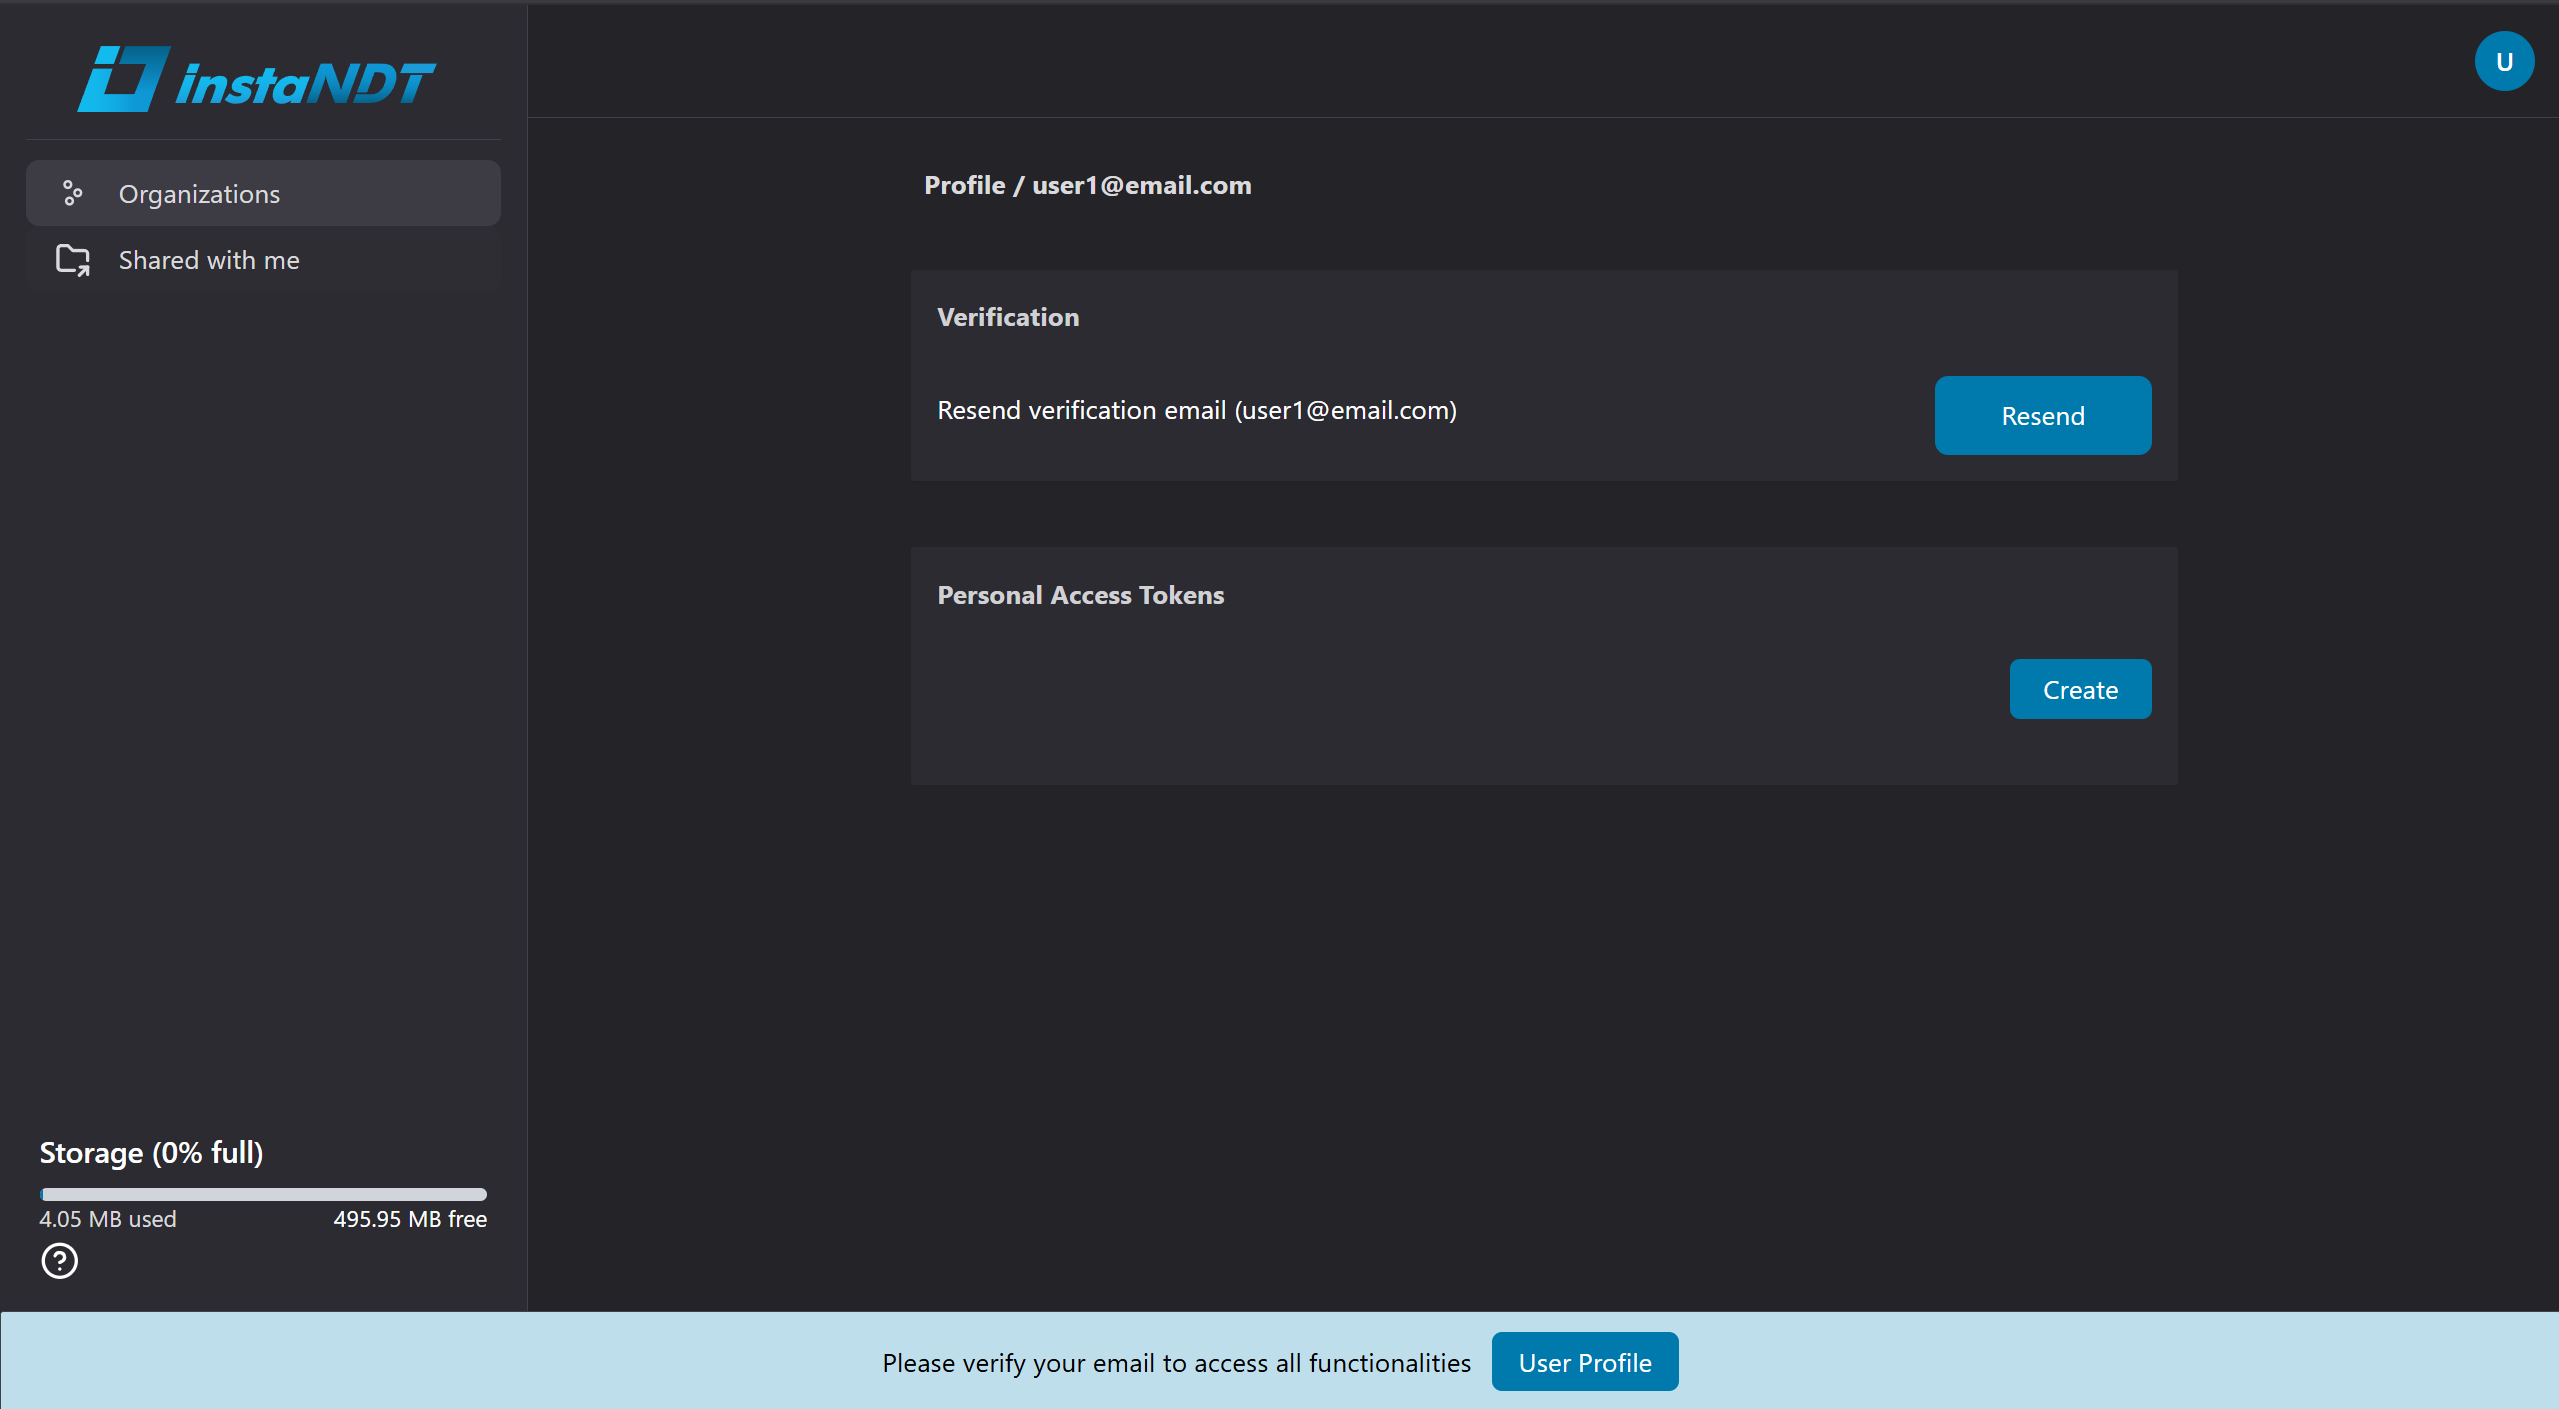
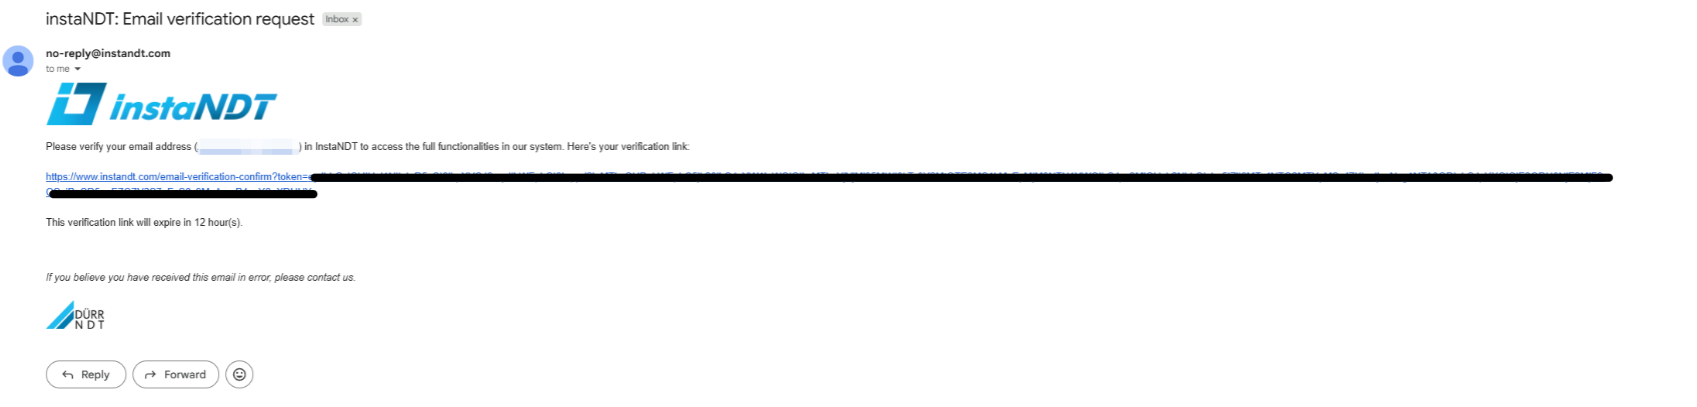
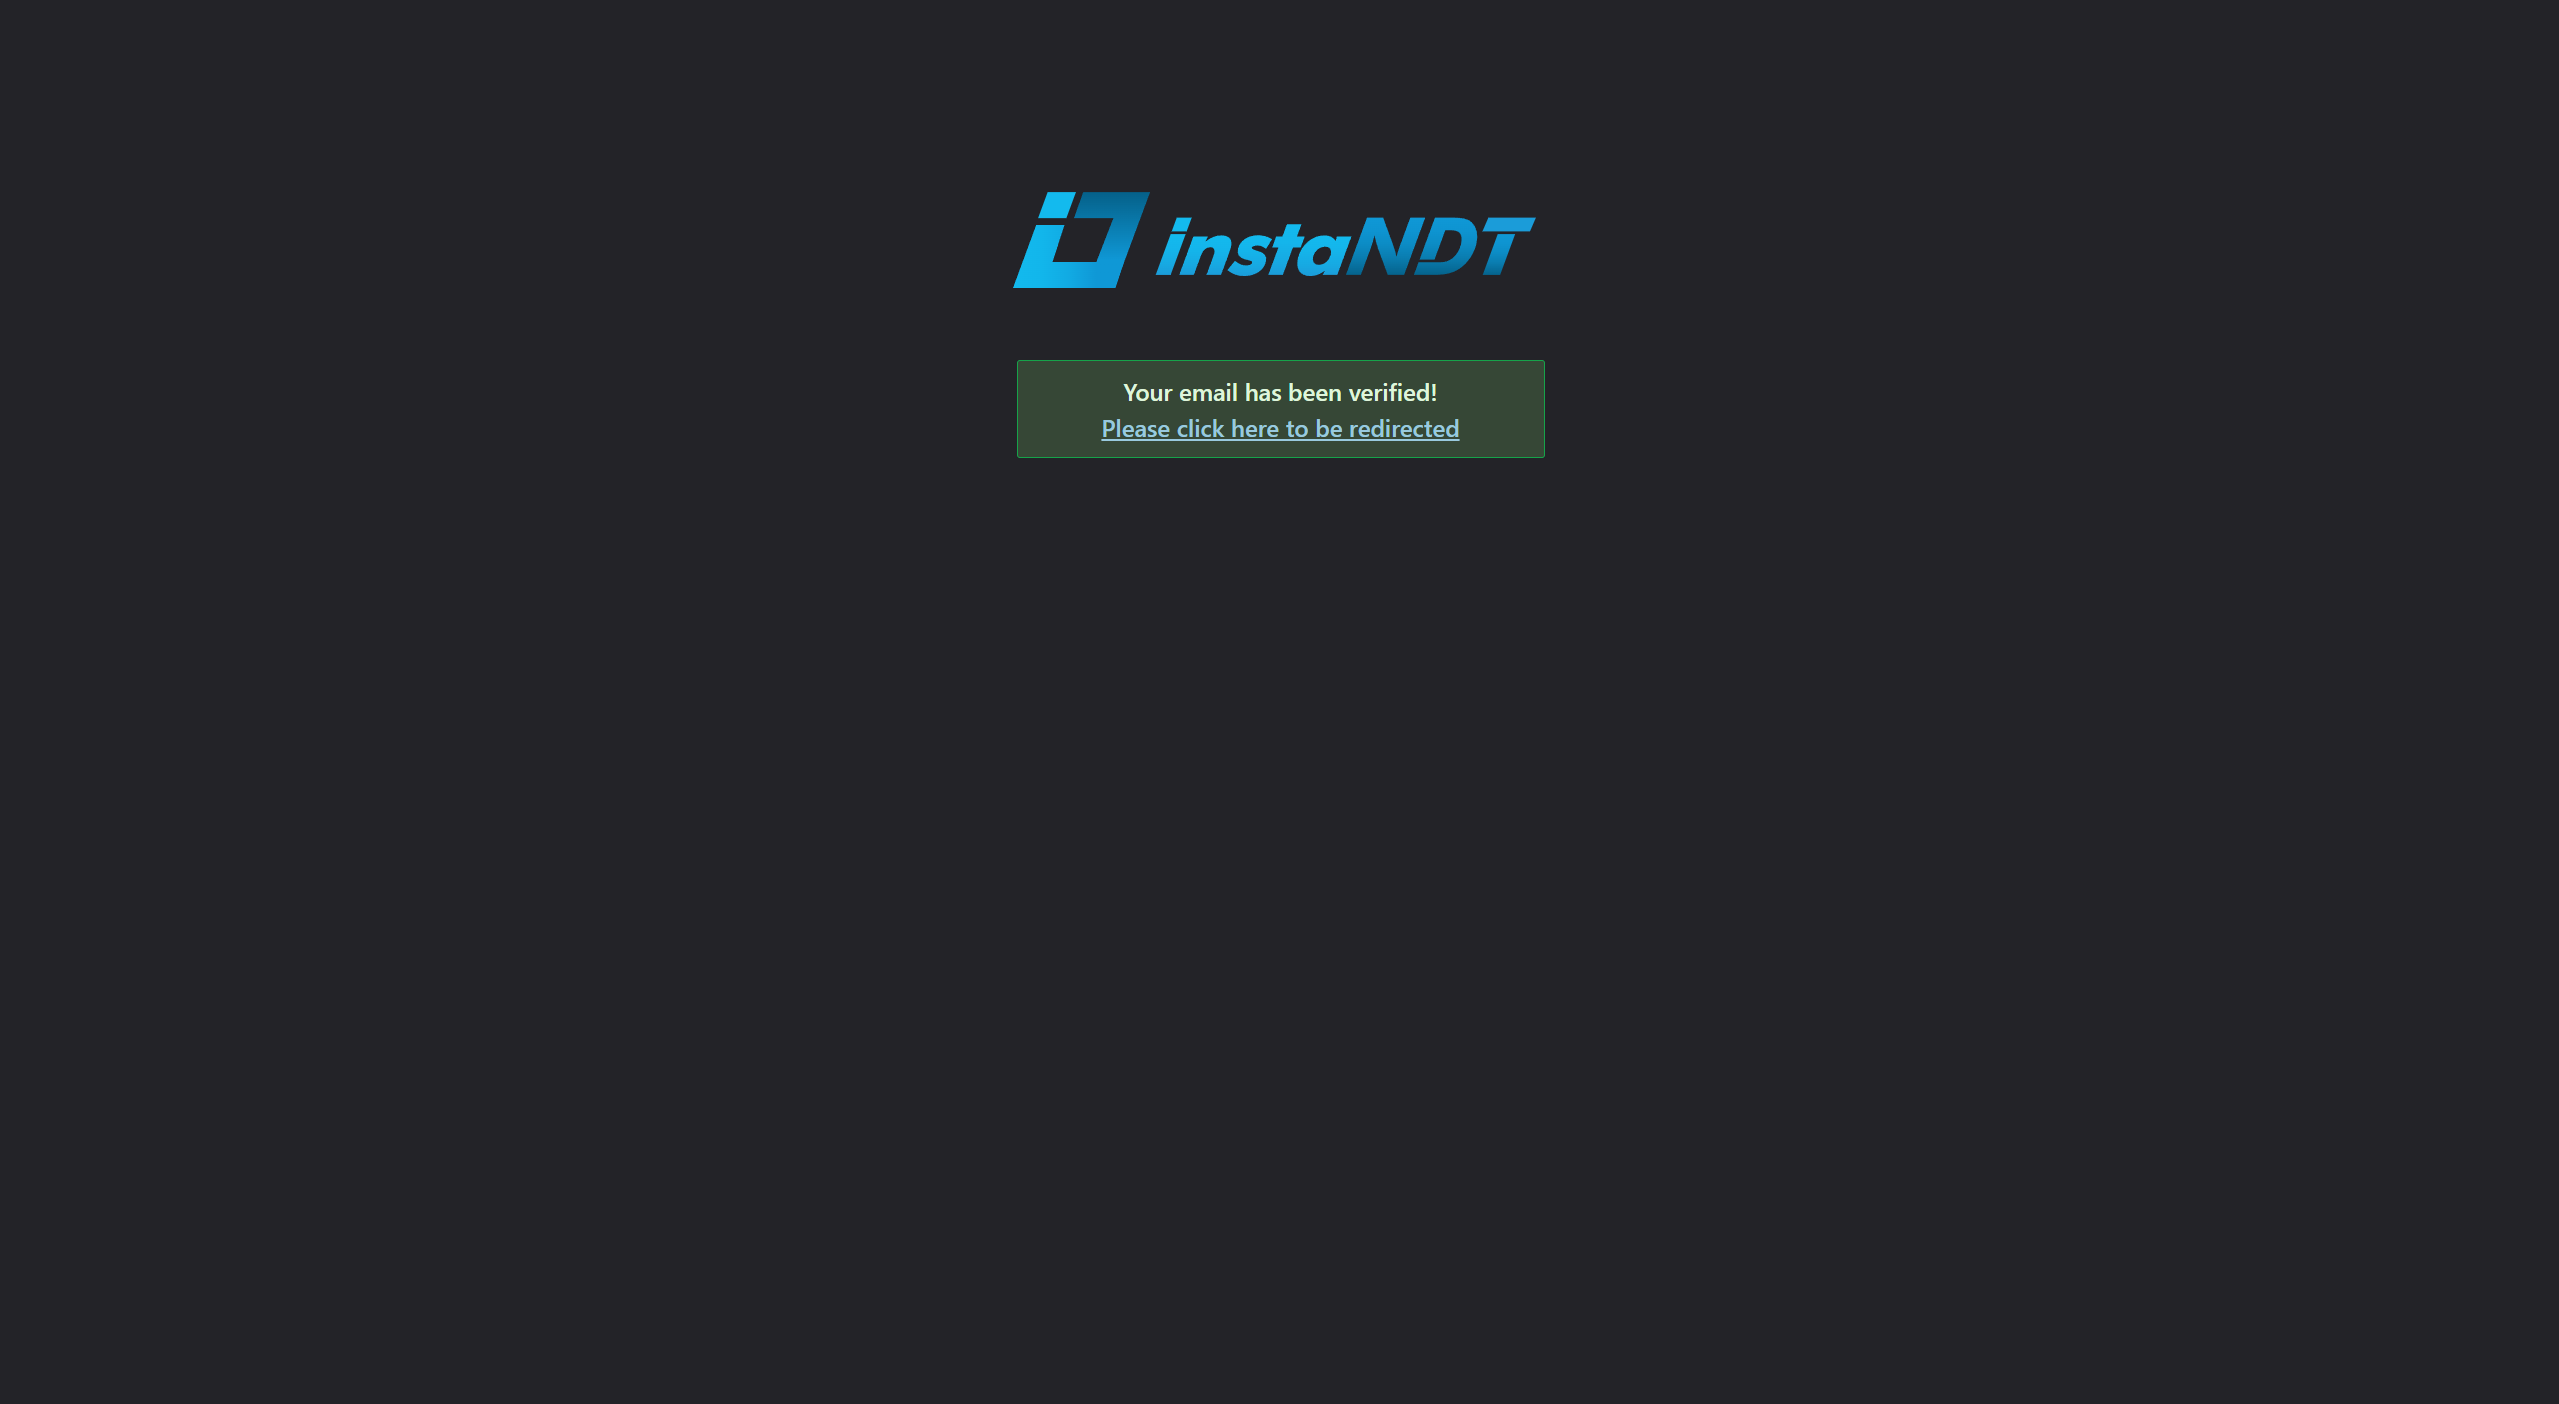
Figures 1–4. Verifying your email address. The application displays a verification banner, sends a verification email, and confirms your email after the verification link is opened.
Organizations
Organizations are the top level of the instaNDT workspace hierarchy. They provide a centralized workspace for managing projects, DICOM media, and team members.
An organization can contain one or more projects. Within each project, you can store DICOM media directly or organize it into folders and subfolders.
Hierarchy
The workspace is organized using the following structure:
Creating an Organization
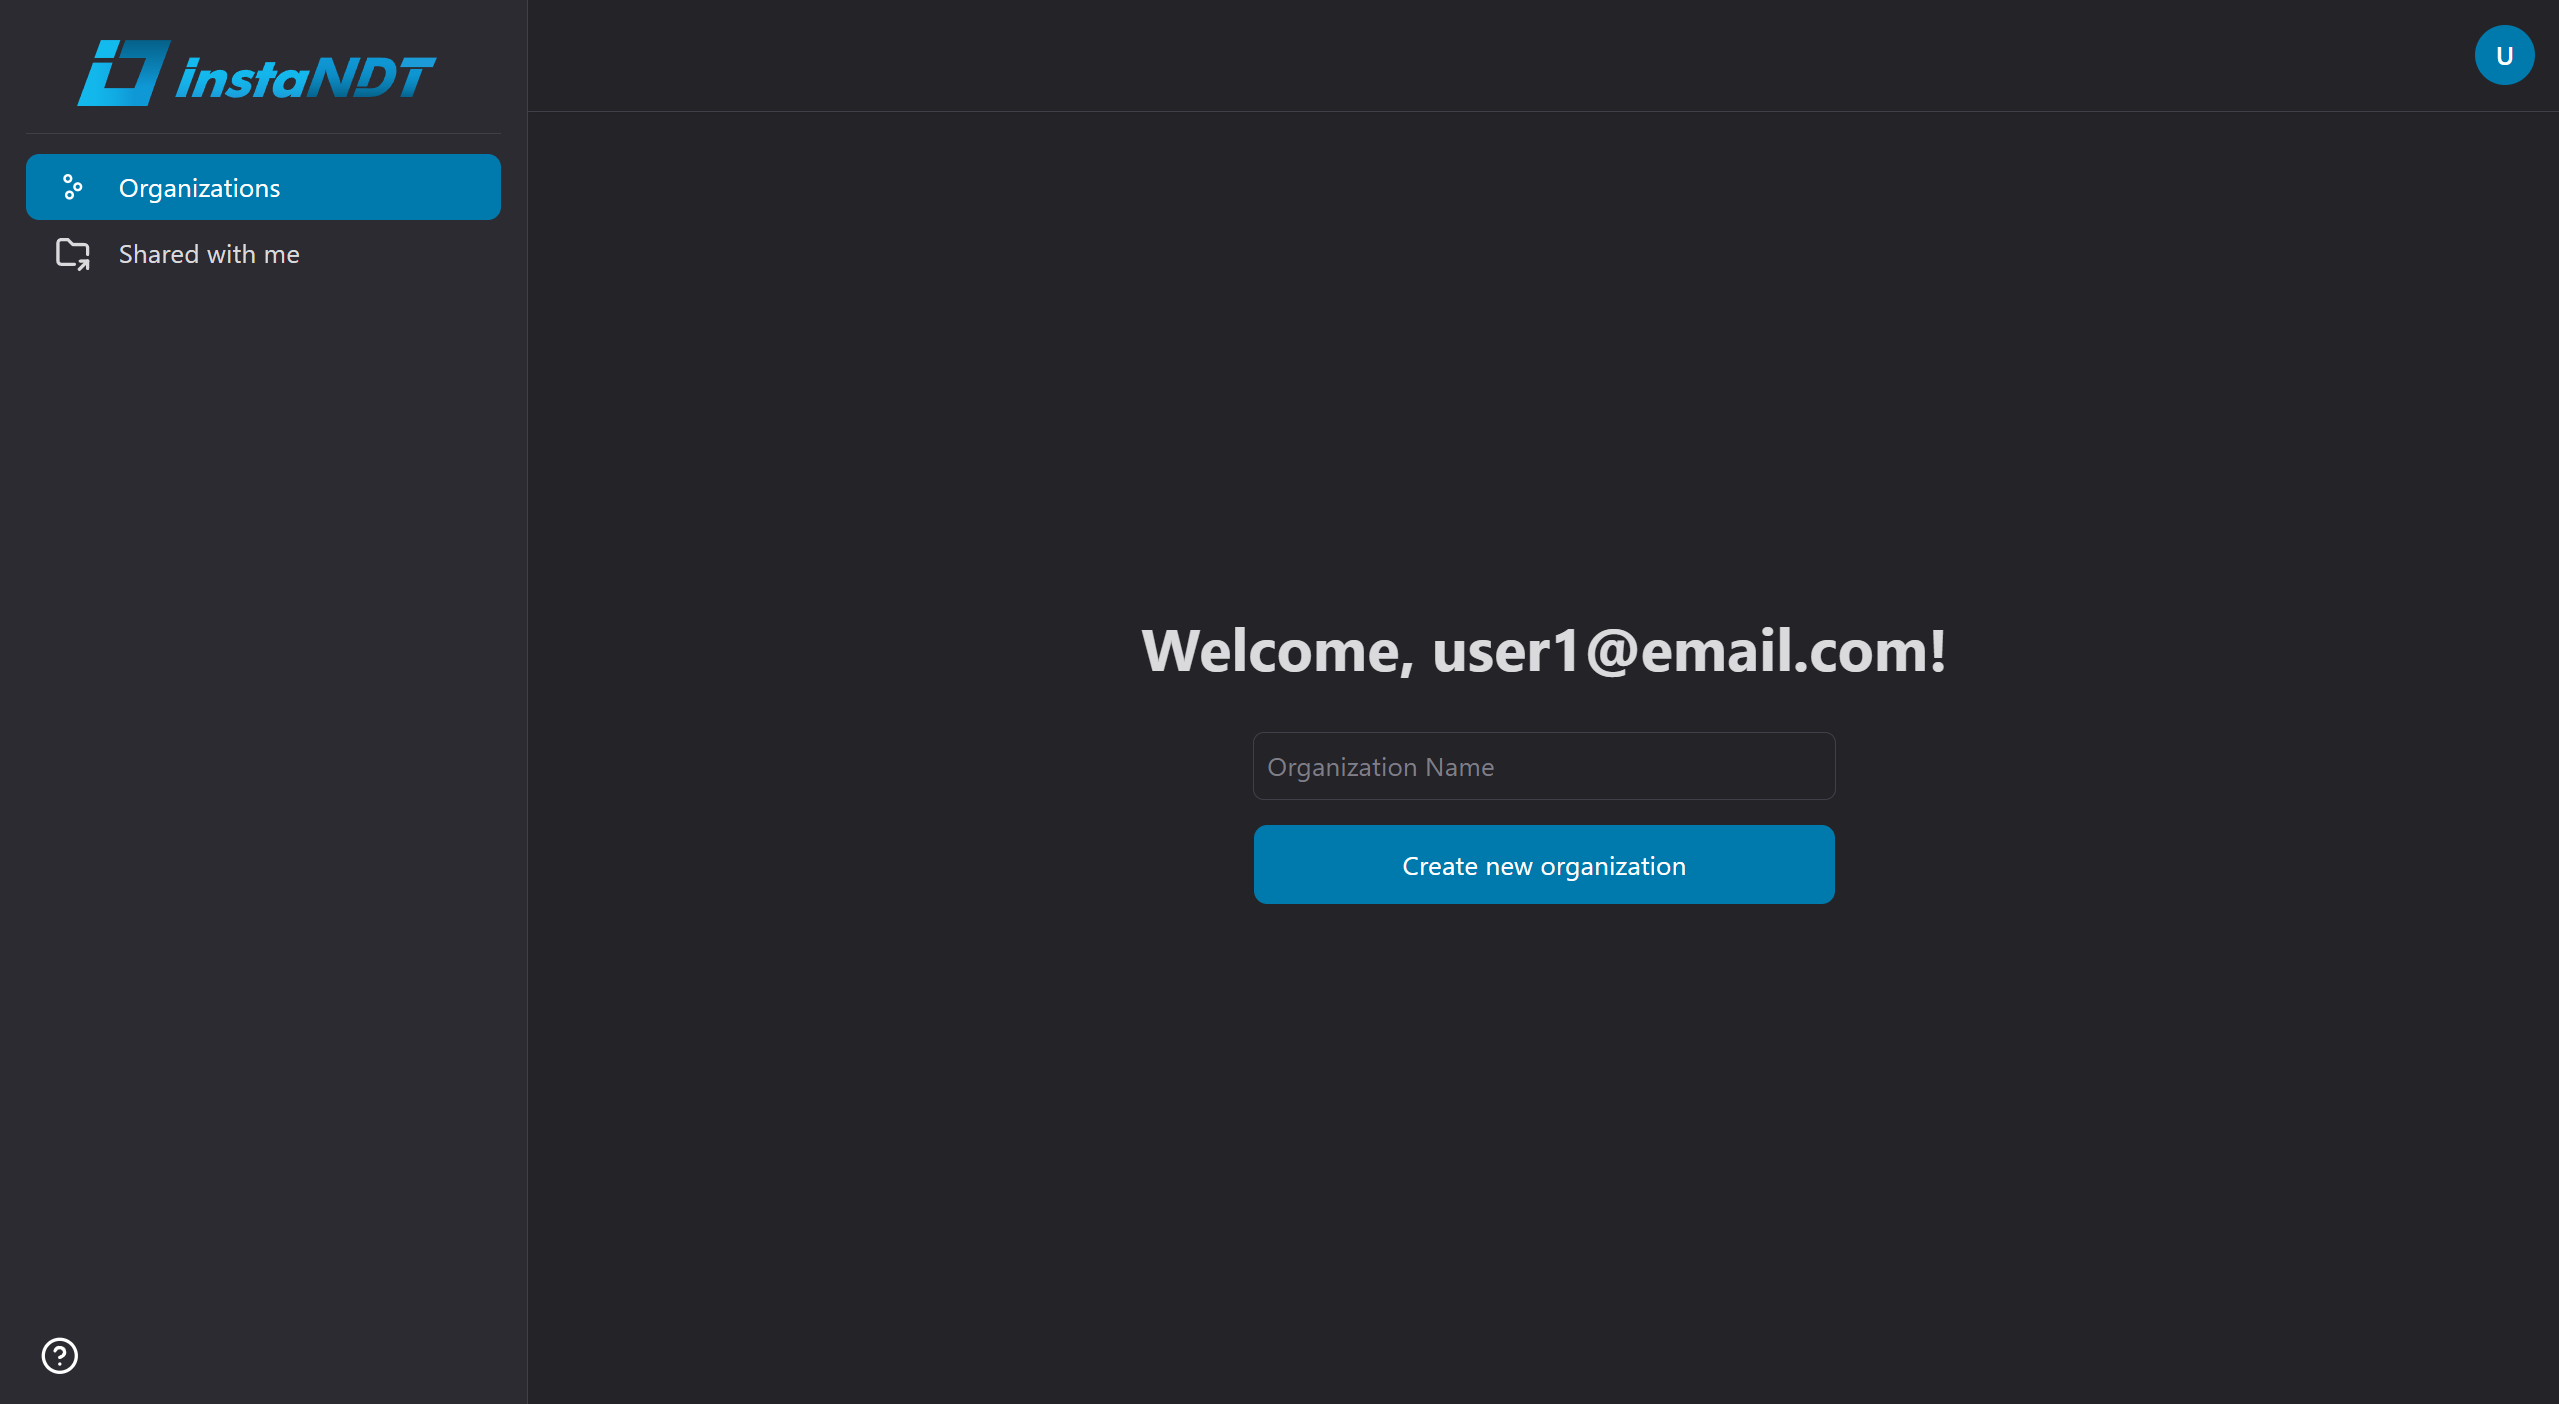
Figure 1. Creating a new organization.
To begin using instaNDT, create an organization from the Organizations page.
When you create an organization:
- You are automatically assigned the Owner role.
- You have full administrative privileges over the organization.
- You can create and manage projects and folders.
- You can invite and manage team members.
- You can configure organization settings.
An organization can contain multiple projects, allowing you to separate DICOM media according to your workflow.
Projects
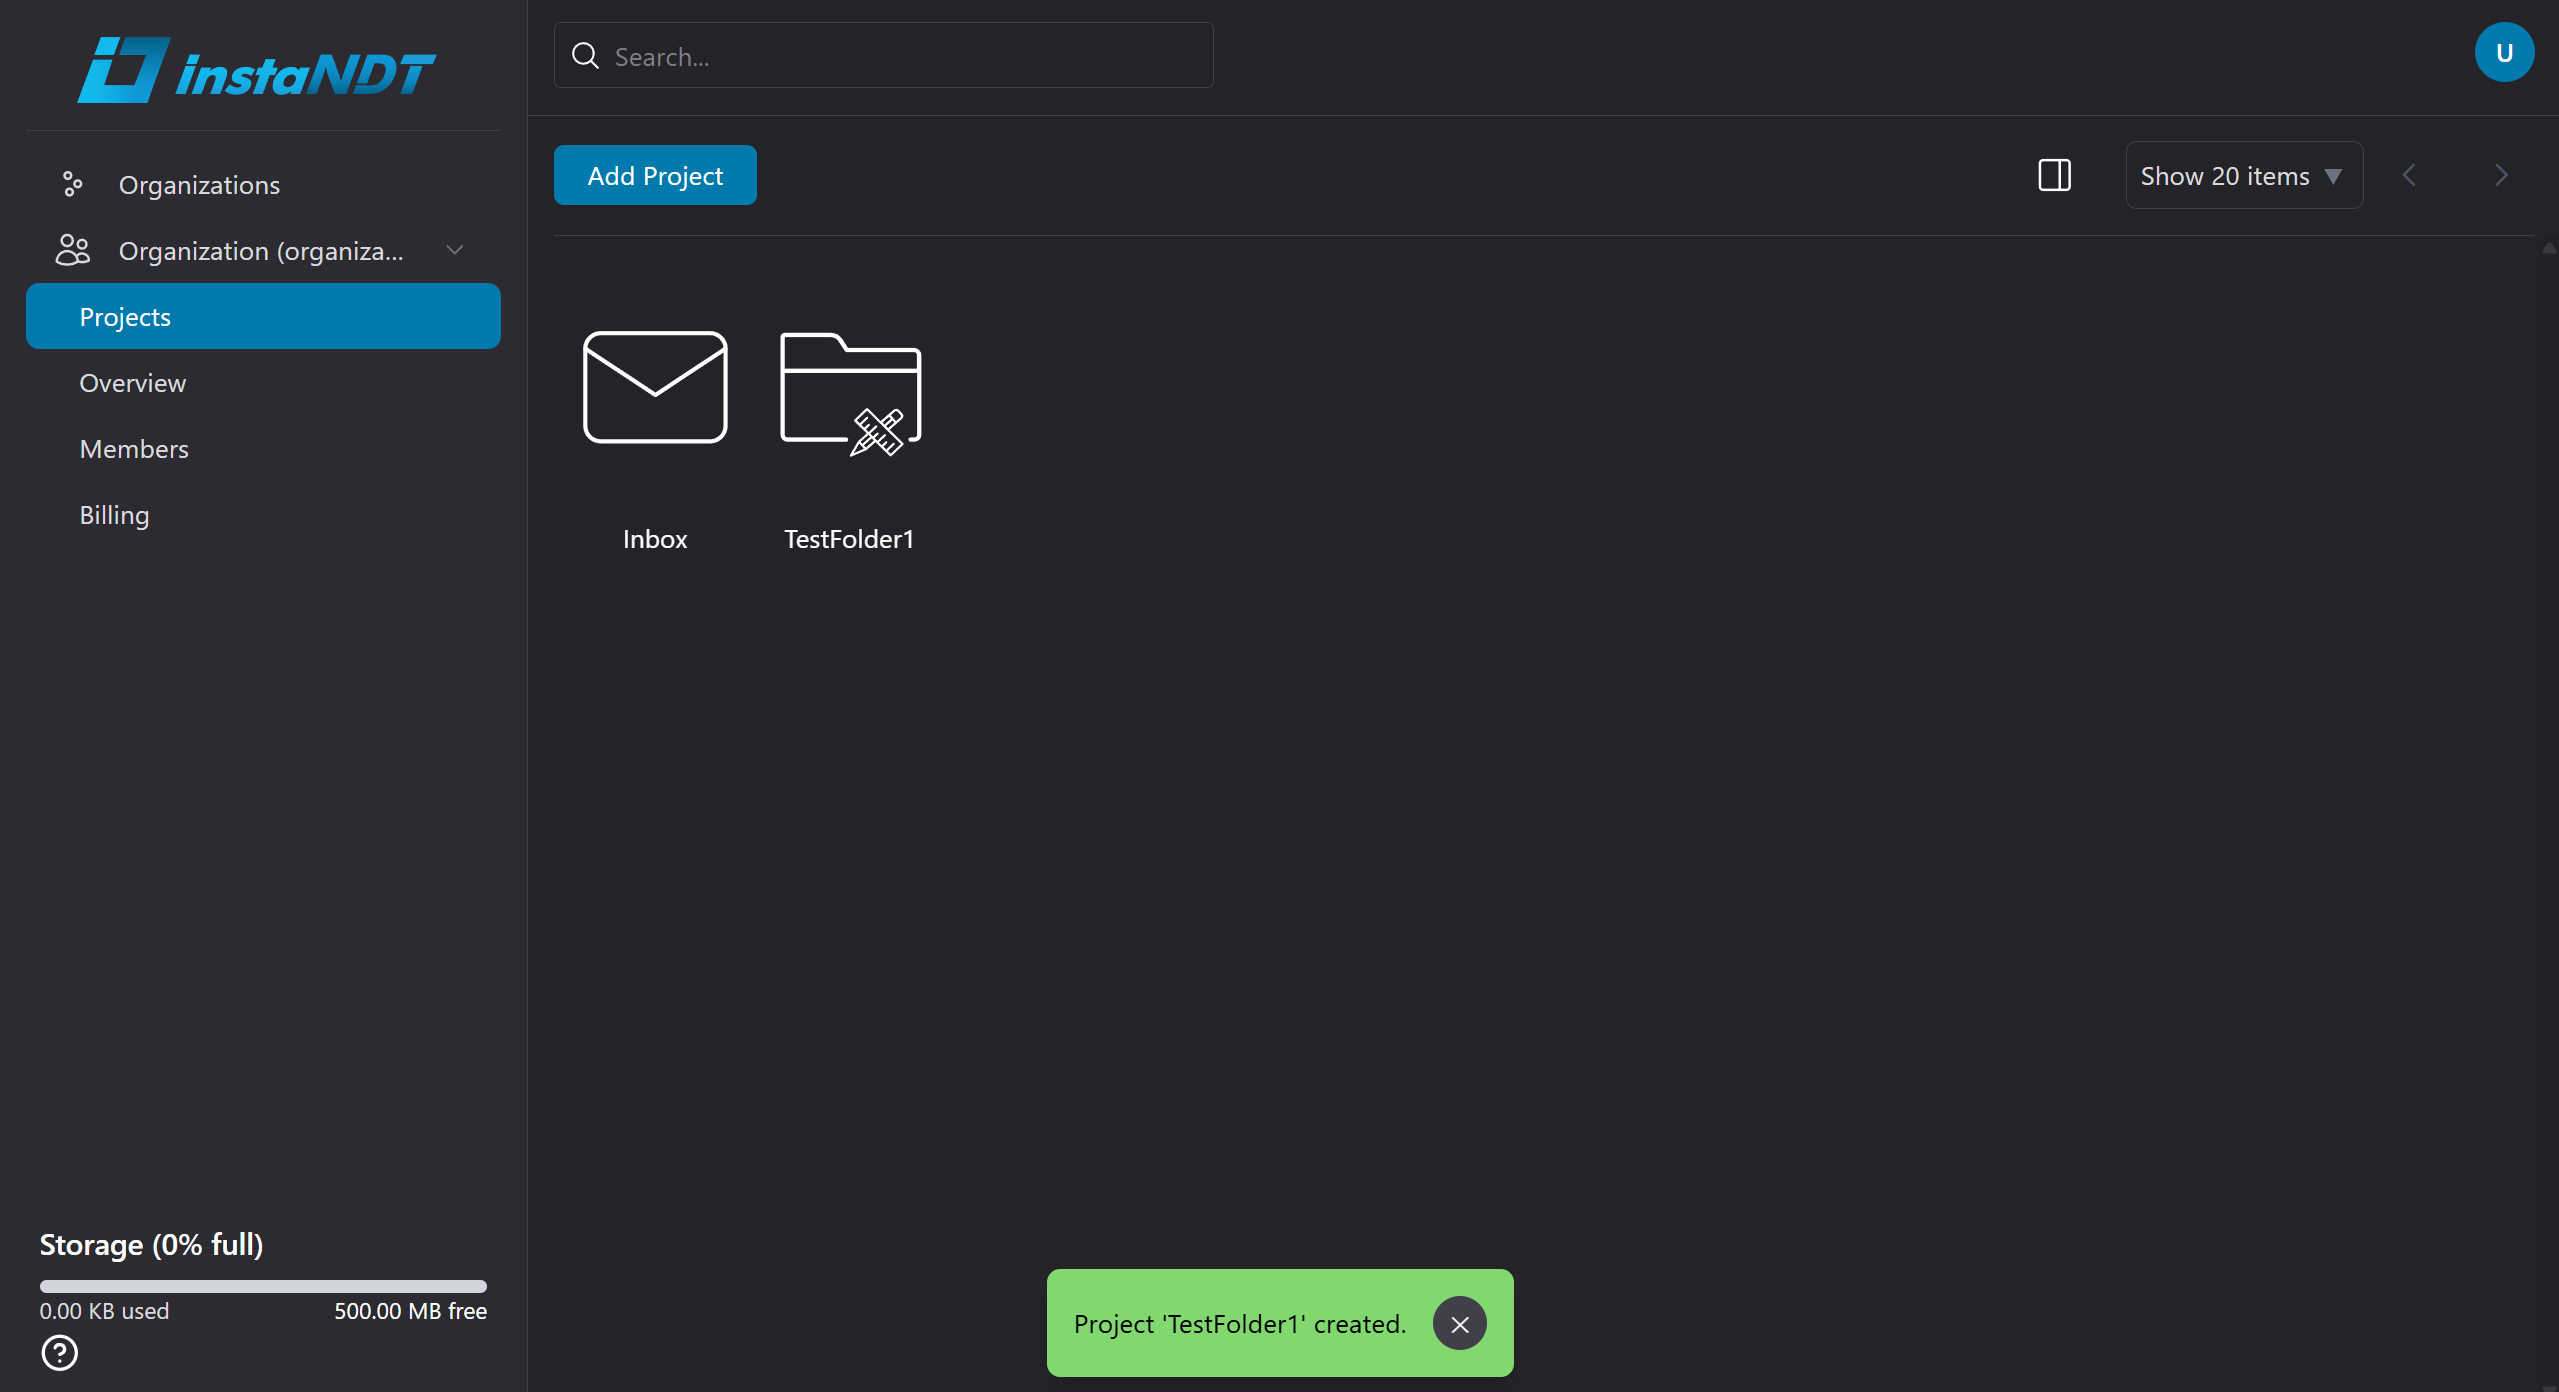
Figure 1. Creating a new project within an organization.
Projects are created within an organization and act as containers for DICOM media. Depending on your workflow, media can be stored directly in the project or organized into folders.
A project can contain:
- DICOM media files stored directly in the project.
- Folders for organizing media.
- Nested folders for creating a hierarchical directory structure.
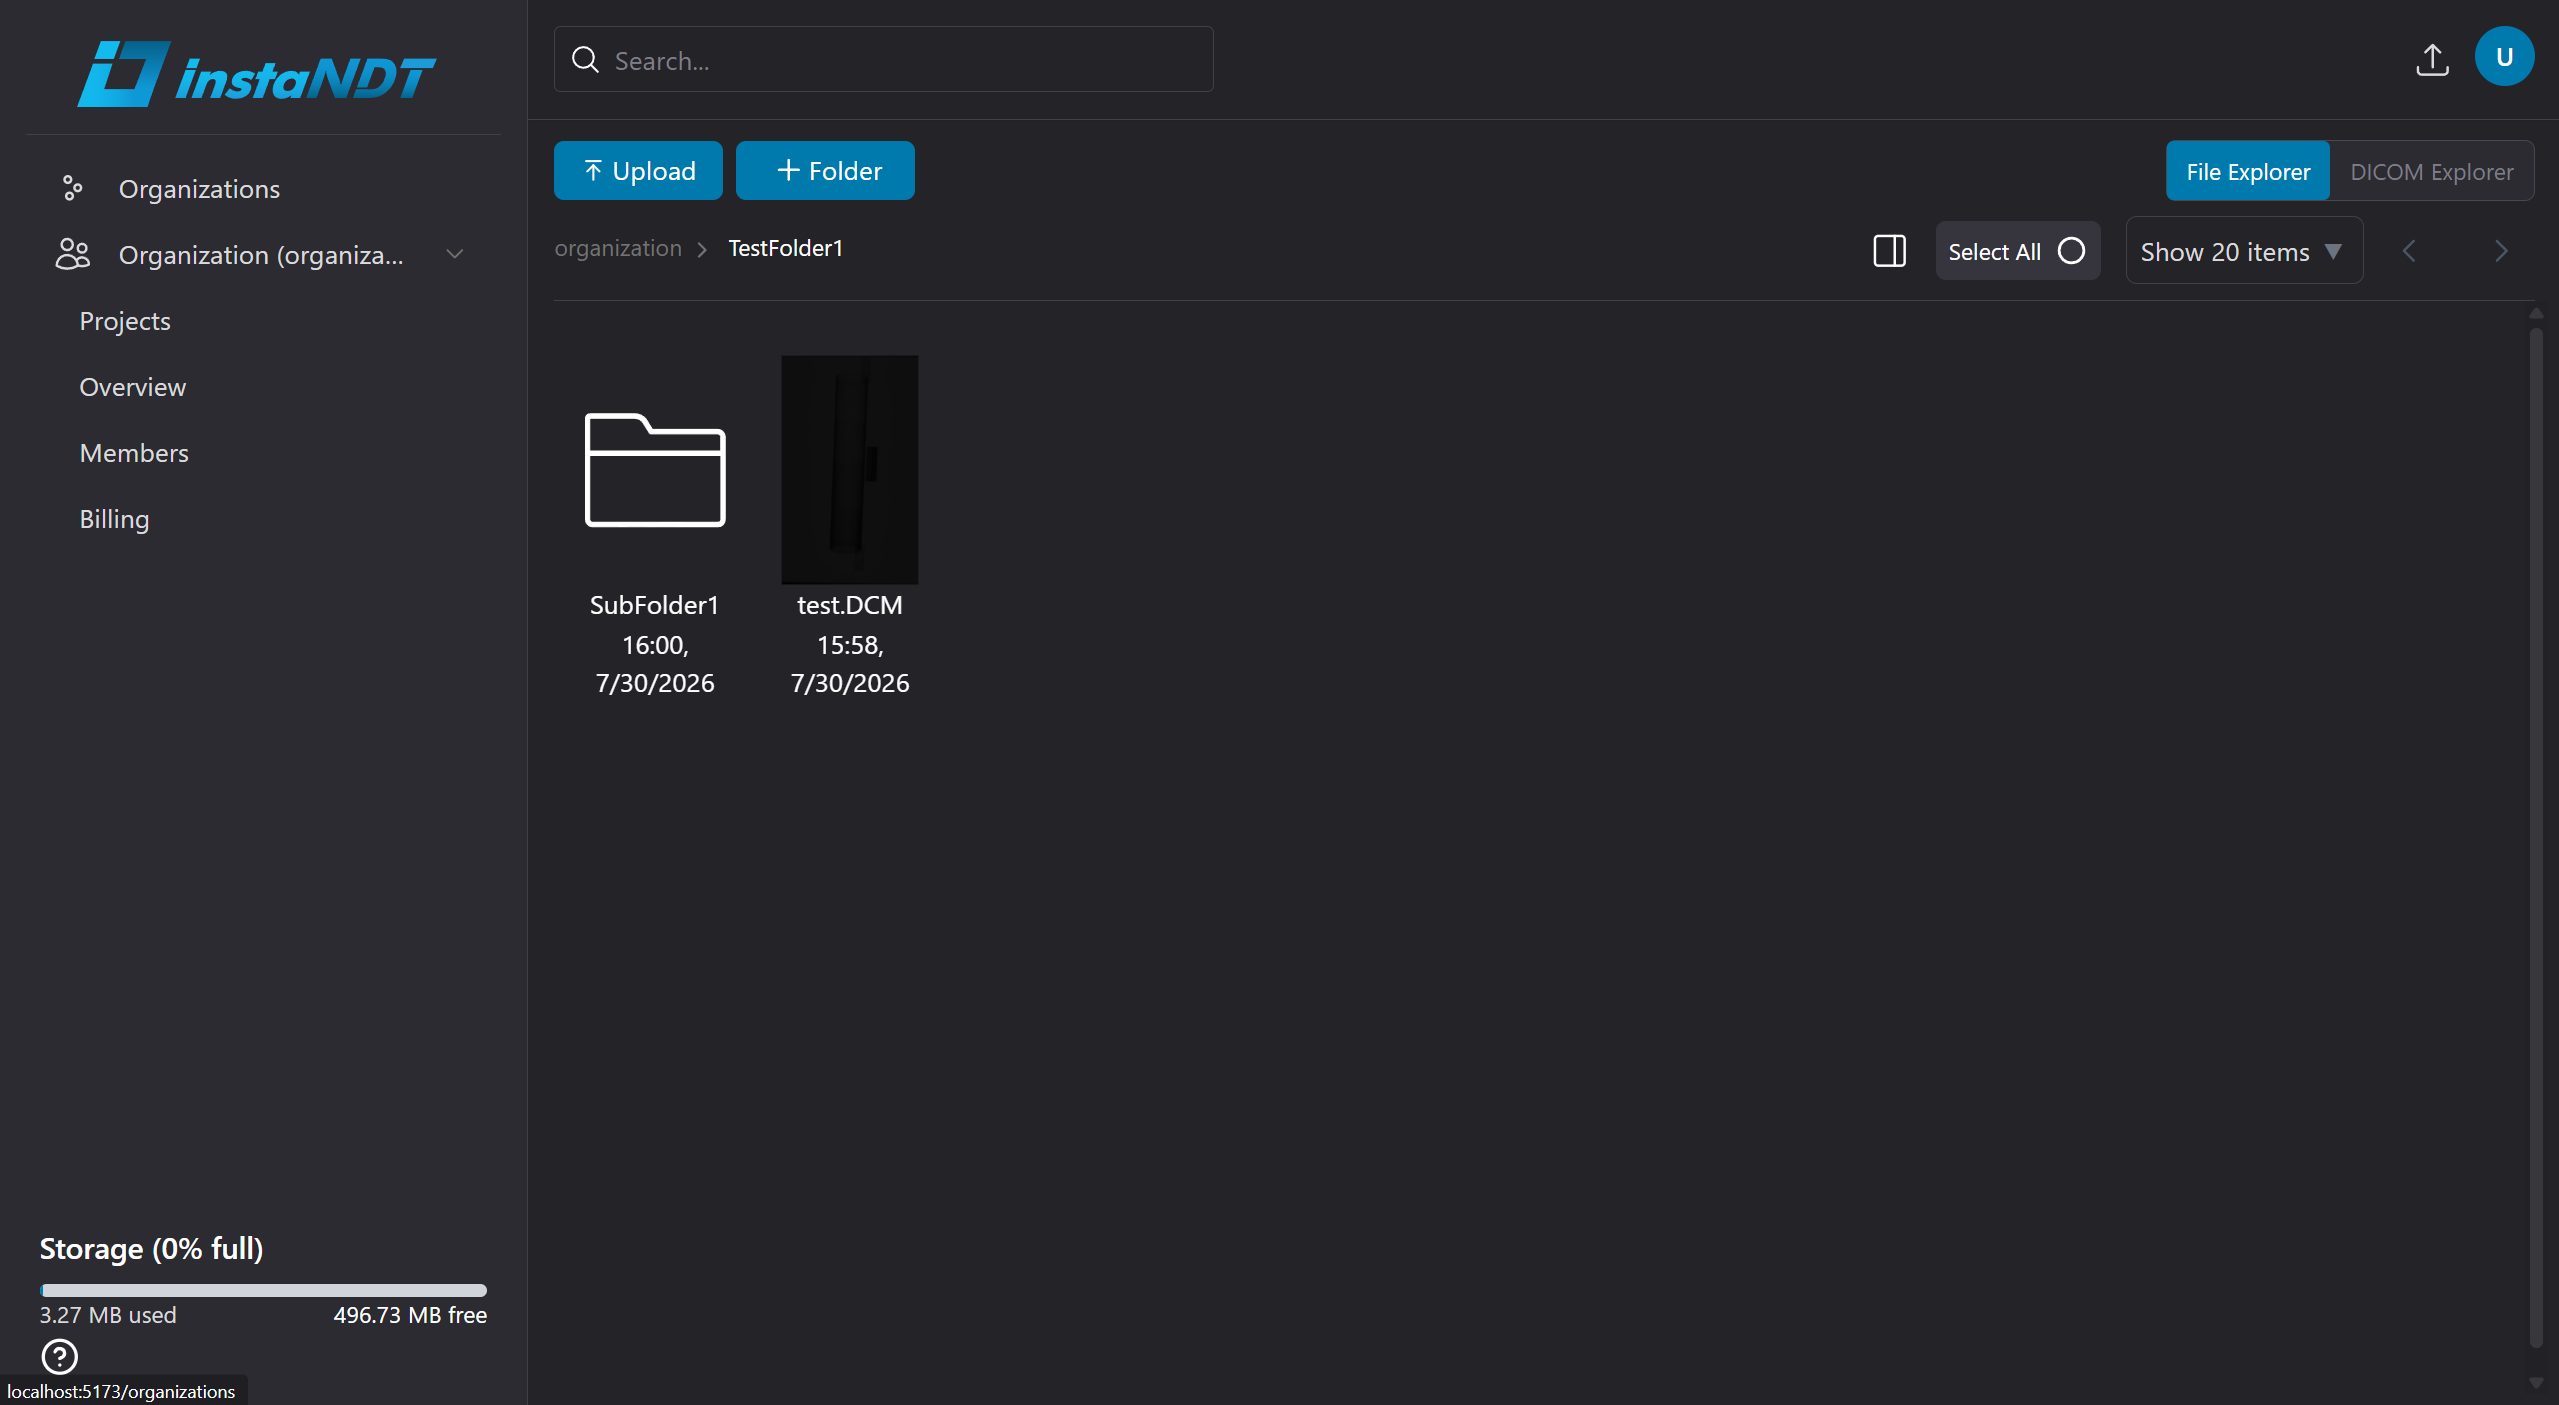
Figure 2. A project containing a DICOM media file and a subfolder.
Figure 2 shows the project created in Figure 2. The project contains a DICOM media file and a subfolder, demonstrating how media and folders can be organized within a project.
Folders
Folders allow you to organize media within a project. A project can contain multiple folders, and each folder can contain additional subfolders, allowing you to create a hierarchical directory structure that suits your workflow.
Both DICOM and non-DICOM media can be stored directly within a folder.
Sharing Folders
Folders can be shared with both instaNDT users and external users. Permissions are applied at the folder level, allowing you to control who can view, create, delete, and manage content within a specific folder.
To share a folder:
- Select the folder.
- Click the ✔ (Select) icon.
- Click the Share icon from the action menu.
- Enter the email address of the user you want to share the folder with.
- Configure the user's permissions.
- Save the changes.
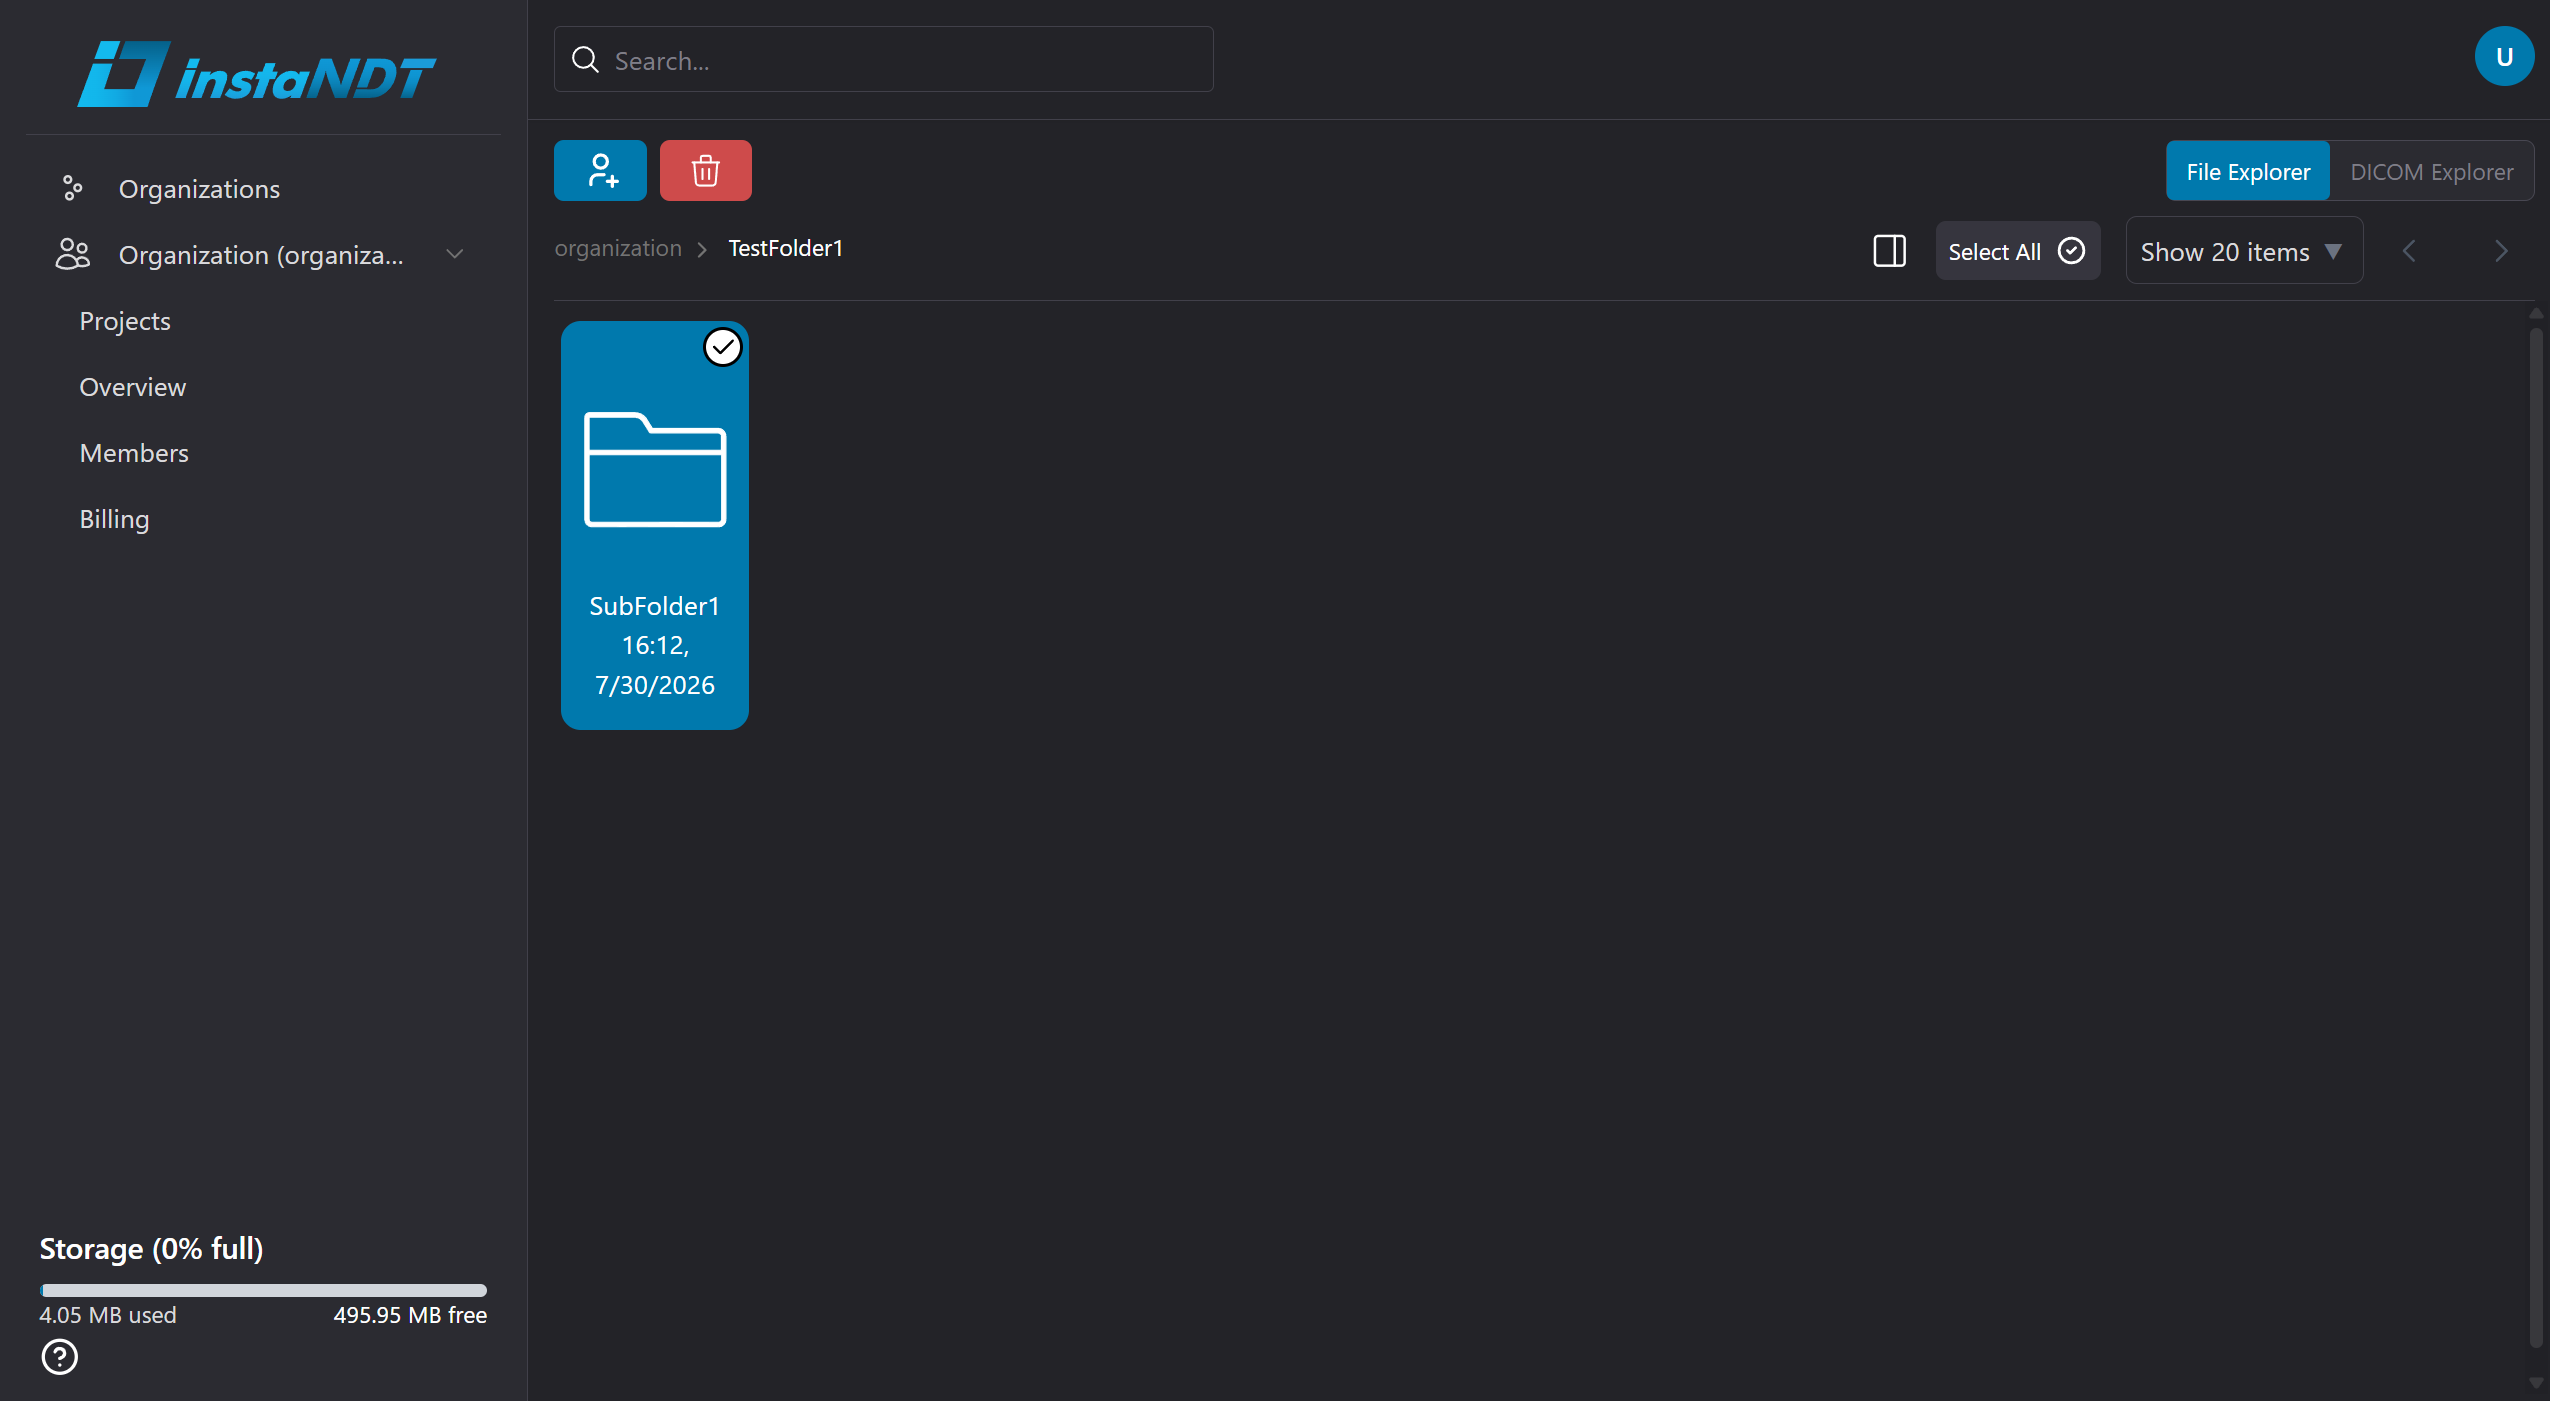
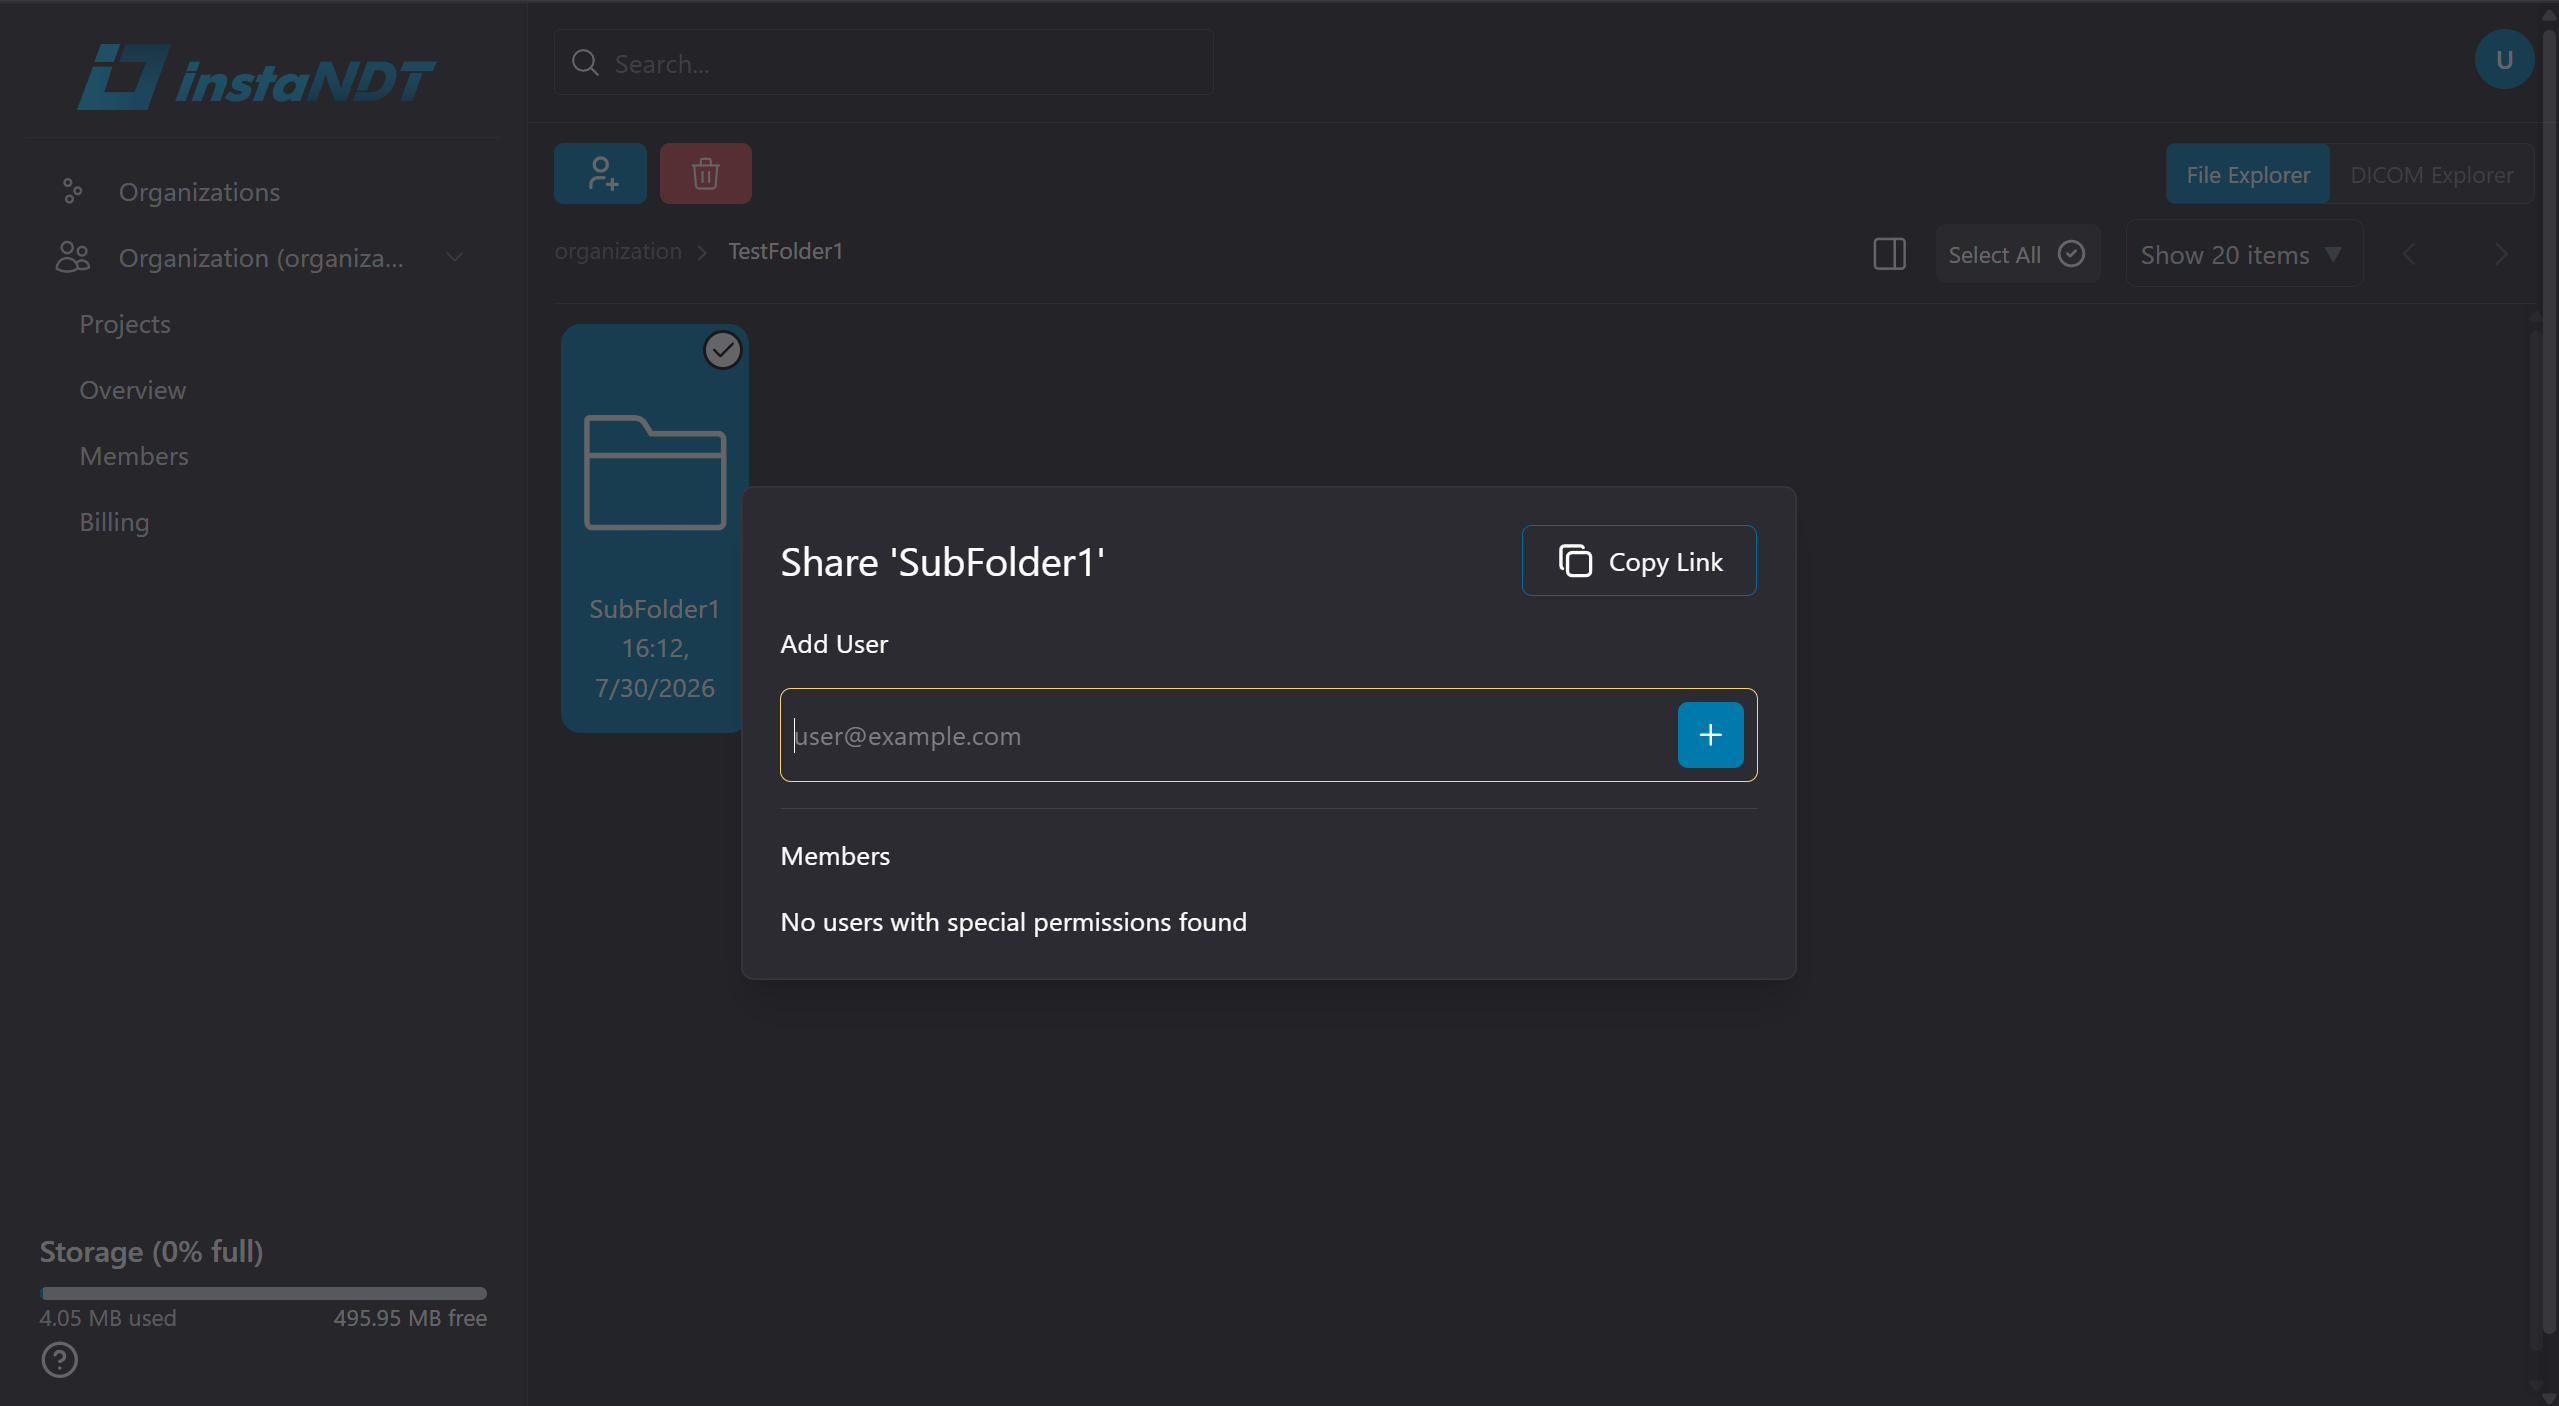
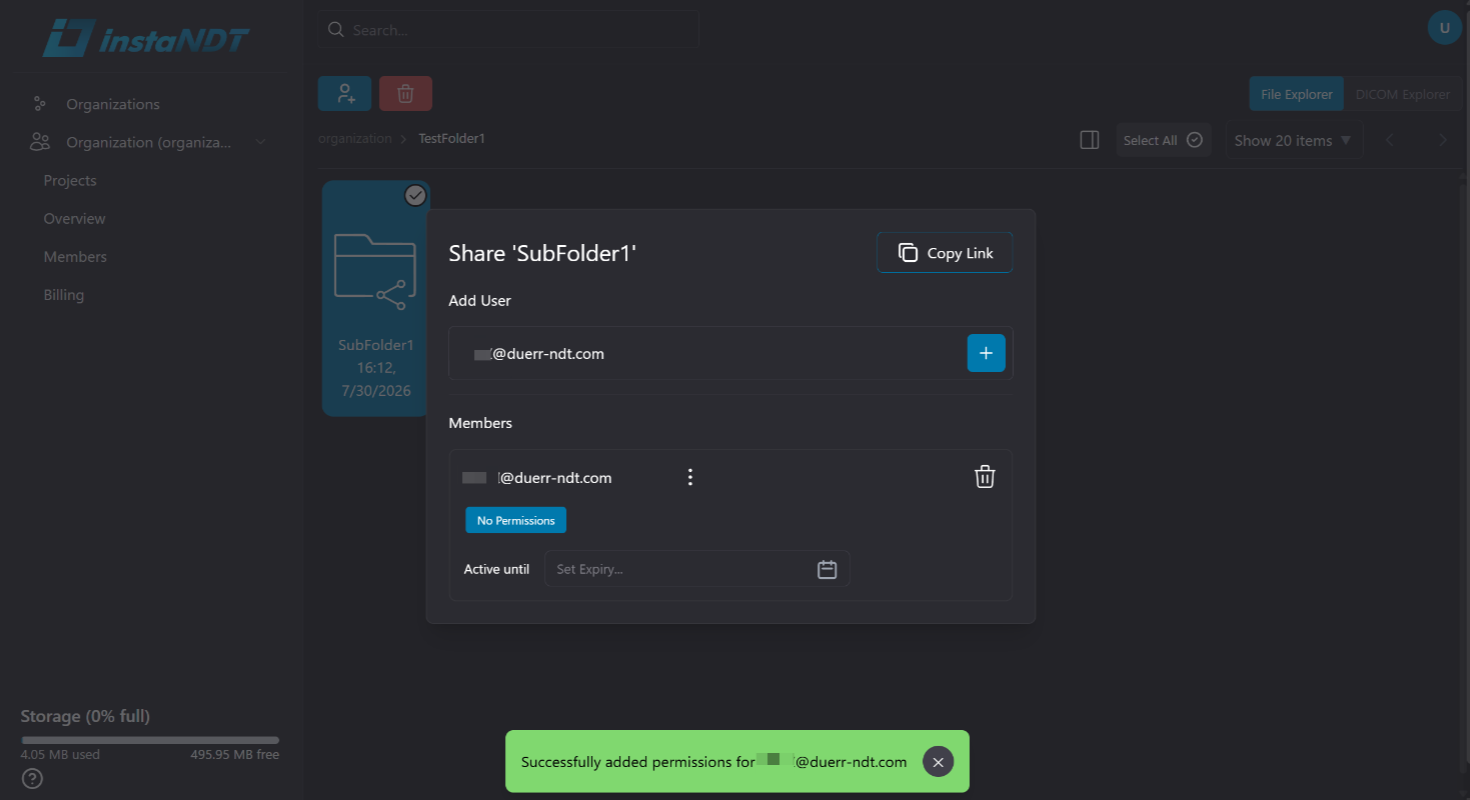
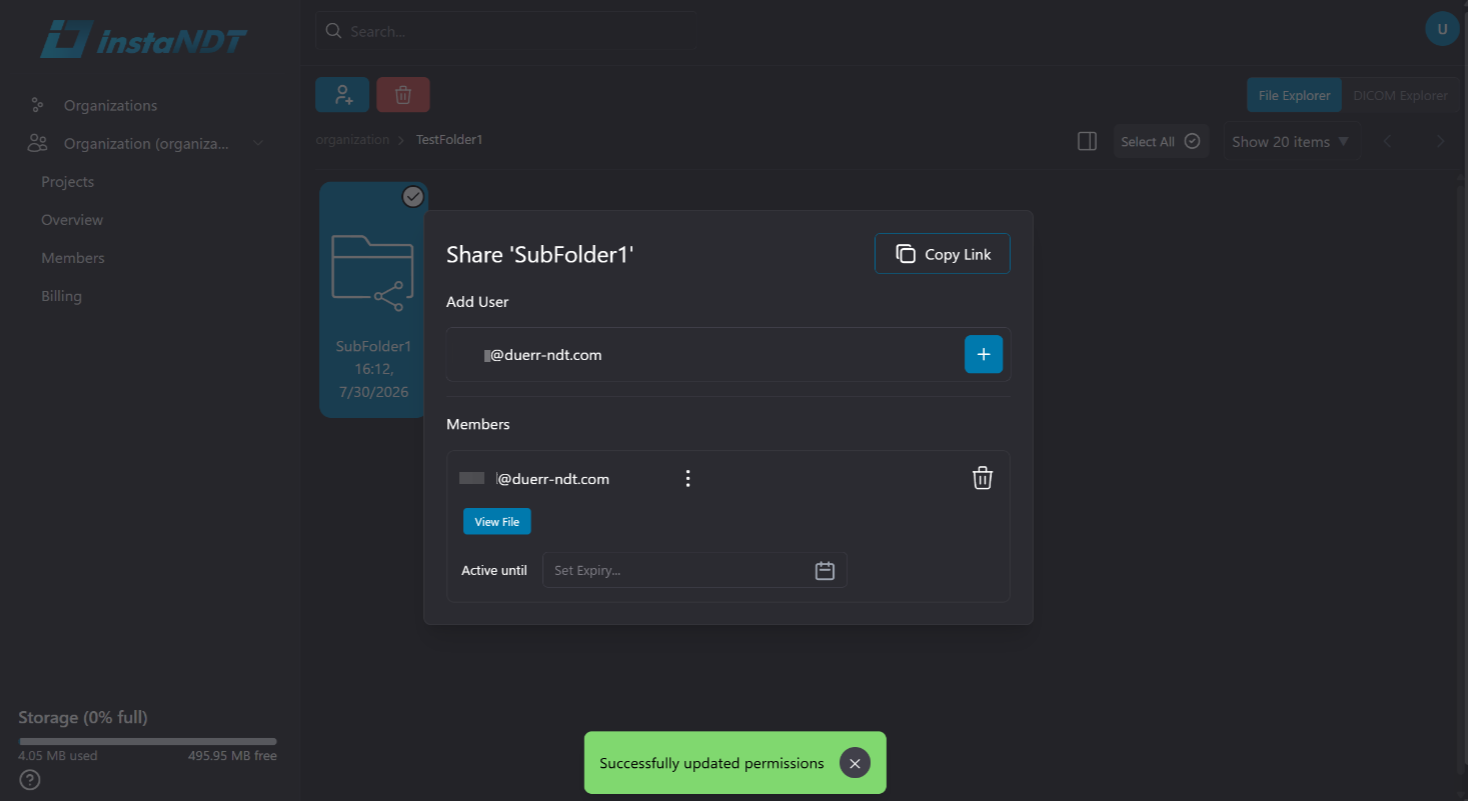
Figures 1–4. Sharing a folder and assigning View File permission to a user.
By default, newly added users are assigned No Permissions.
Folder Permissions
The following permissions can be assigned to each user for a shared folder.
| Permission | Allows the user to |
|---|---|
| View File | View the folder and all media contained within it. |
| Create File | Upload media and create subfolders within the folder. |
| Delete File | Delete media and subfolders within the folder. |
| View Project Members | View users who have access to the folder. |
| Add Project Members | Share the folder with additional users. |
| Edit Project Permissions | Modify permissions for users who have access to the folder. |
| Remove Folder Members | Remove users from the folder. |
Note: Folder permissions only apply to the selected folder. Users can have different permissions for different folders within the same project.
No Permissions
A user assigned No Permissions cannot access the folder, even if they have broader permissions elsewhere in the organization or project.
For example:
- A user has View File permission at the organization level.
- The same user is assigned No Permissions for TestFolder1.
In this scenario, the user cannot view or access TestFolder1 or any media contained within it.
This behavior also applies to users who have not yet registered with instaNDT.
Sharing with External Users
Folders can be shared with users who do not have an instaNDT account.
After entering the user's email address in the Share dialog:
- Copy the sharing link from the upper-right corner of the dialog.
- Send the link to the external user.
- The user opens the link and enters the same email address that the folder was shared with.
- A one-time verification code is sent to that email address.
- After entering the verification code, the user is granted access to the shared folder according to the permissions you assigned.
This verification process ensures that only the intended recipient can access the shared folder.
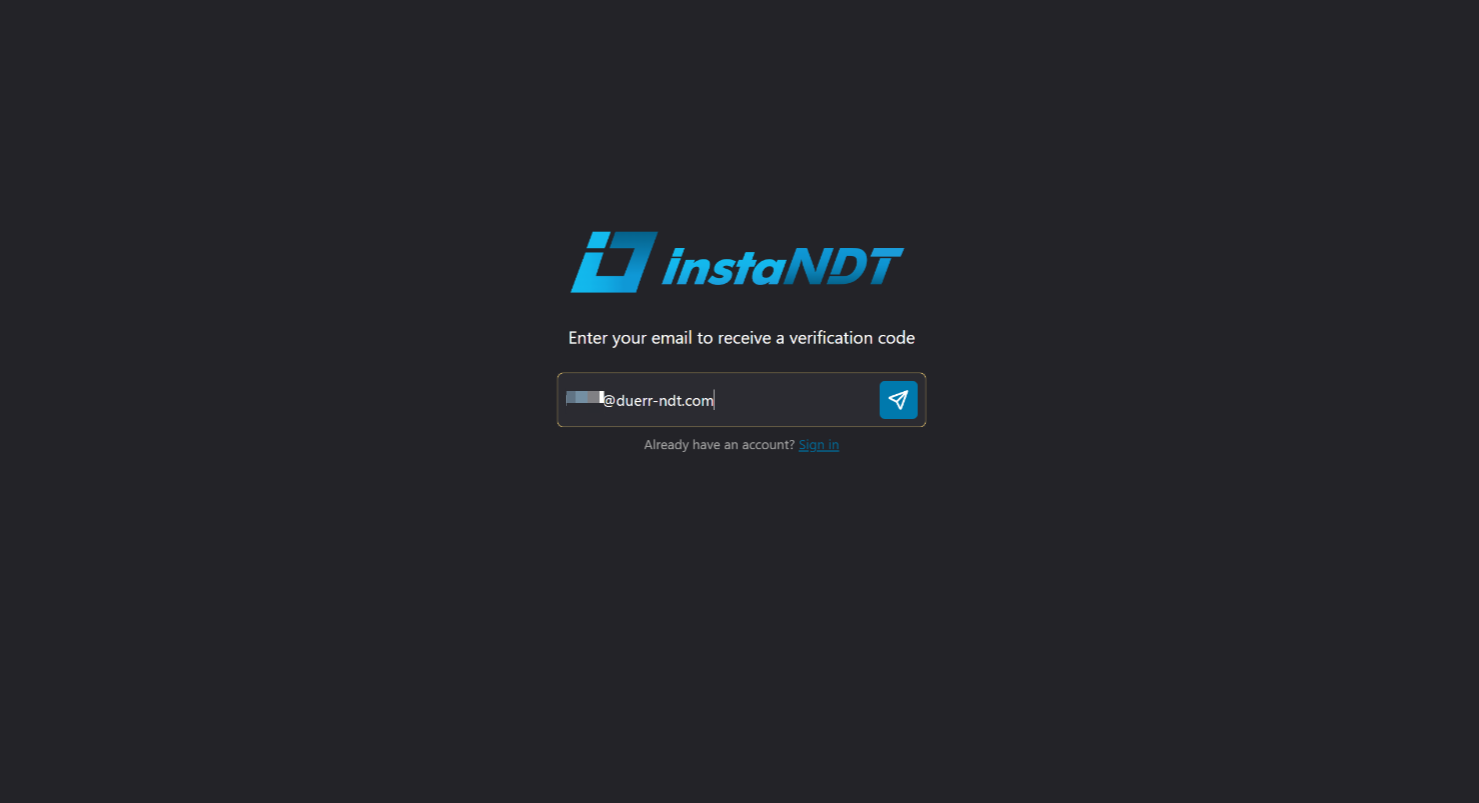
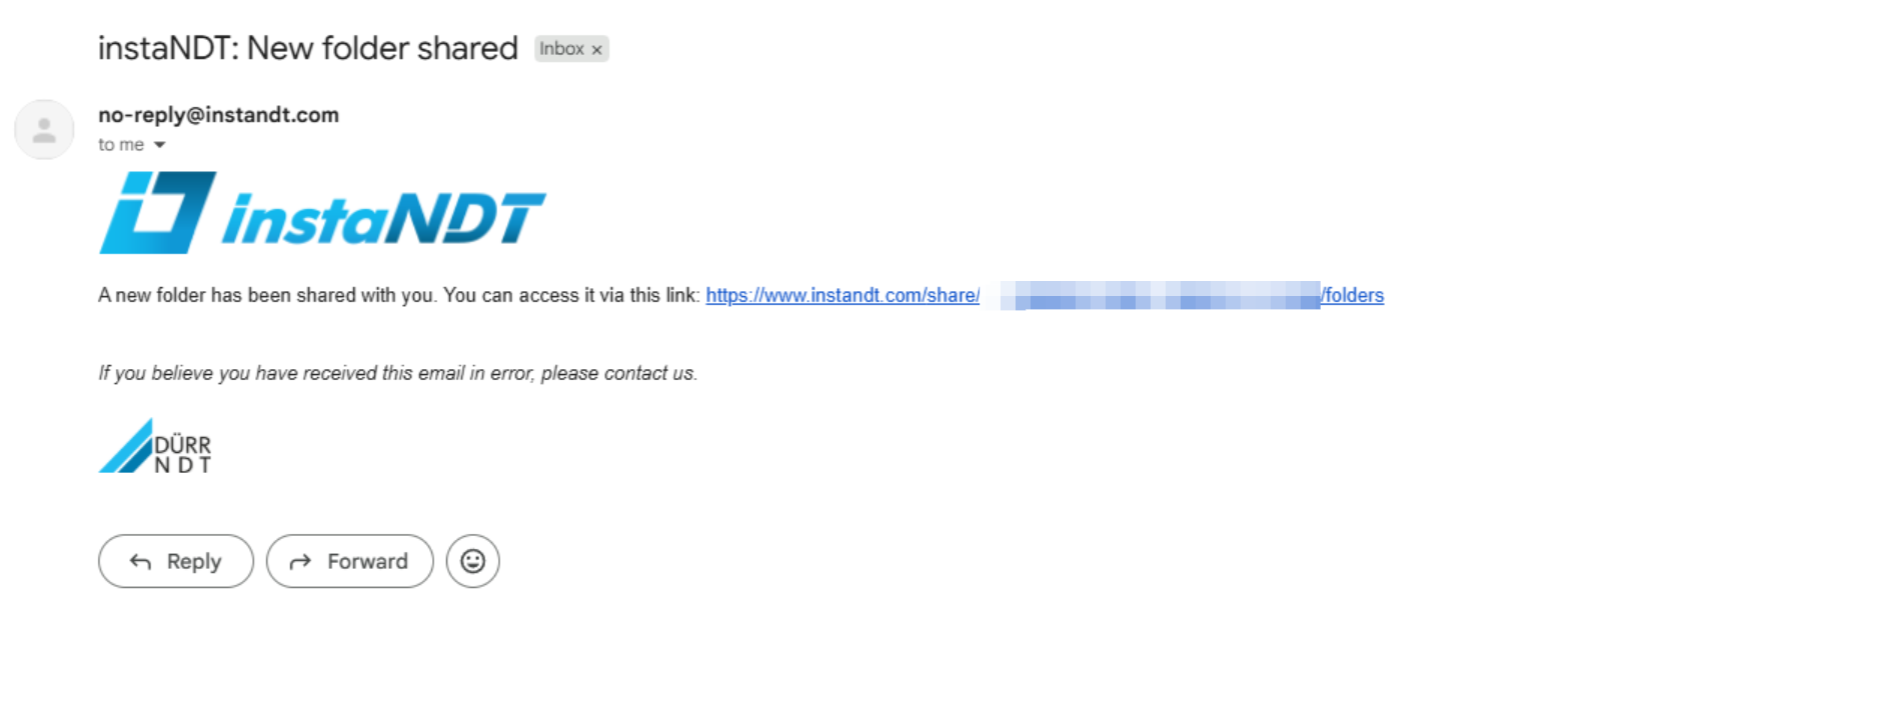
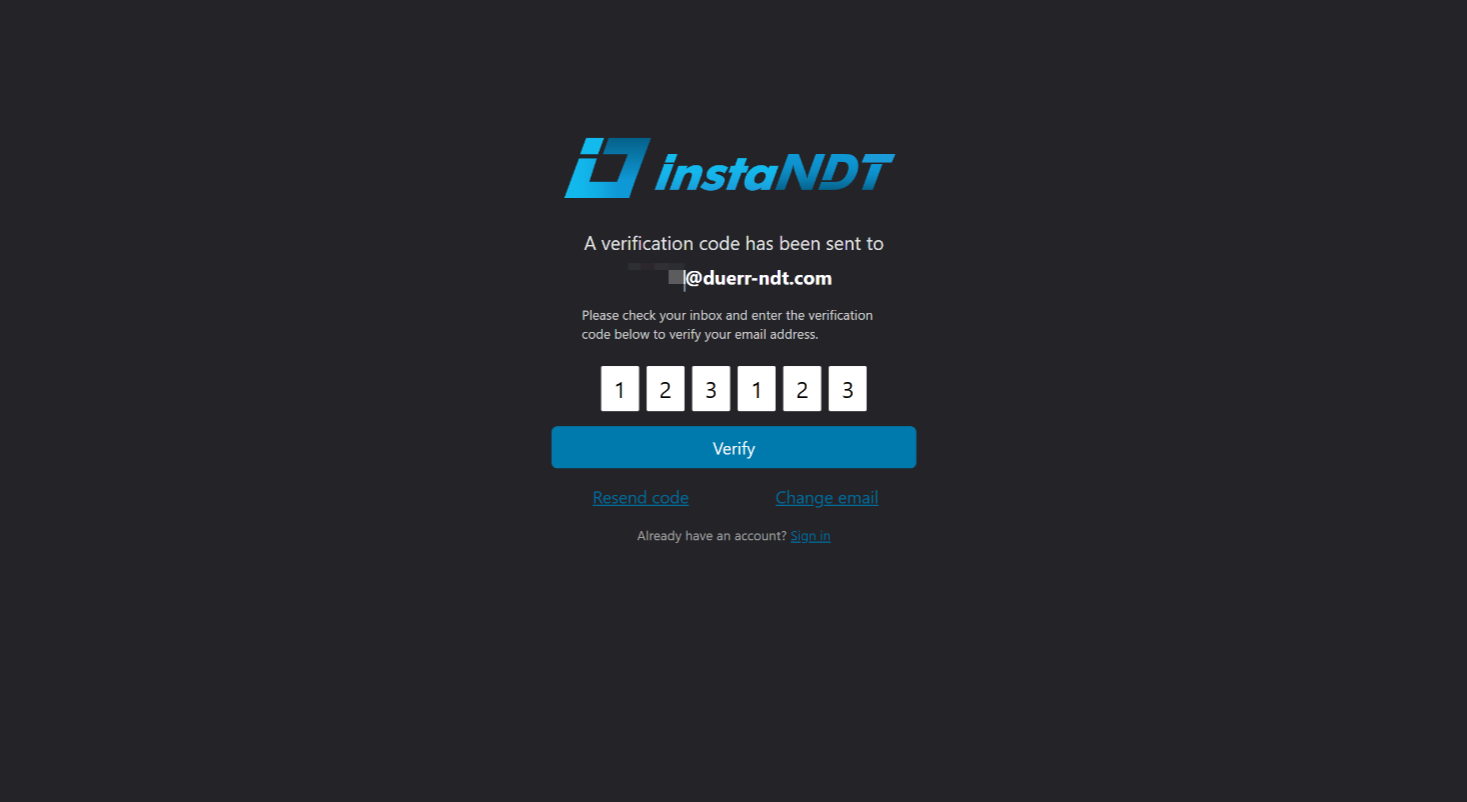
Figures 5–8. An external user accessing a shared folder using an email verification code.
Media
Projects support both DICOM (.dcm) and non-DICOM media files. Depending on the file type, different features are available after upload.
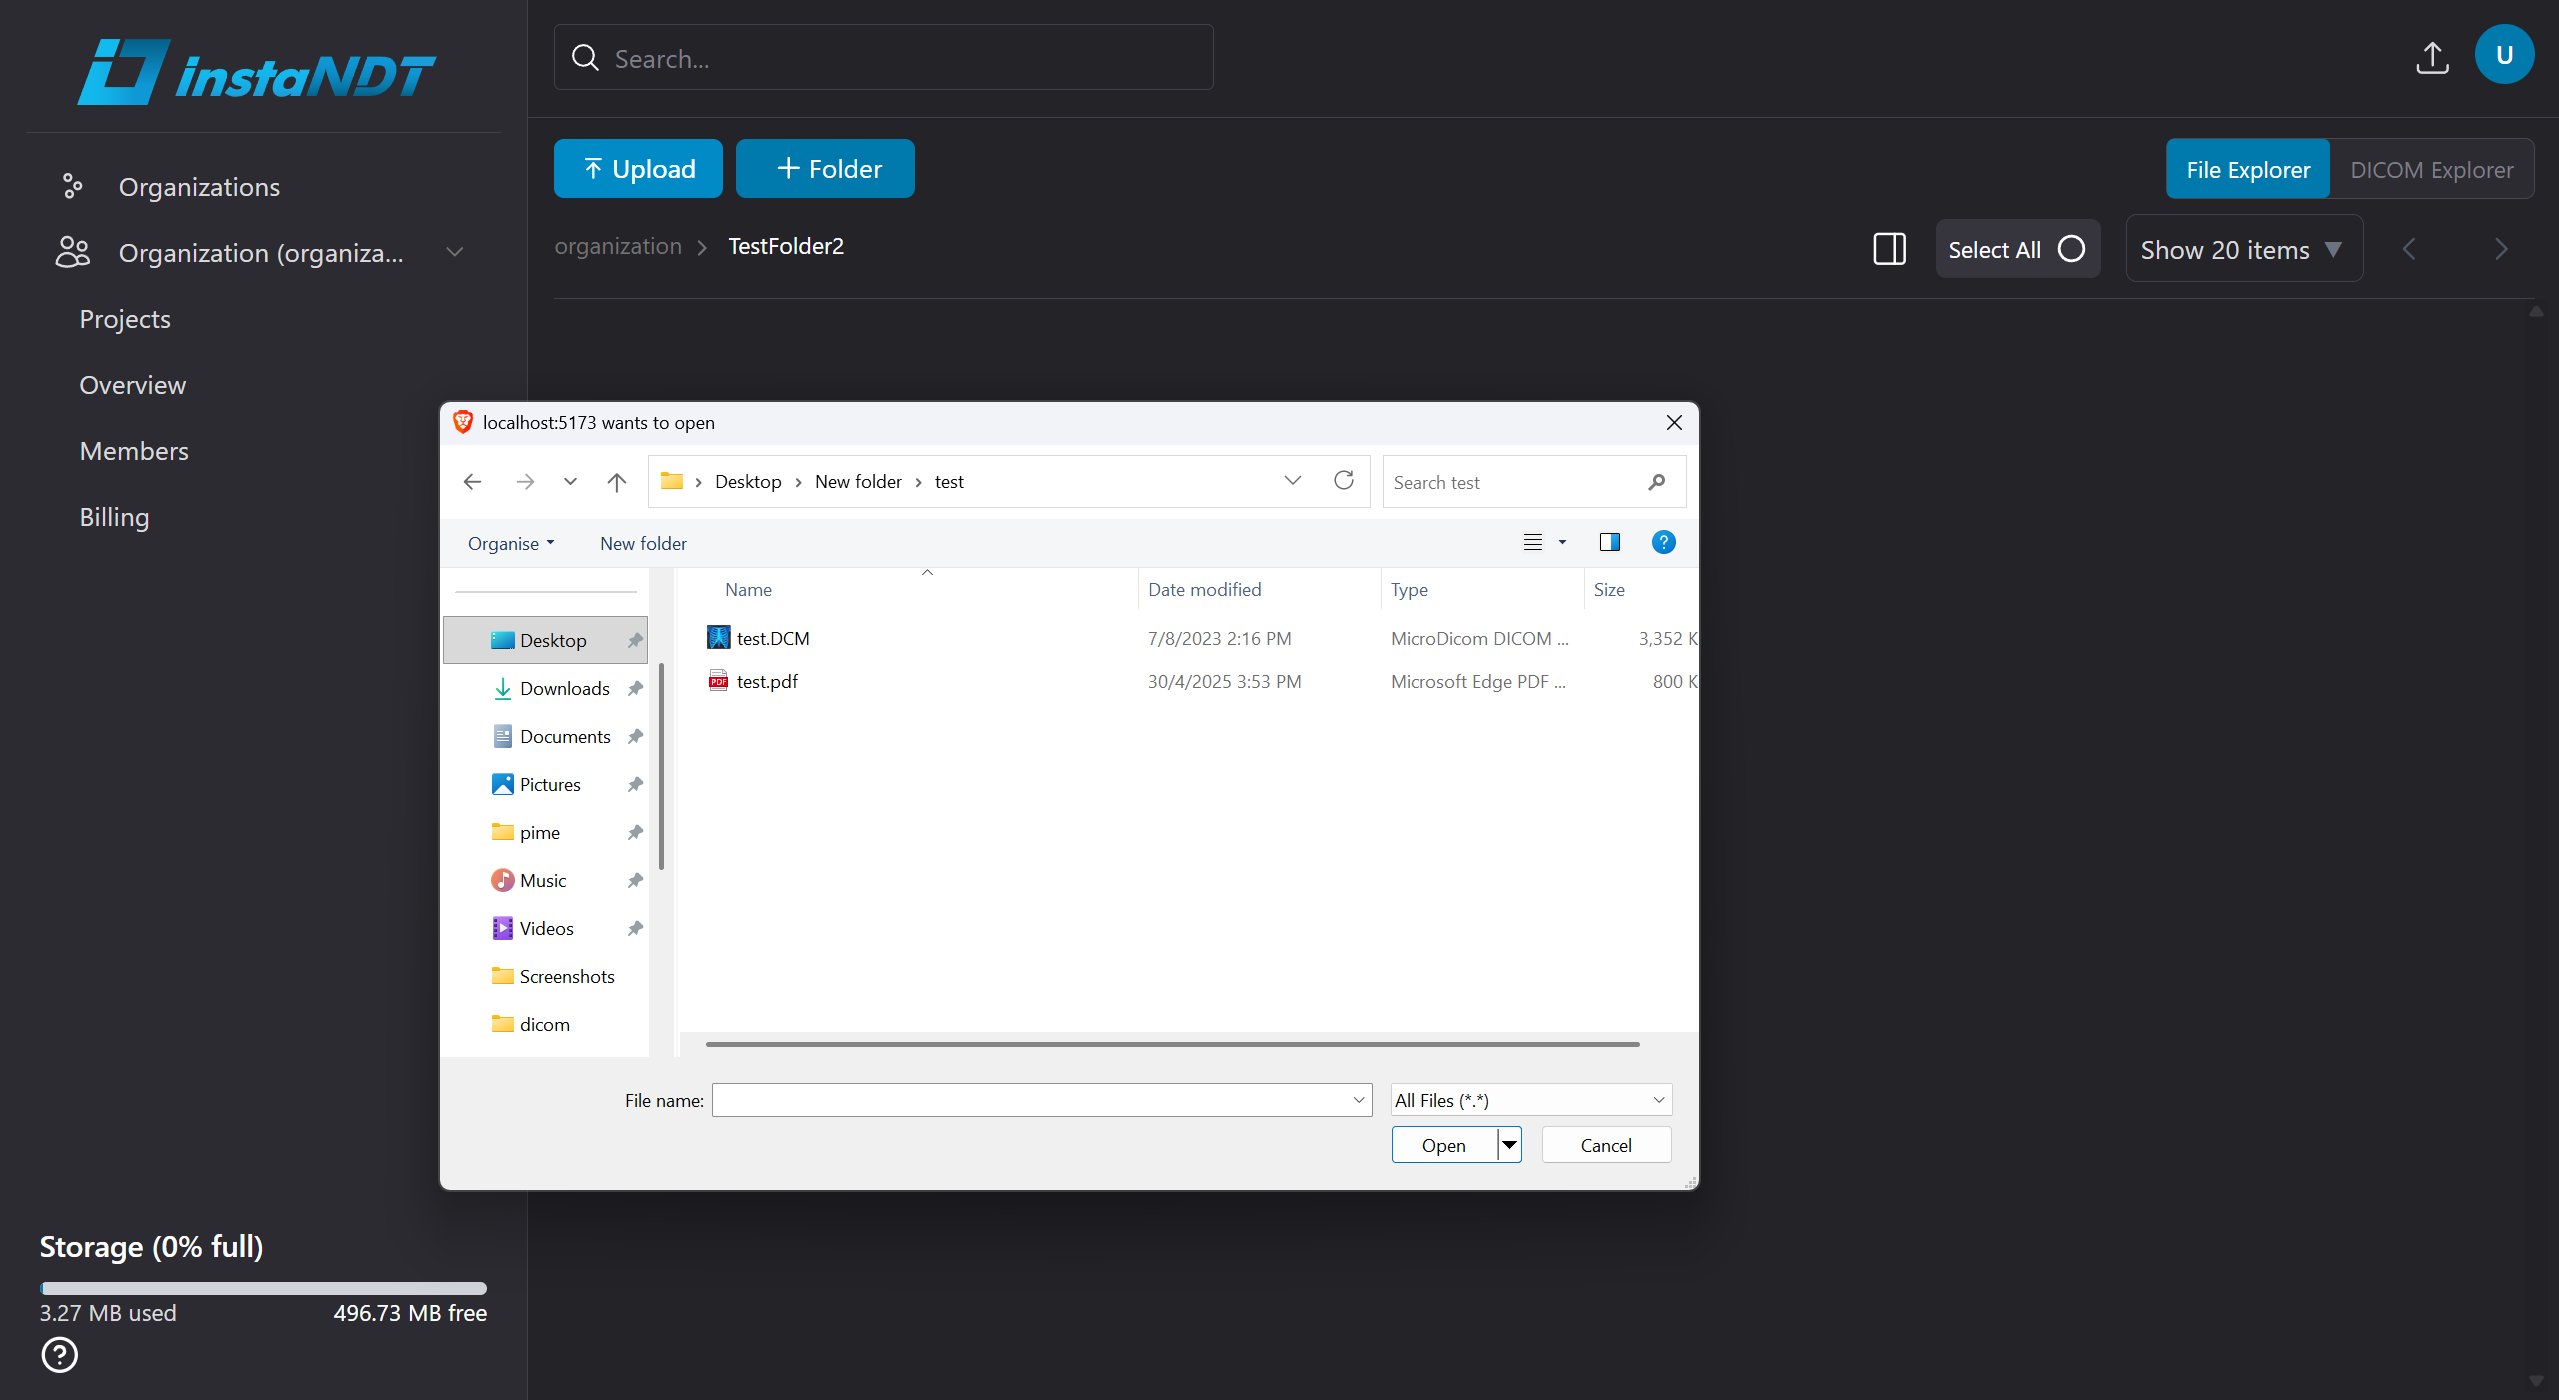
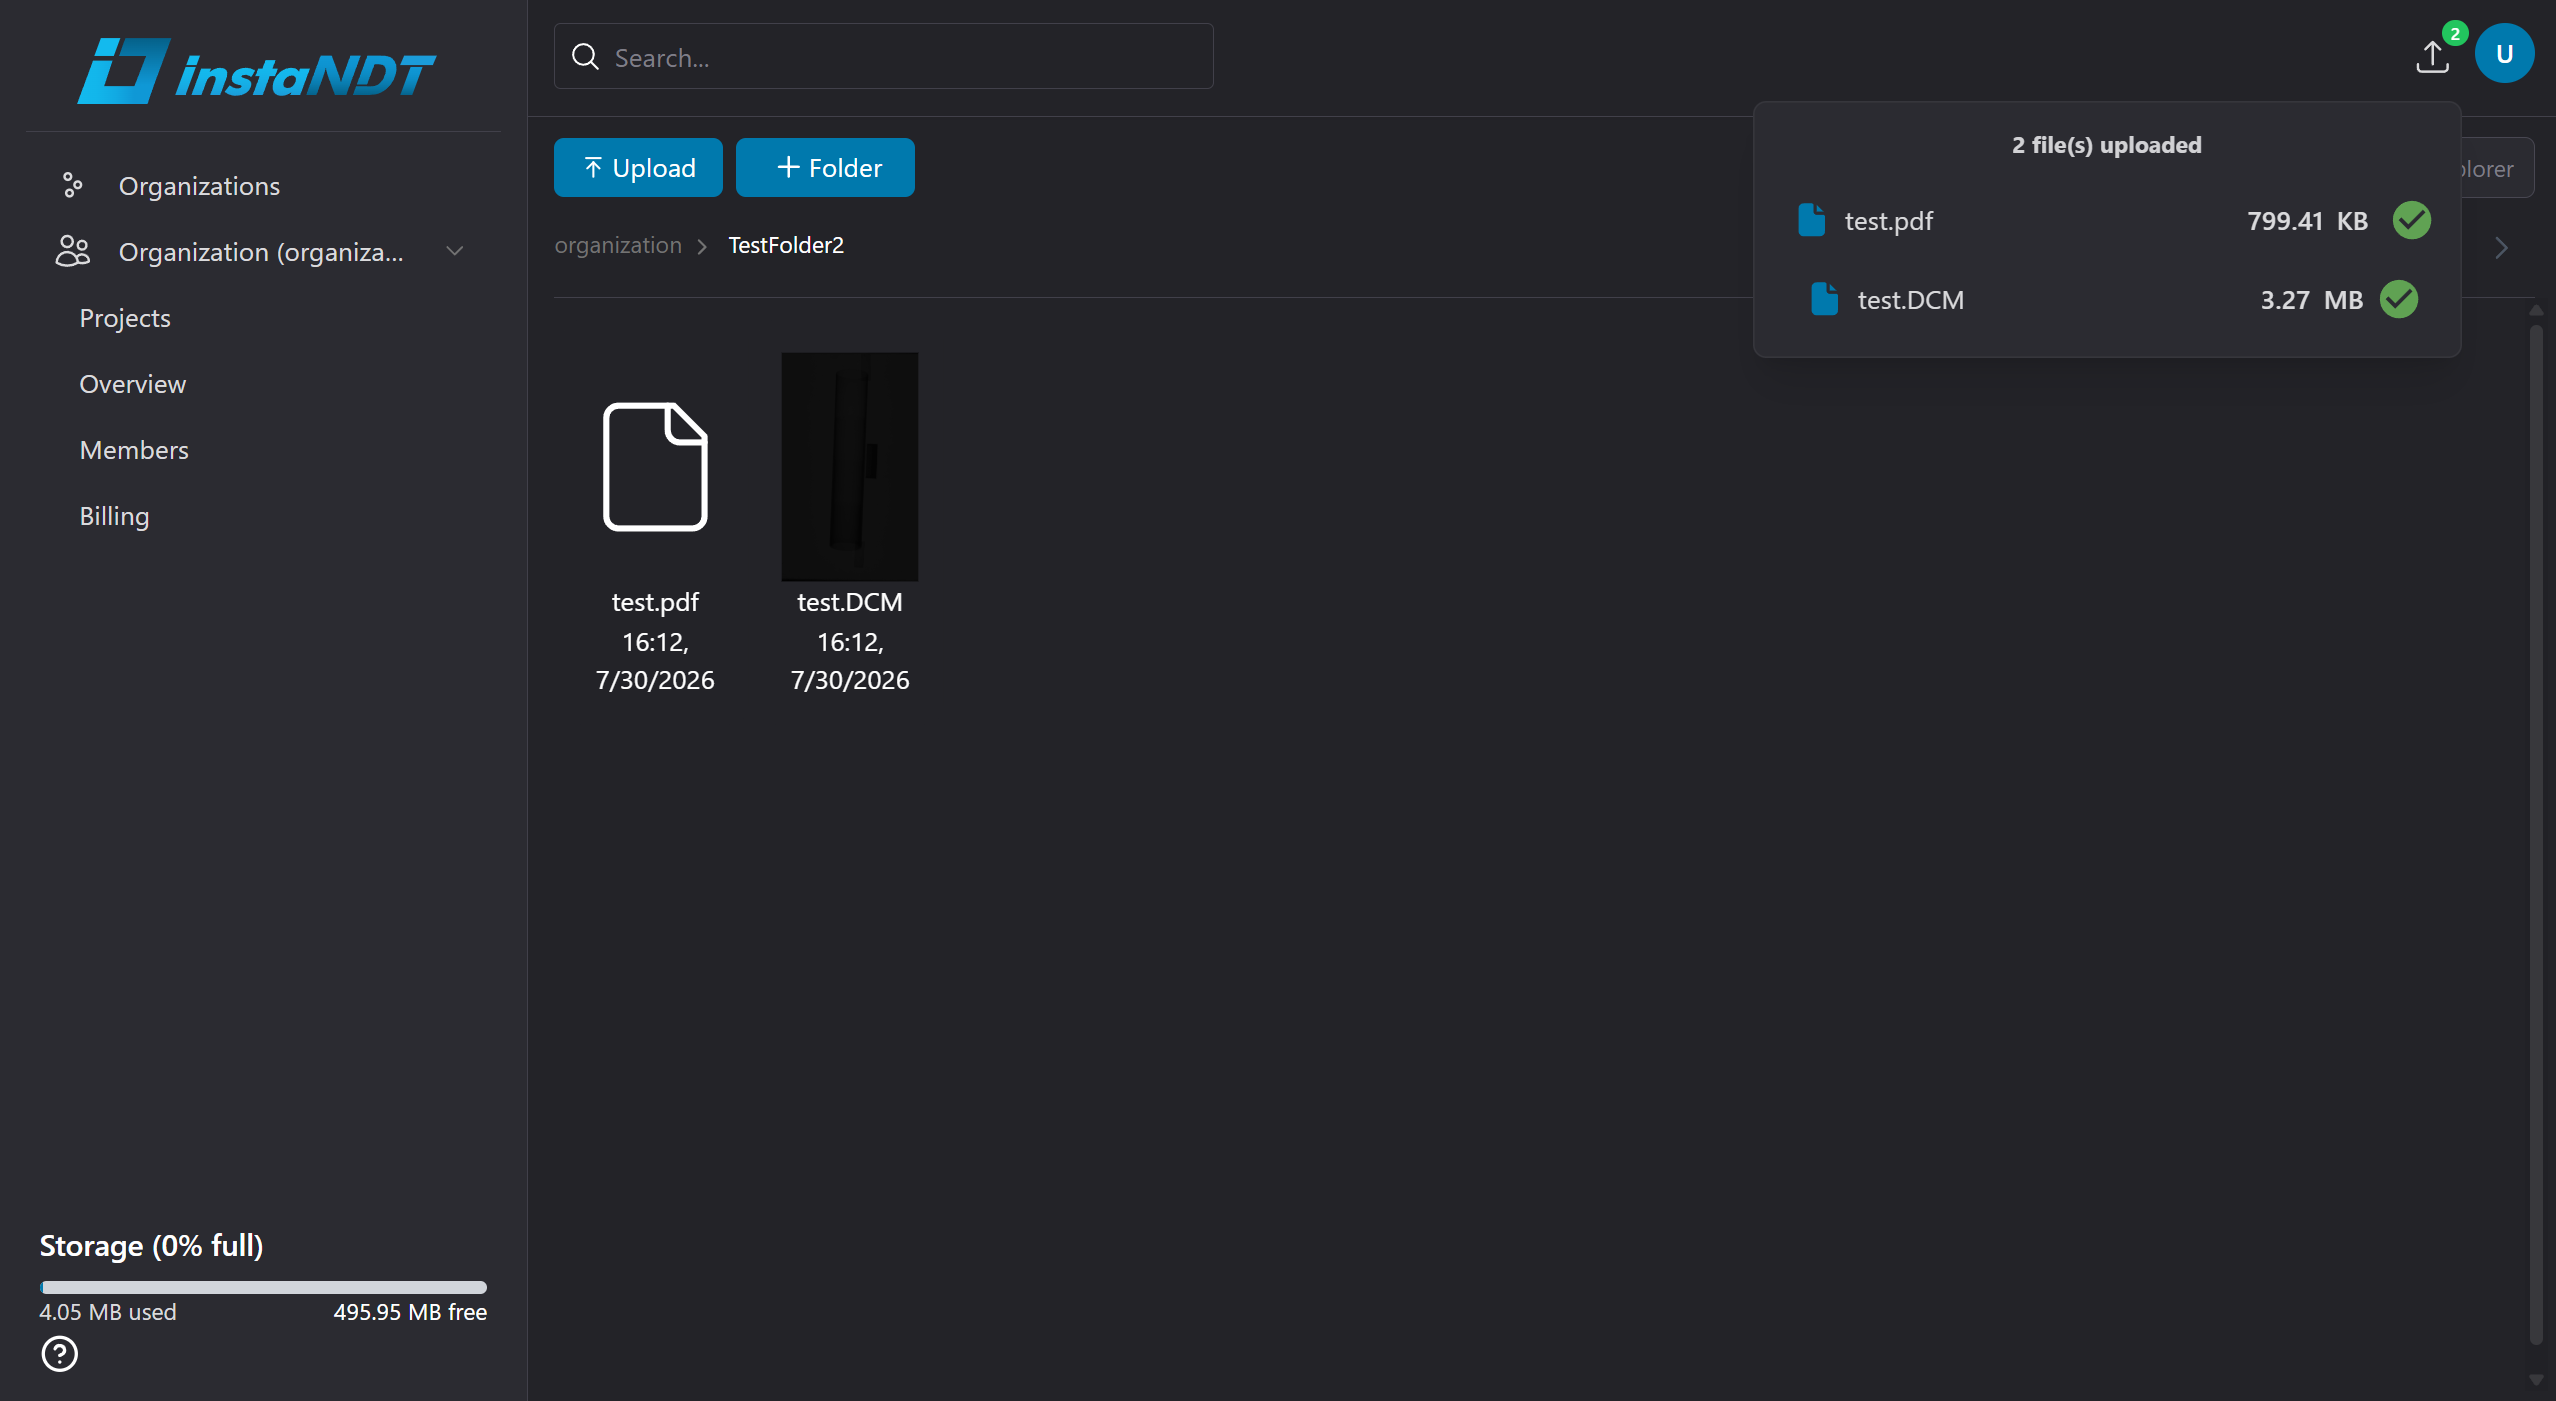
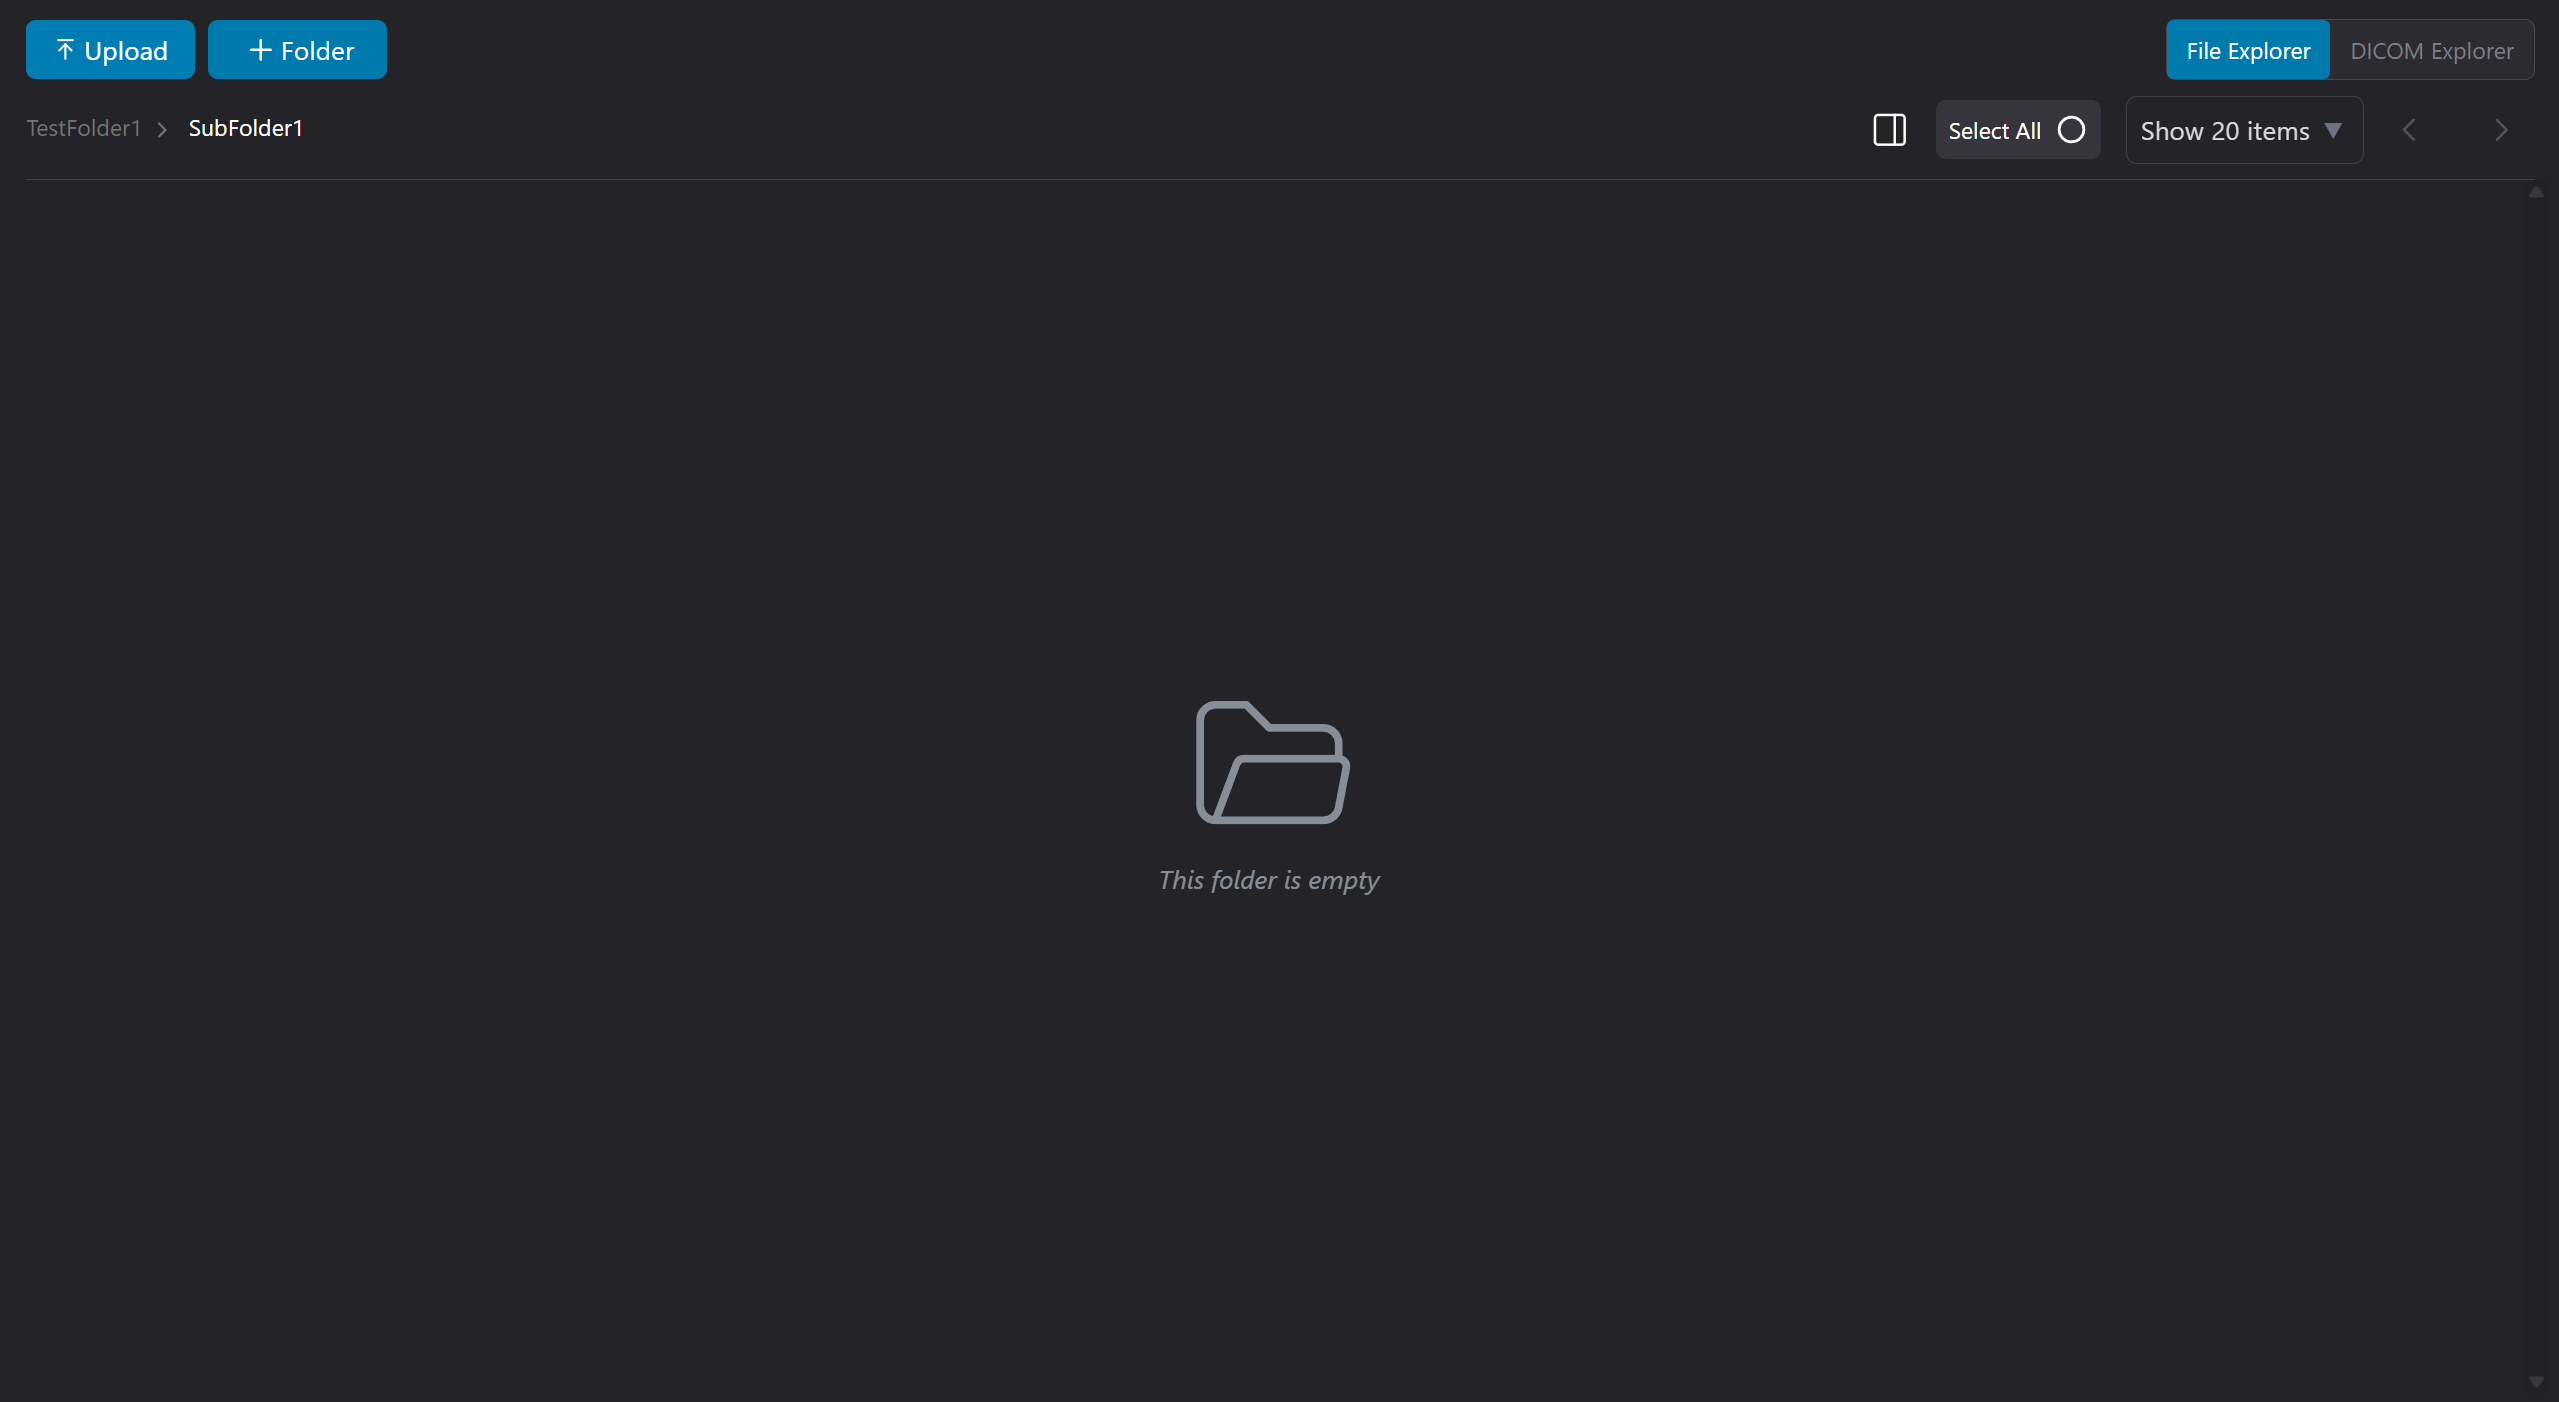
Figures 1 and 2. Uploading DICOM (.dcm) and non-DICOM media files to a project.
DICOM Media
DICOM (.dcm) files can be opened directly in the built-in DICOM viewer, providing access to the imaging data without requiring external software.
The DICOM viewer allows you to:
- View DICOM images directly in your browser.
- Download individual DICOM (
.dcm) files when needed.
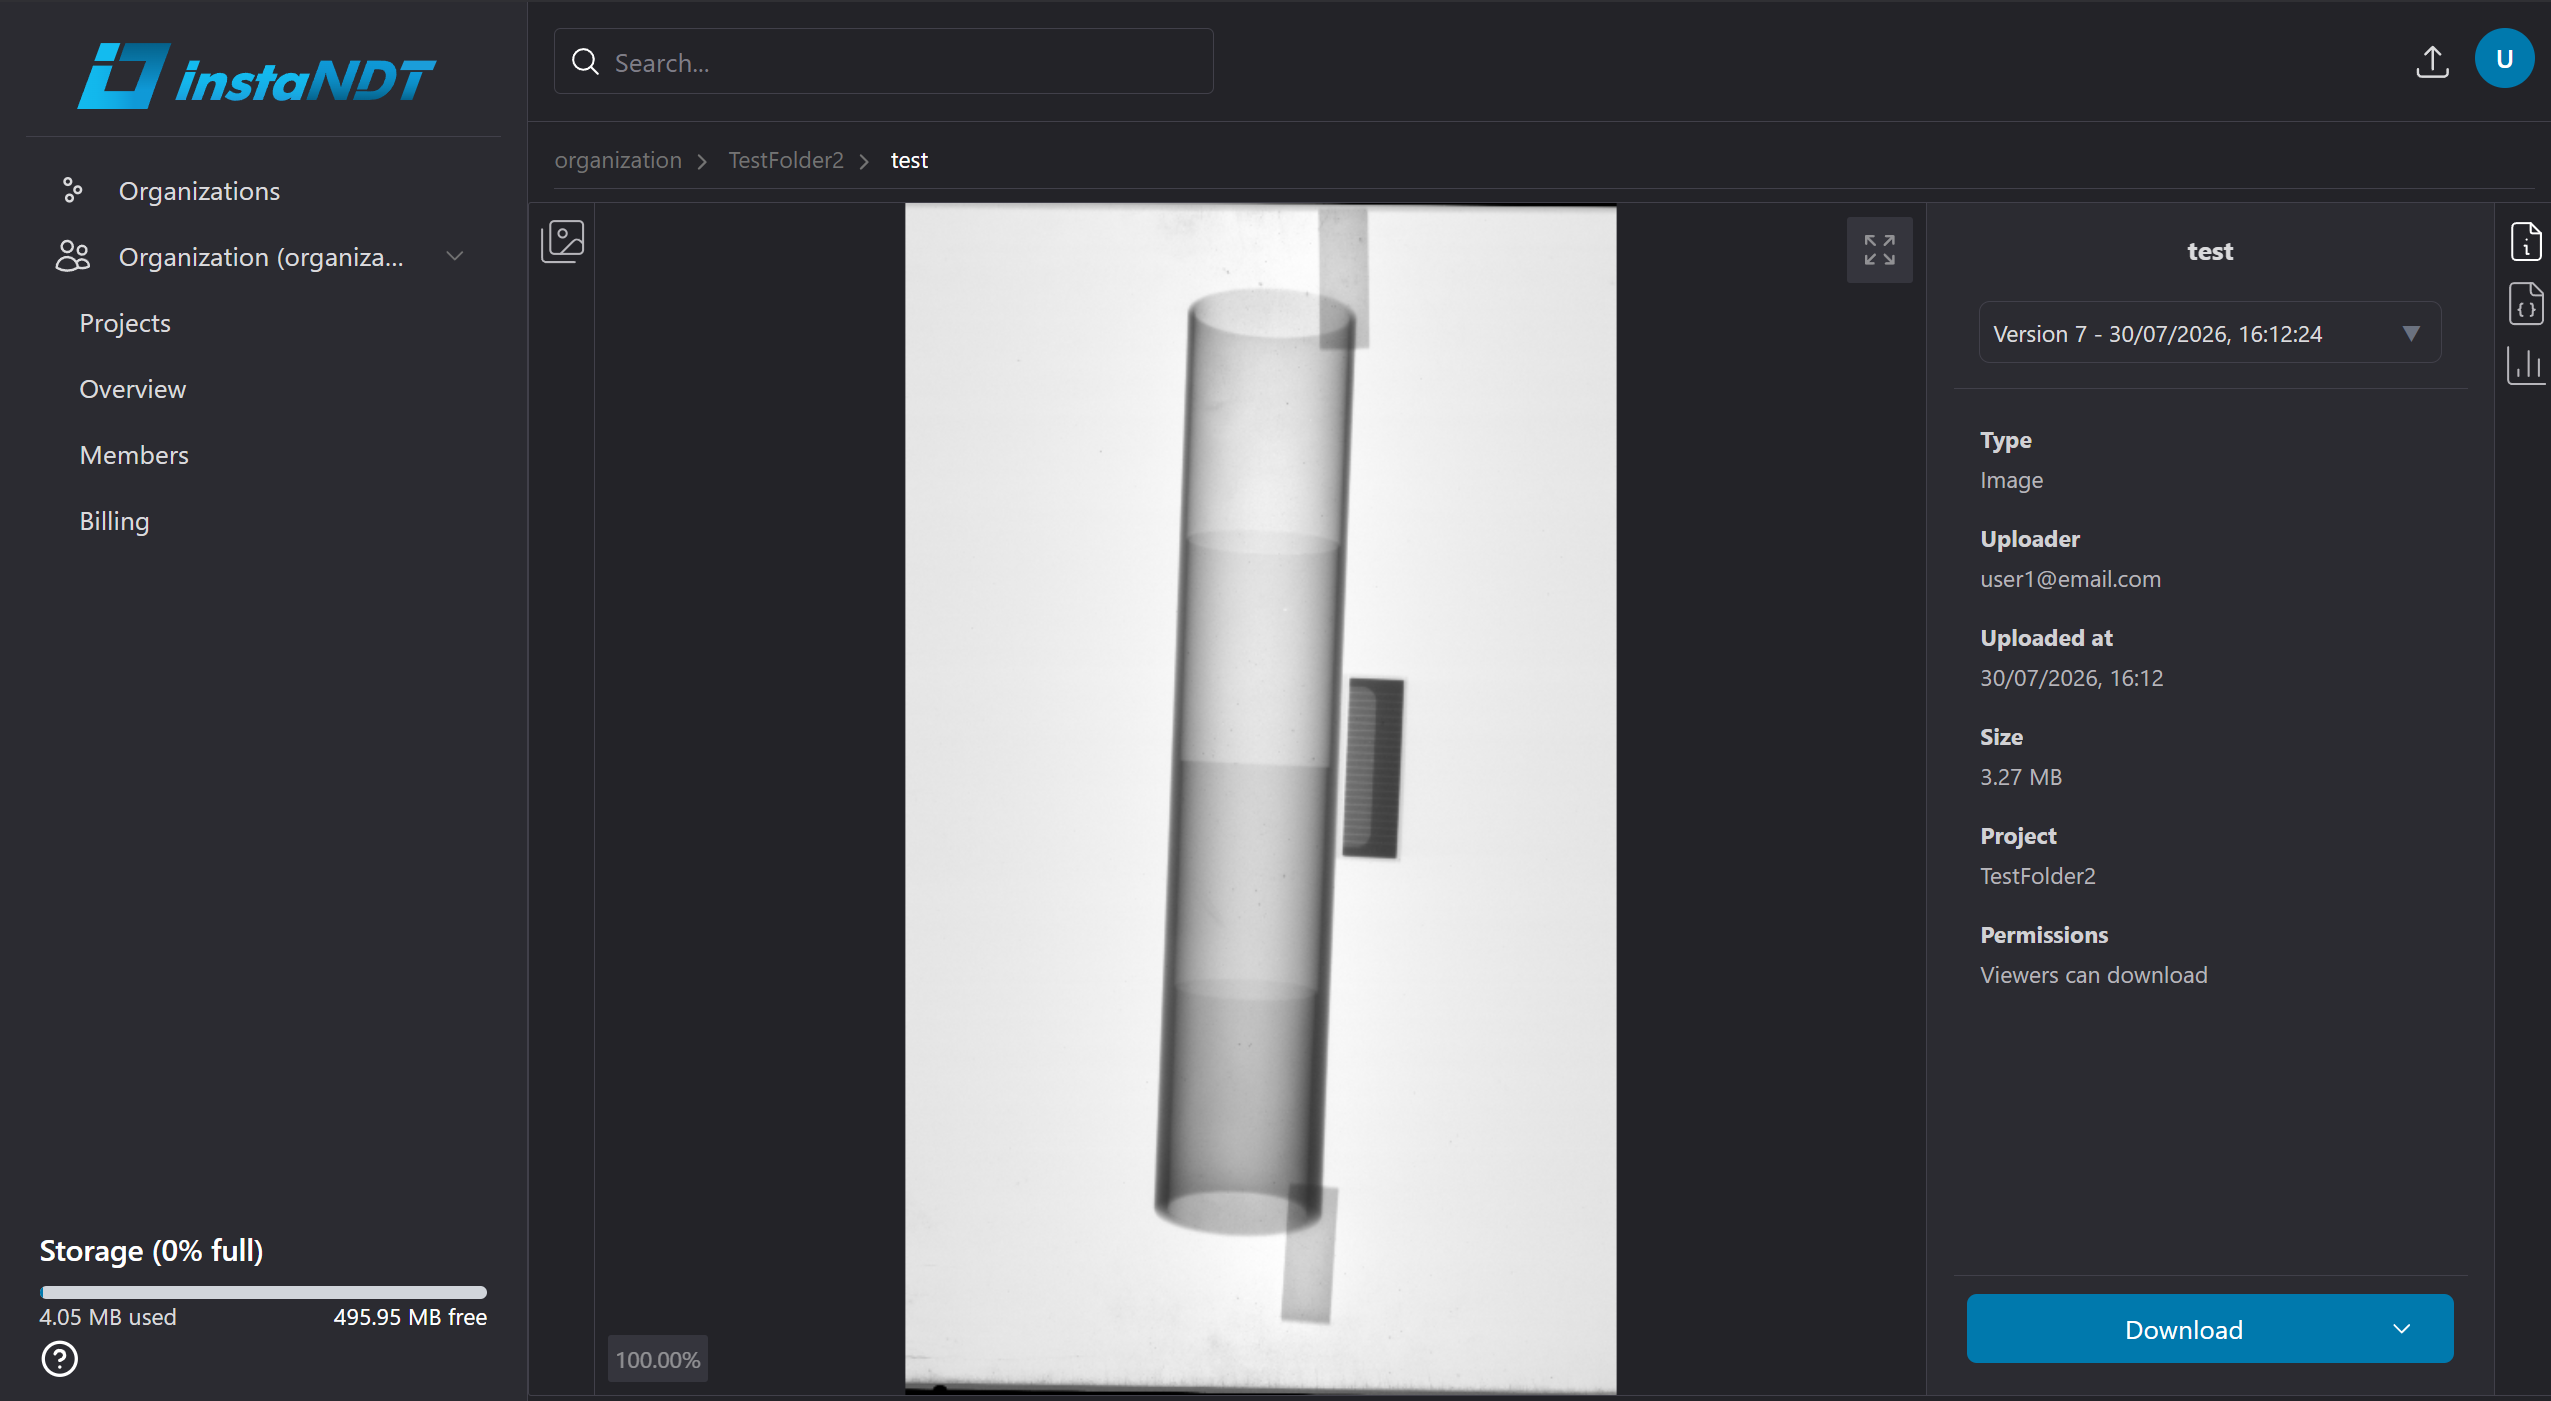
Figure 3. Opening a DICOM file in the built-in DICOM viewer.
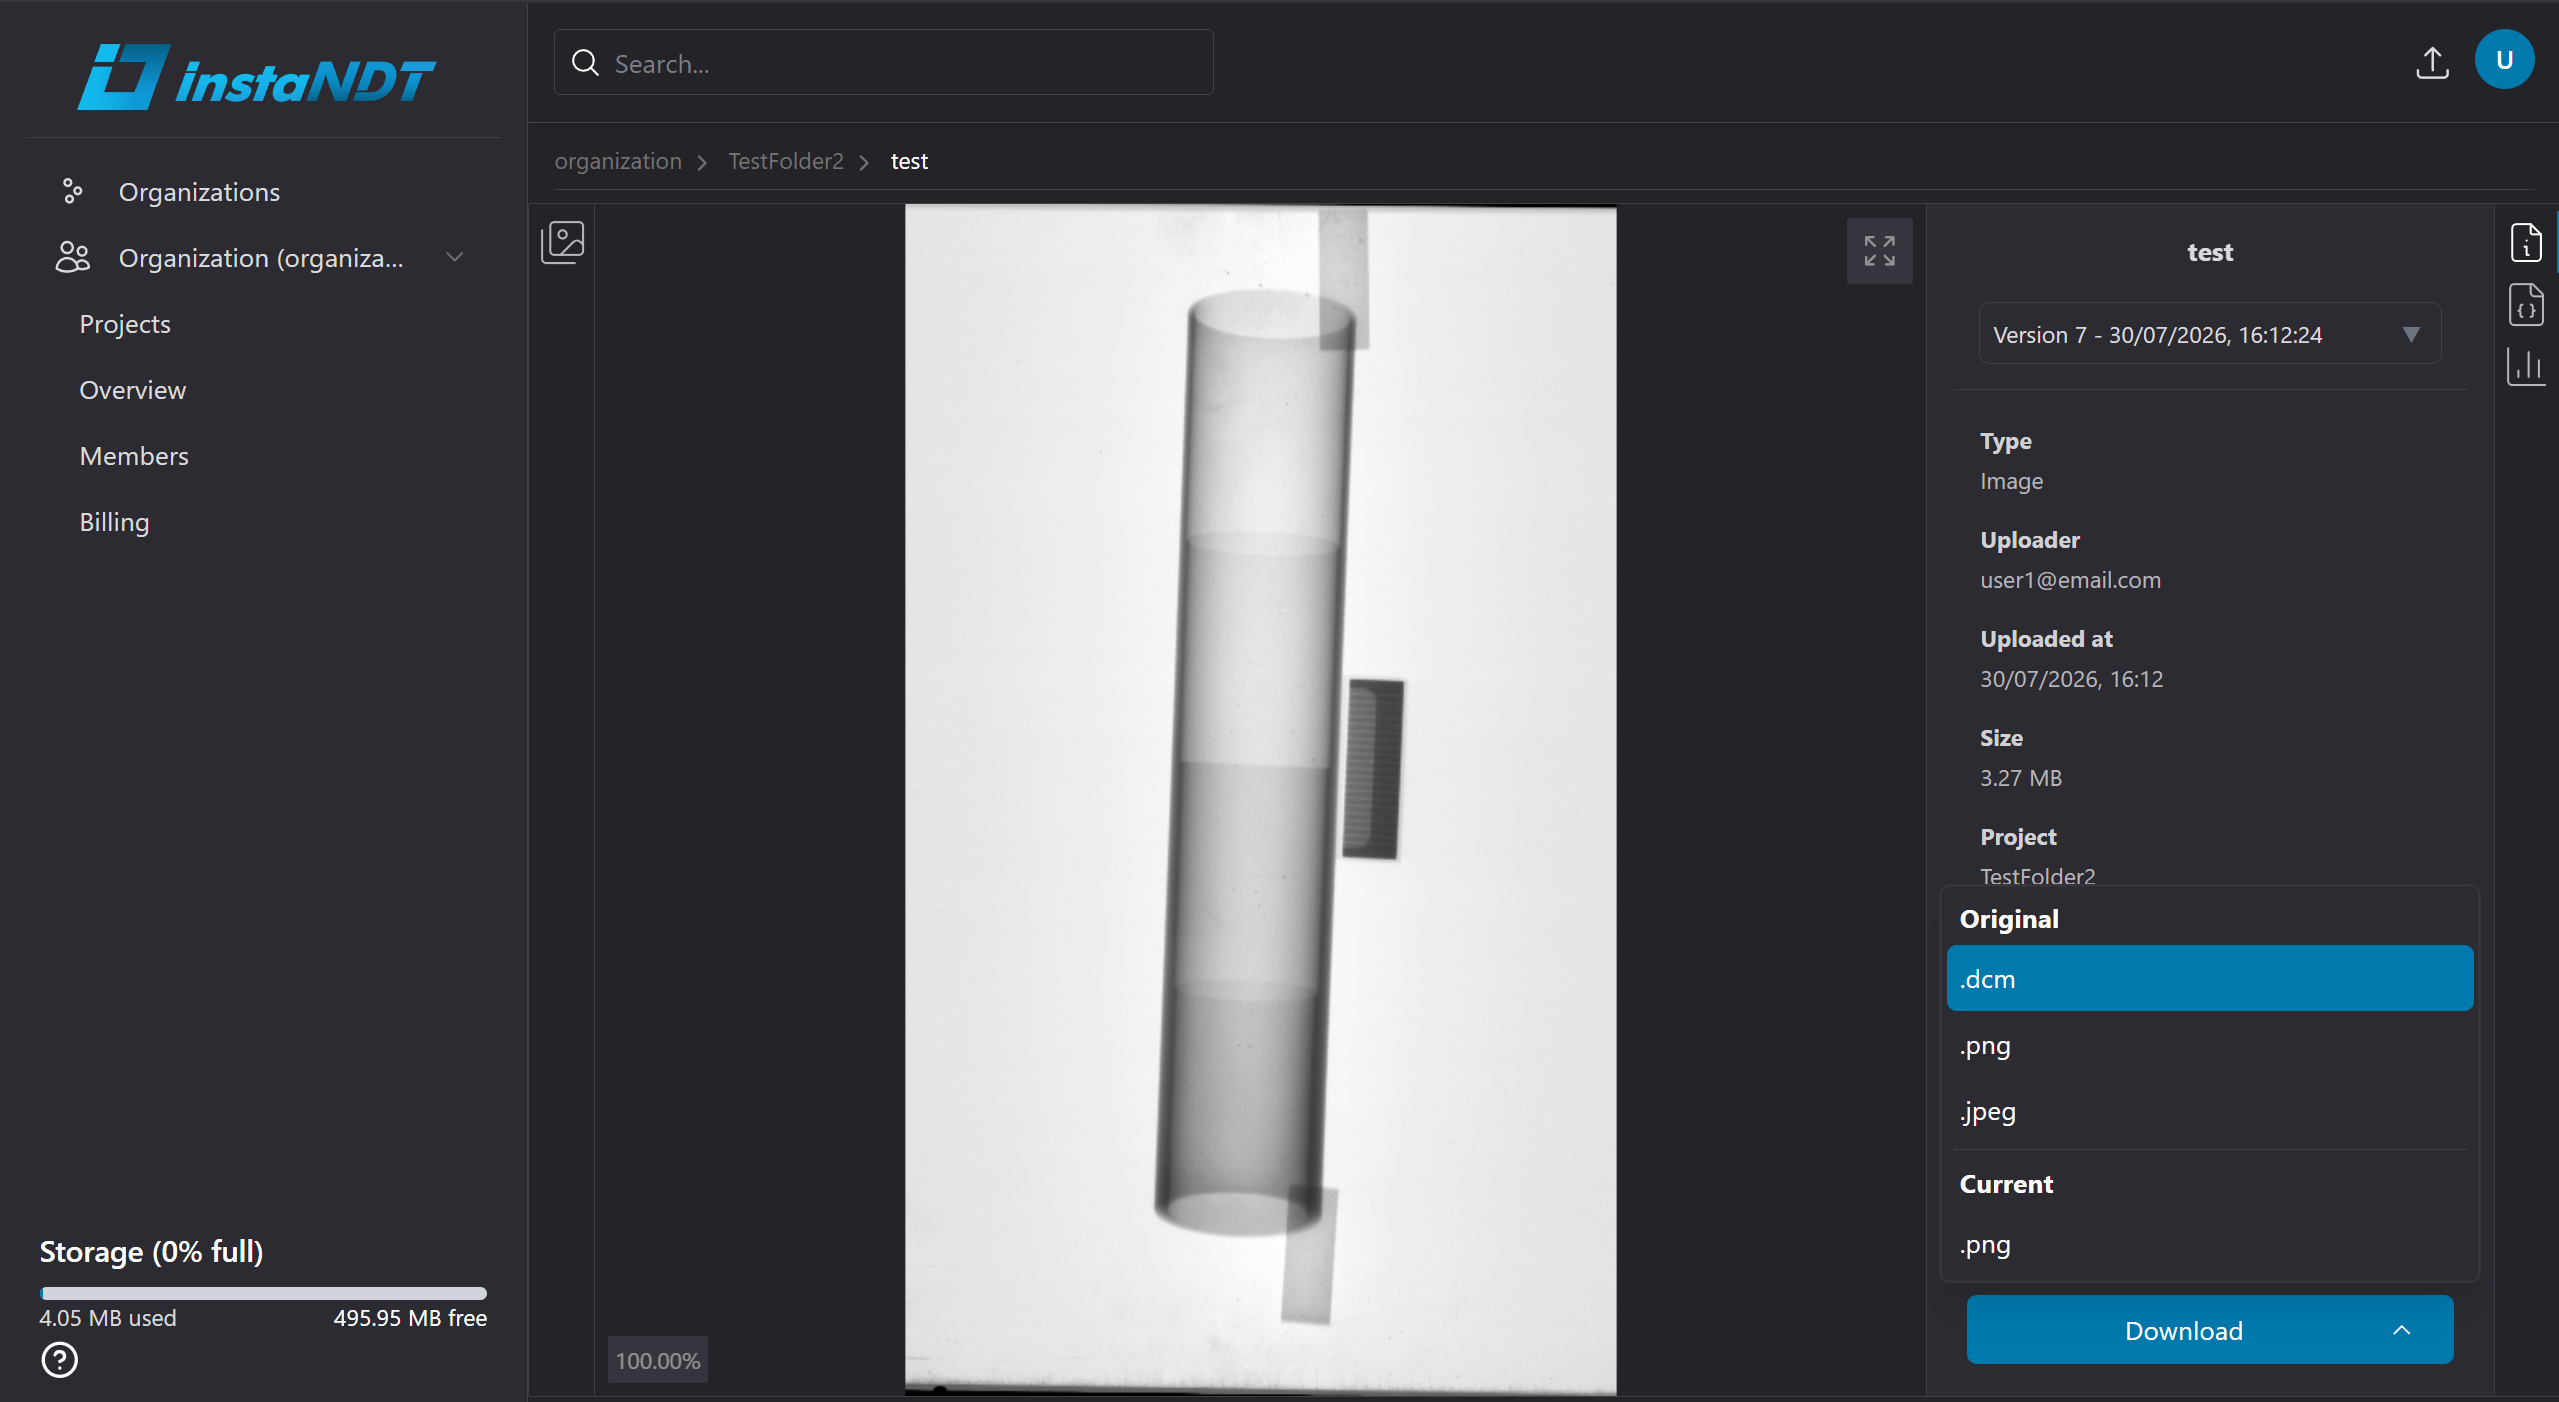
Figure 4. Download options available for a DICOM media.
Non-DICOM Media
Non-DICOM files are stored alongside DICOM media within the project. Although they cannot be opened in the DICOM viewer, they can still be organized in folders and downloaded at any time.
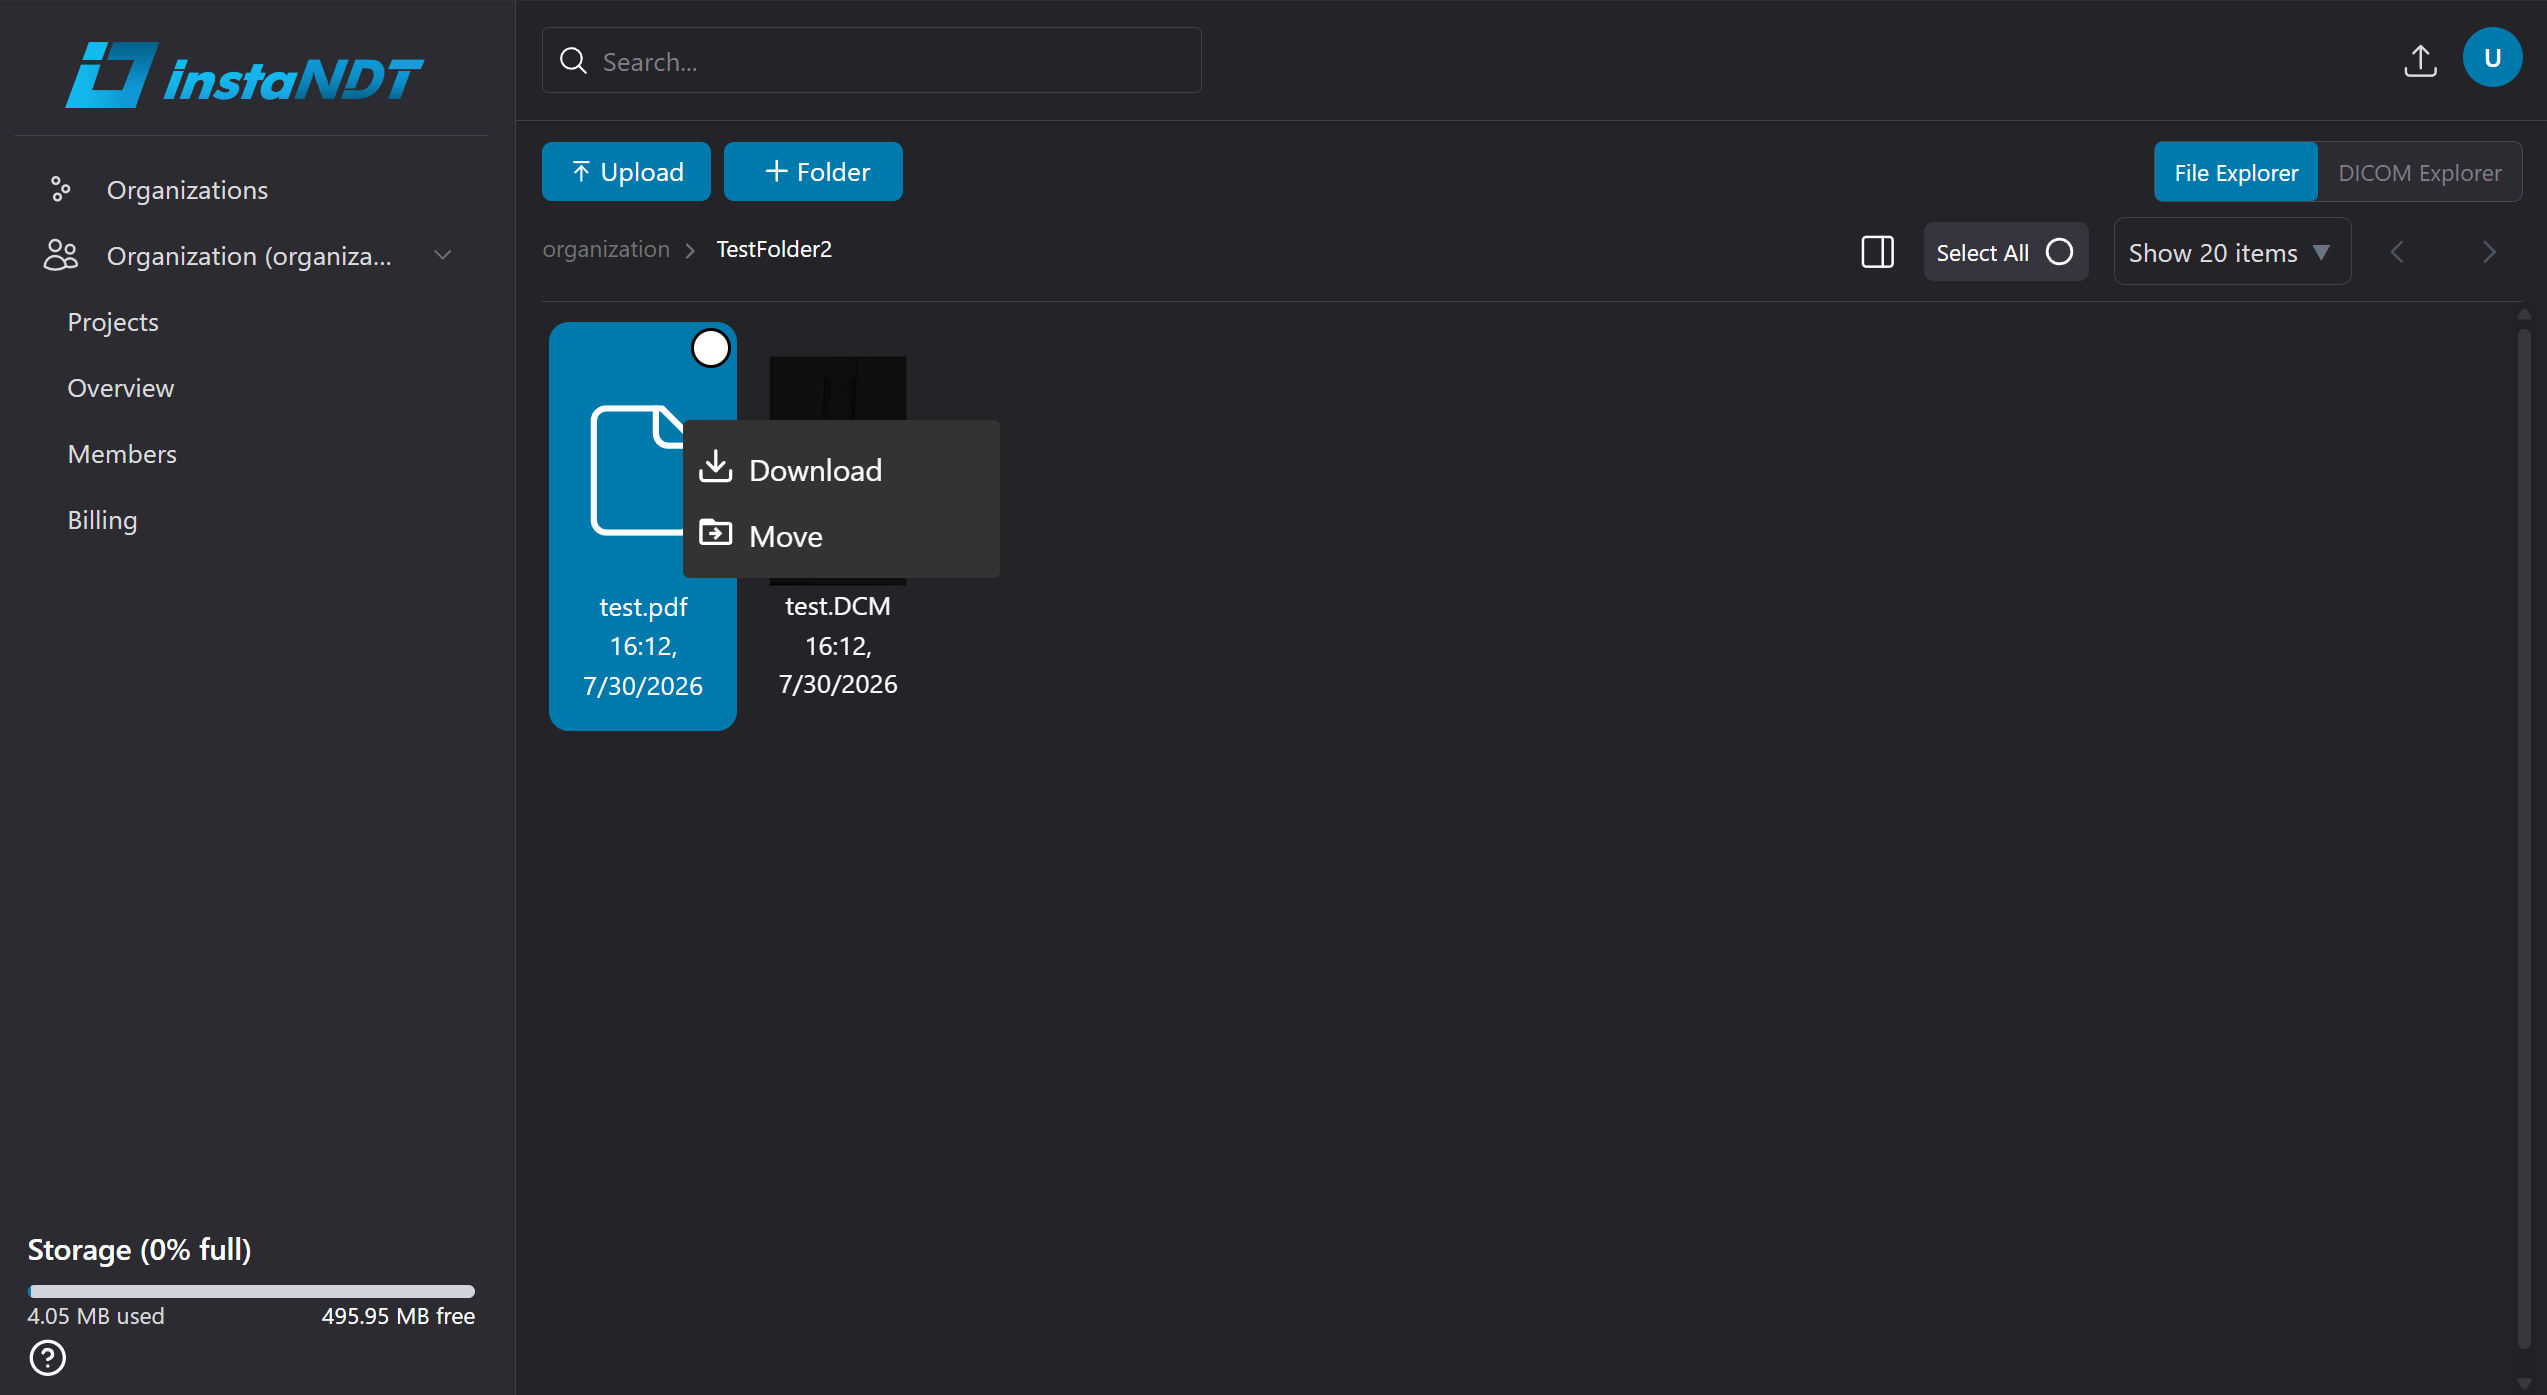
Figure 5. Downloading a non-DICOM file using the context menu with a right-click.
Metadata
Overview
Metadata allows you to attach additional information to Projects and Folders to help organize, classify, and search your content more effectively.
In instaNDT hierarchy:
Metadata can be added to:
- Projects
- Folders
Why Use Metadata?
Adding metadata helps you:
- Categorize projects and folders.
- Store important descriptive information.
Adding Metadata to a Project
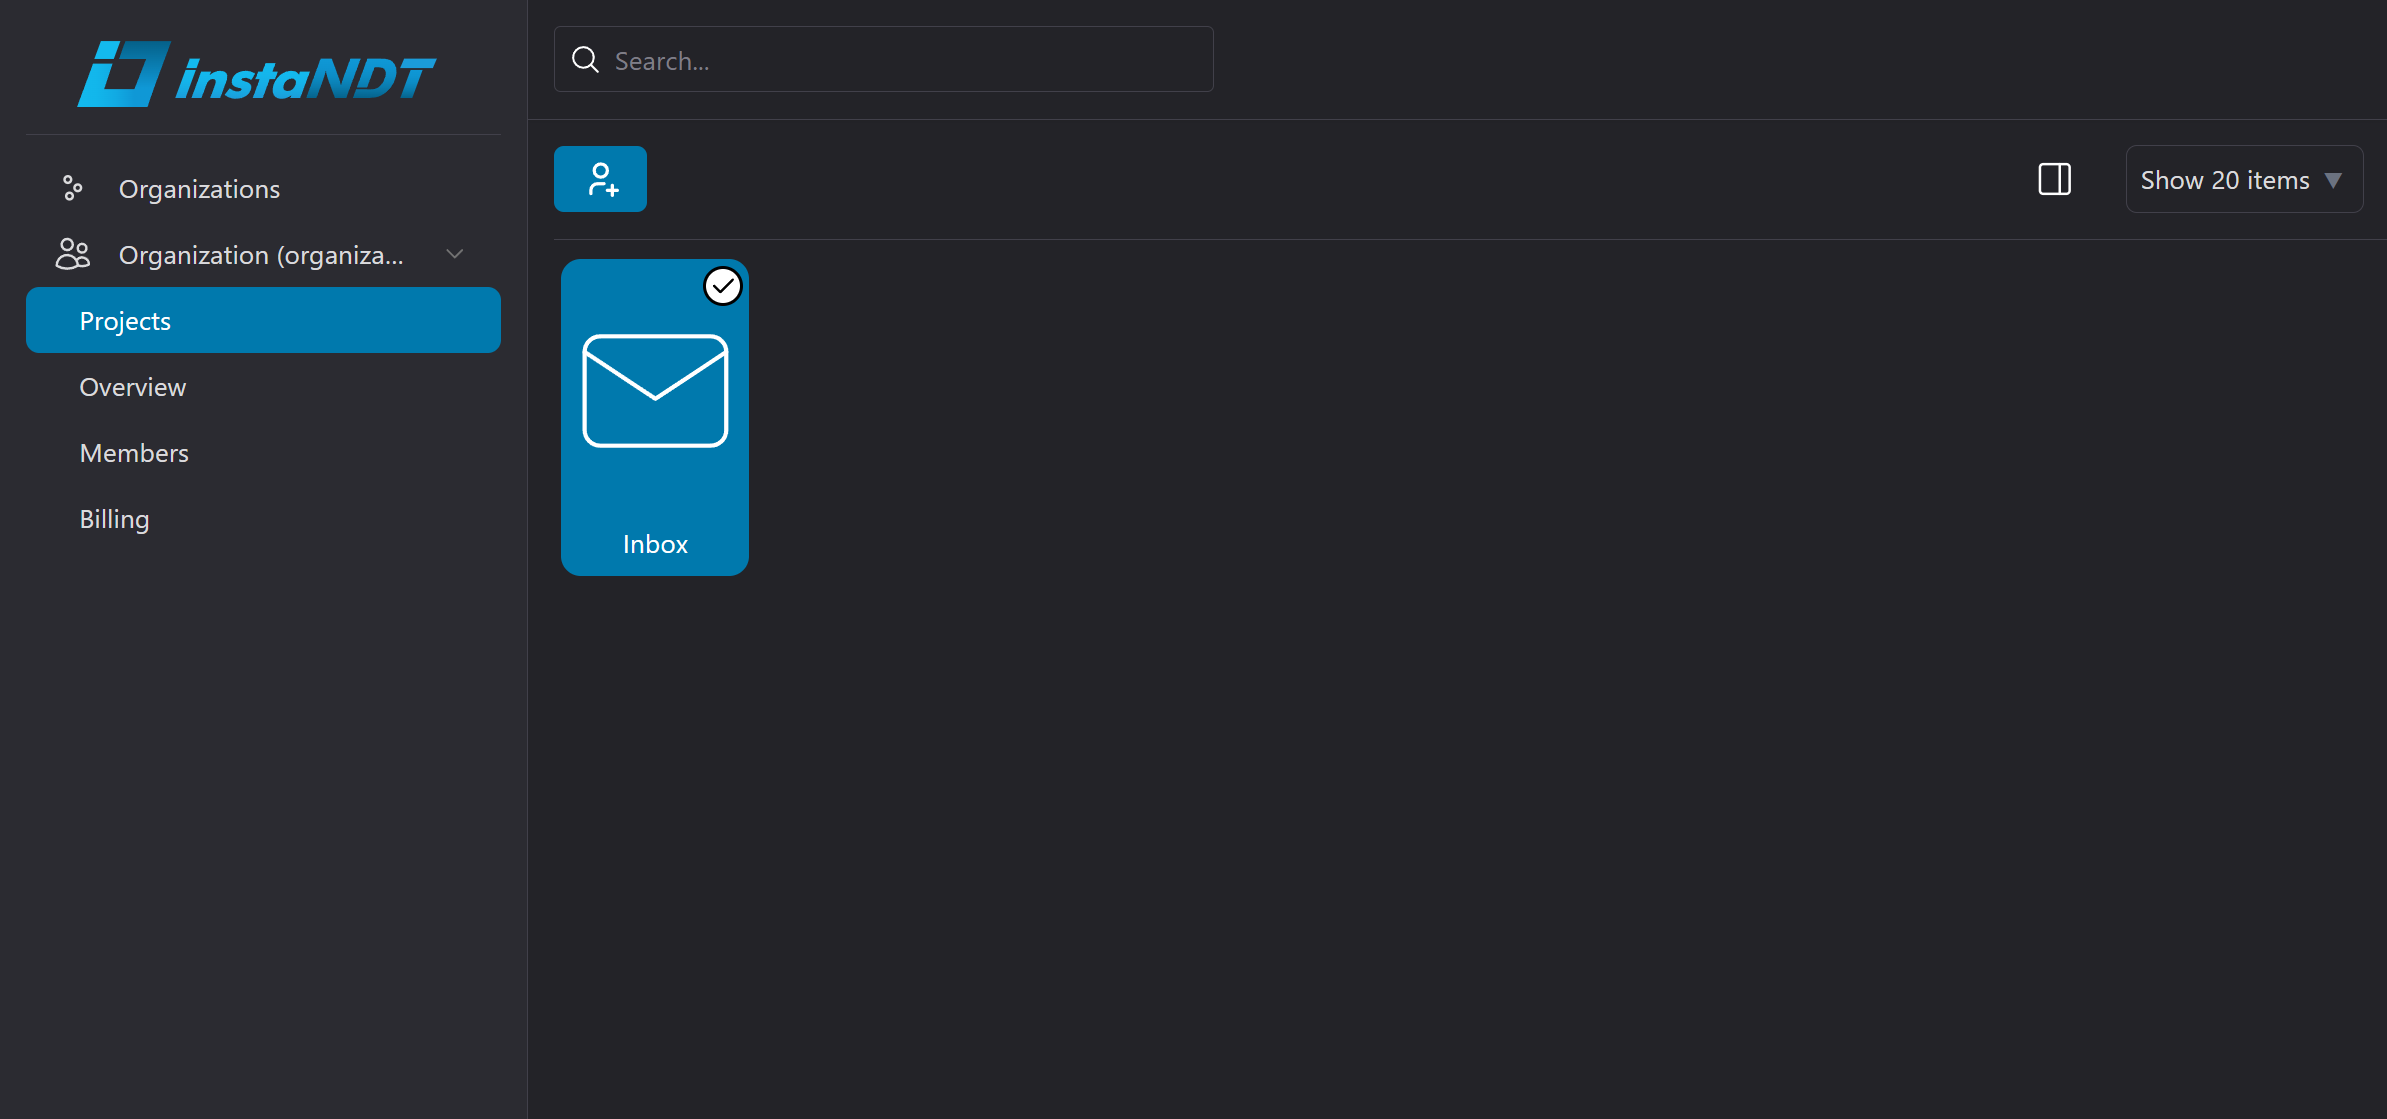
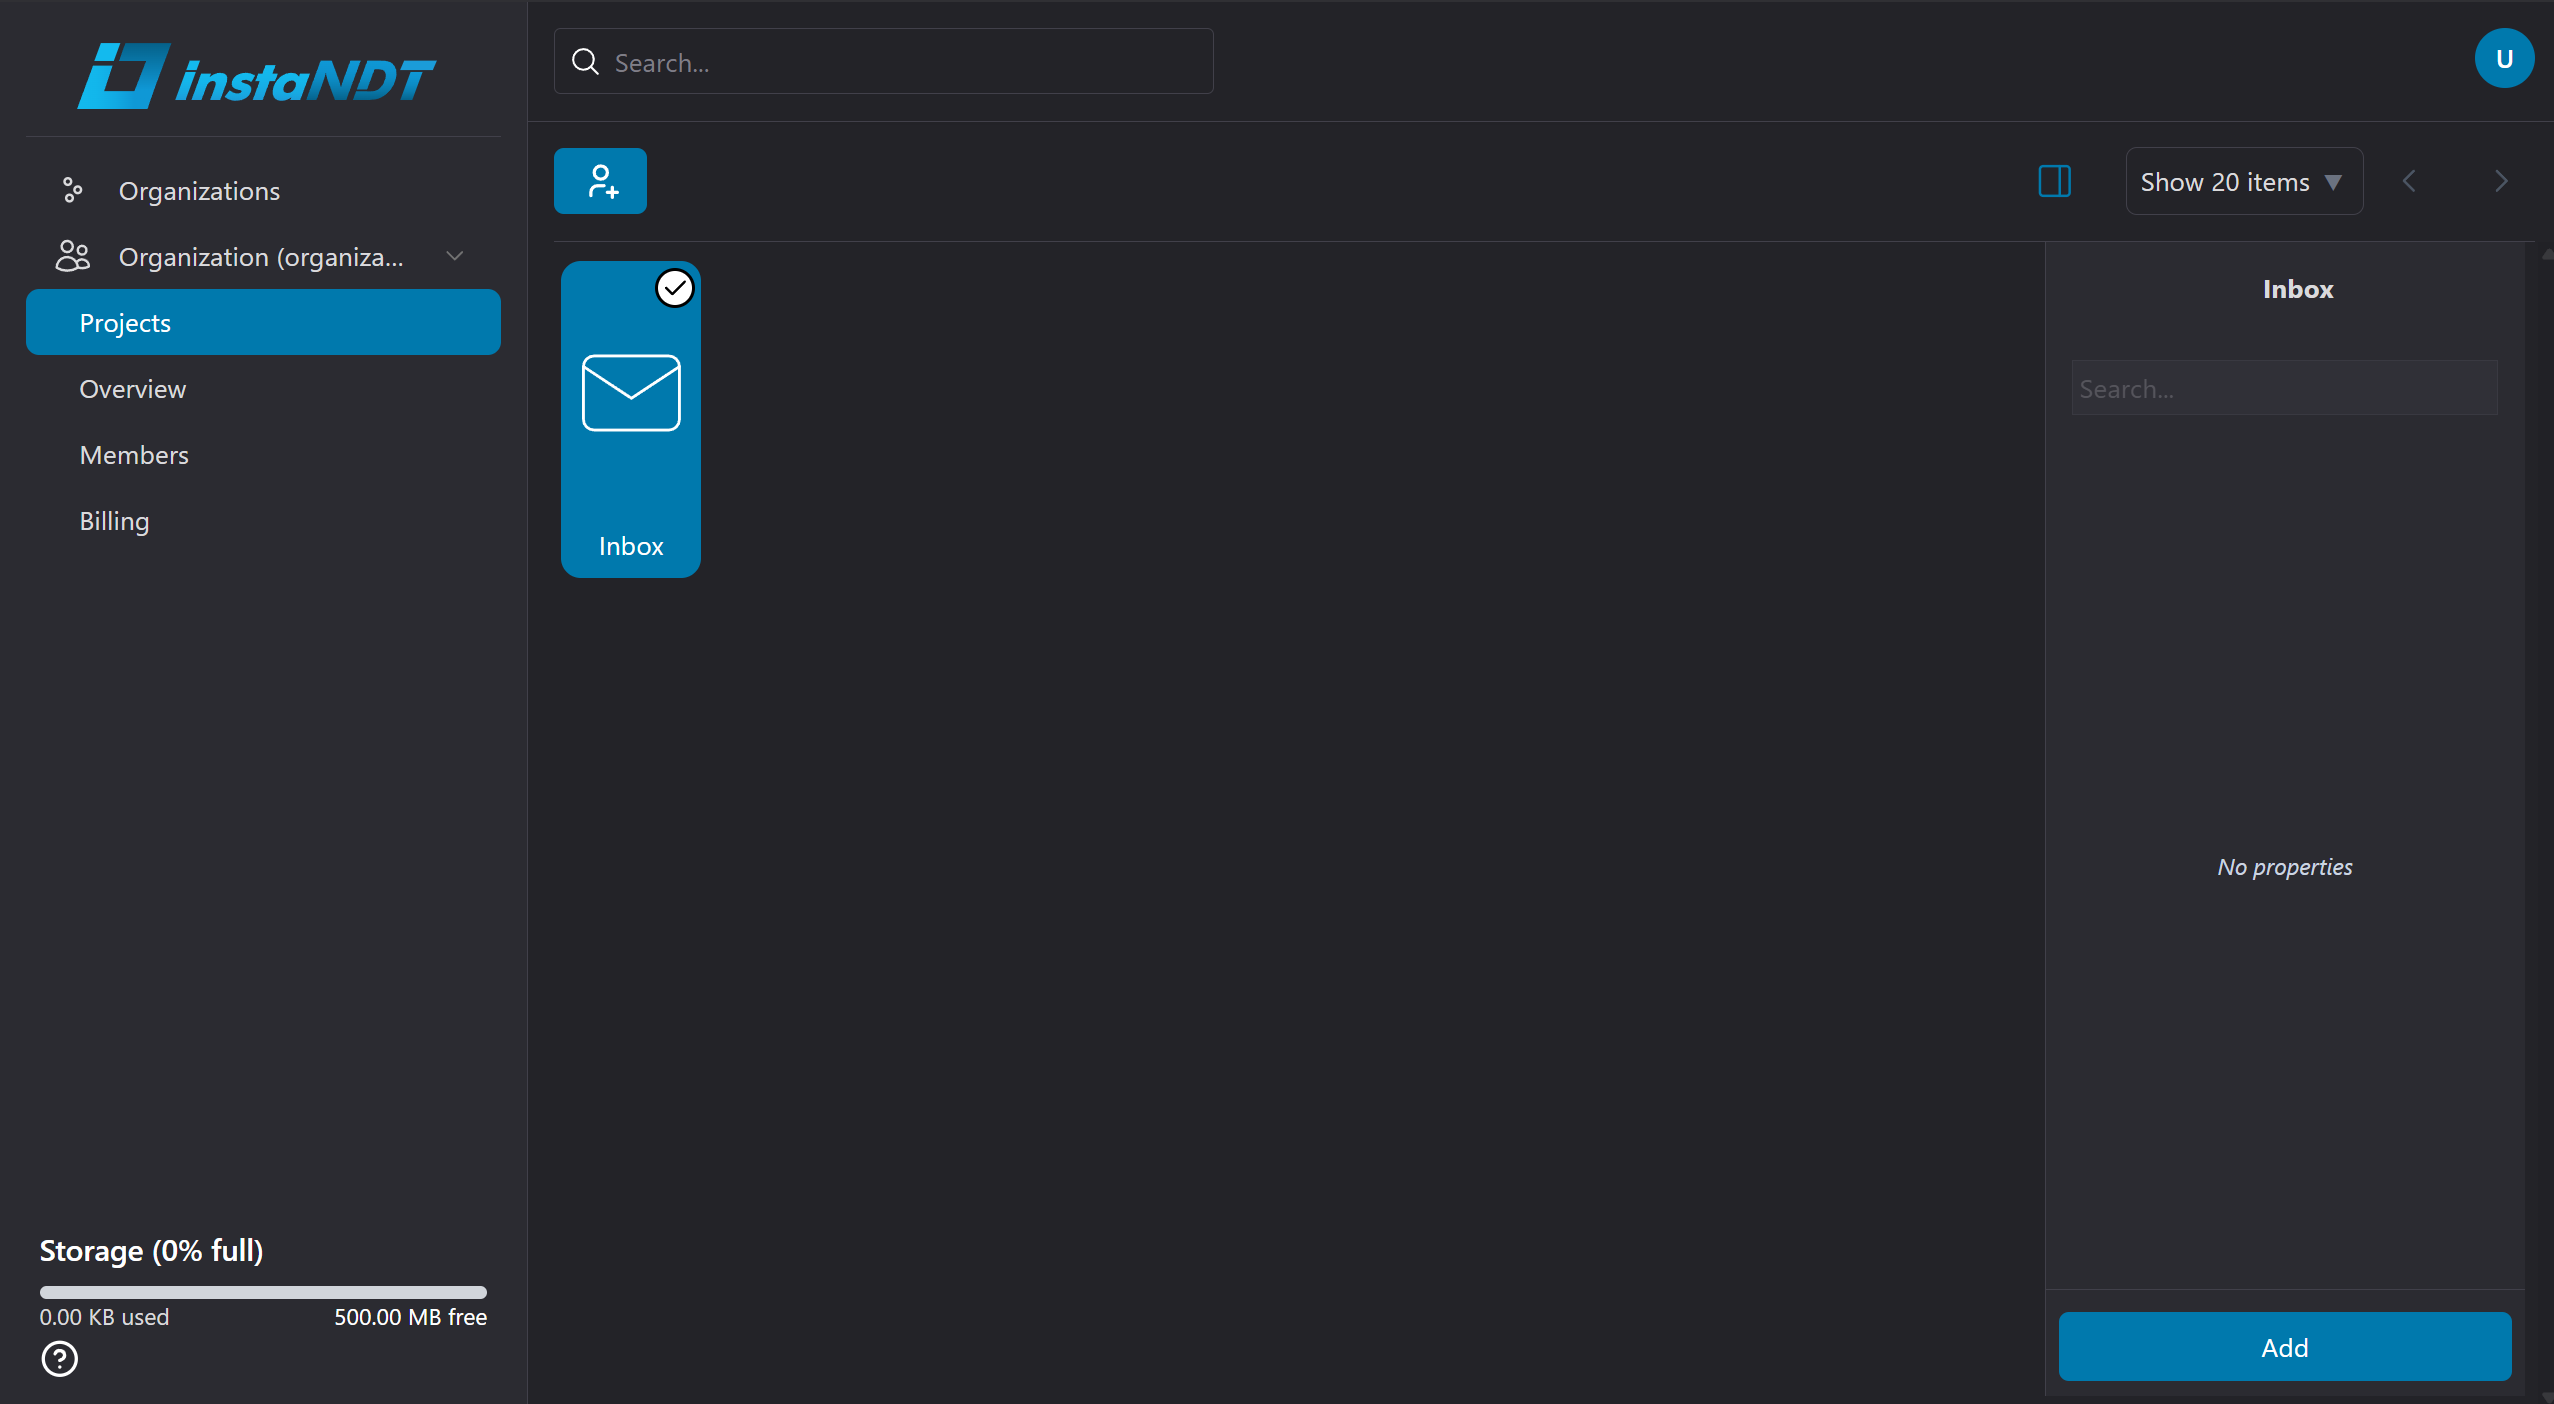
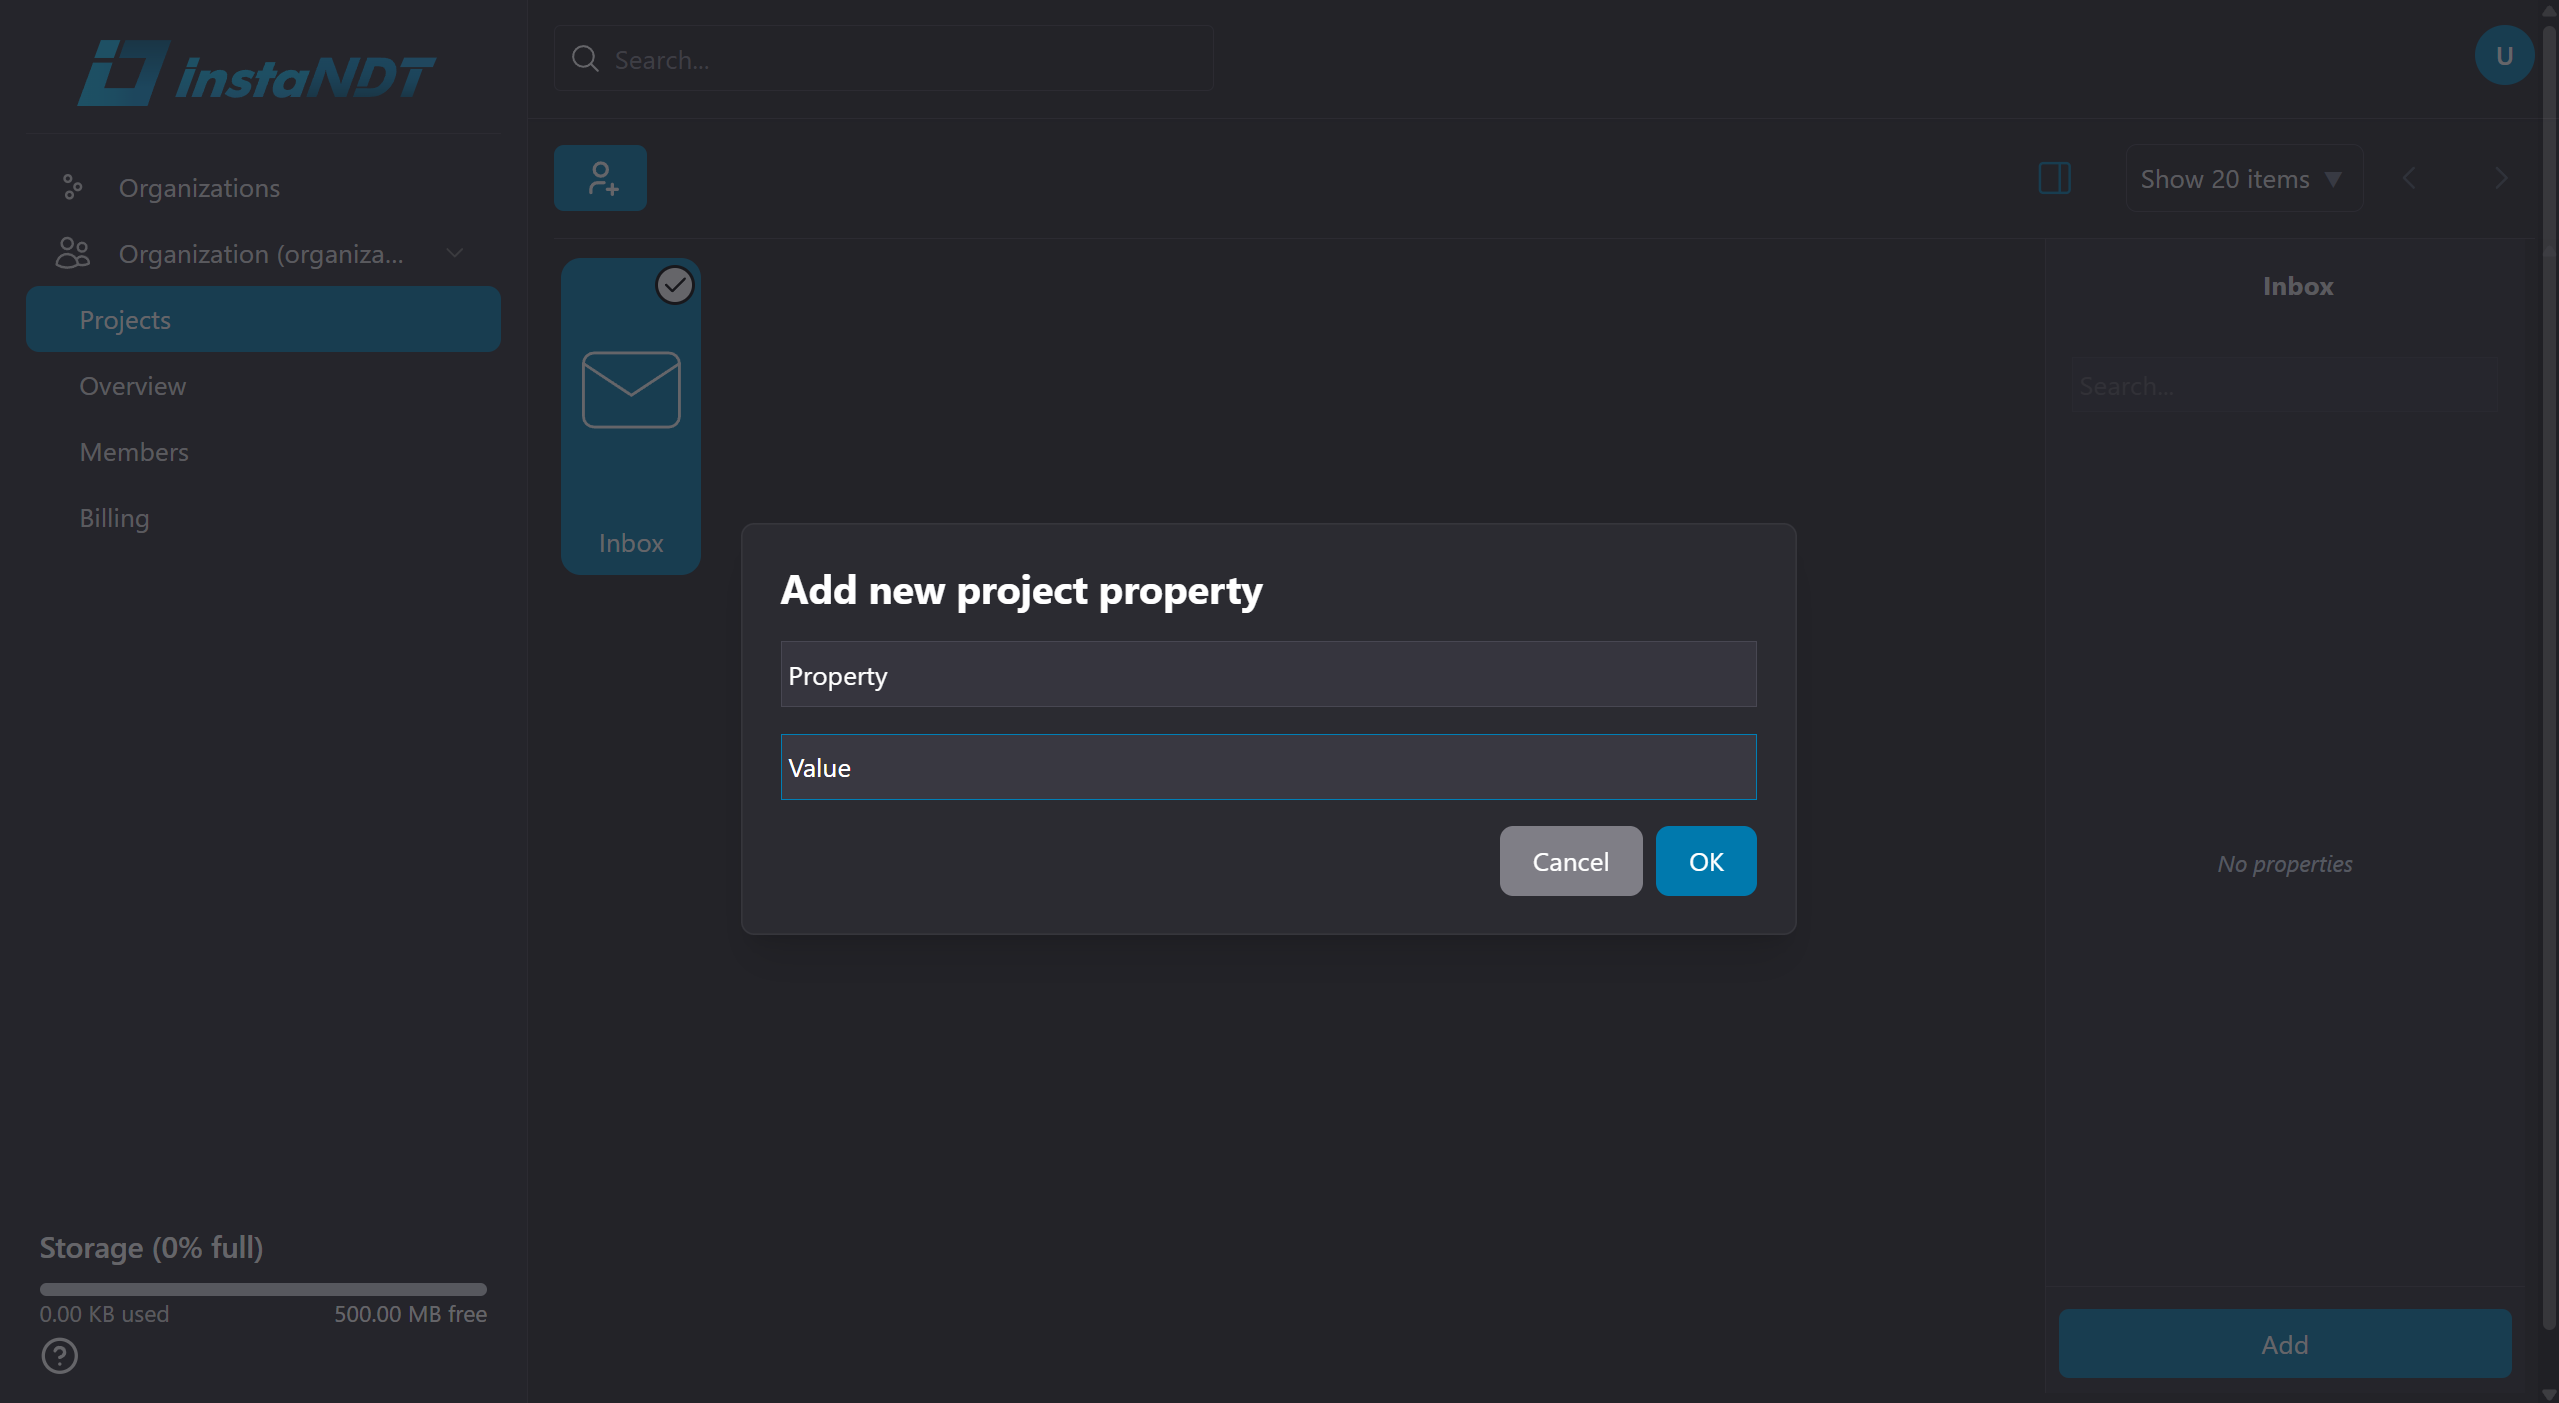
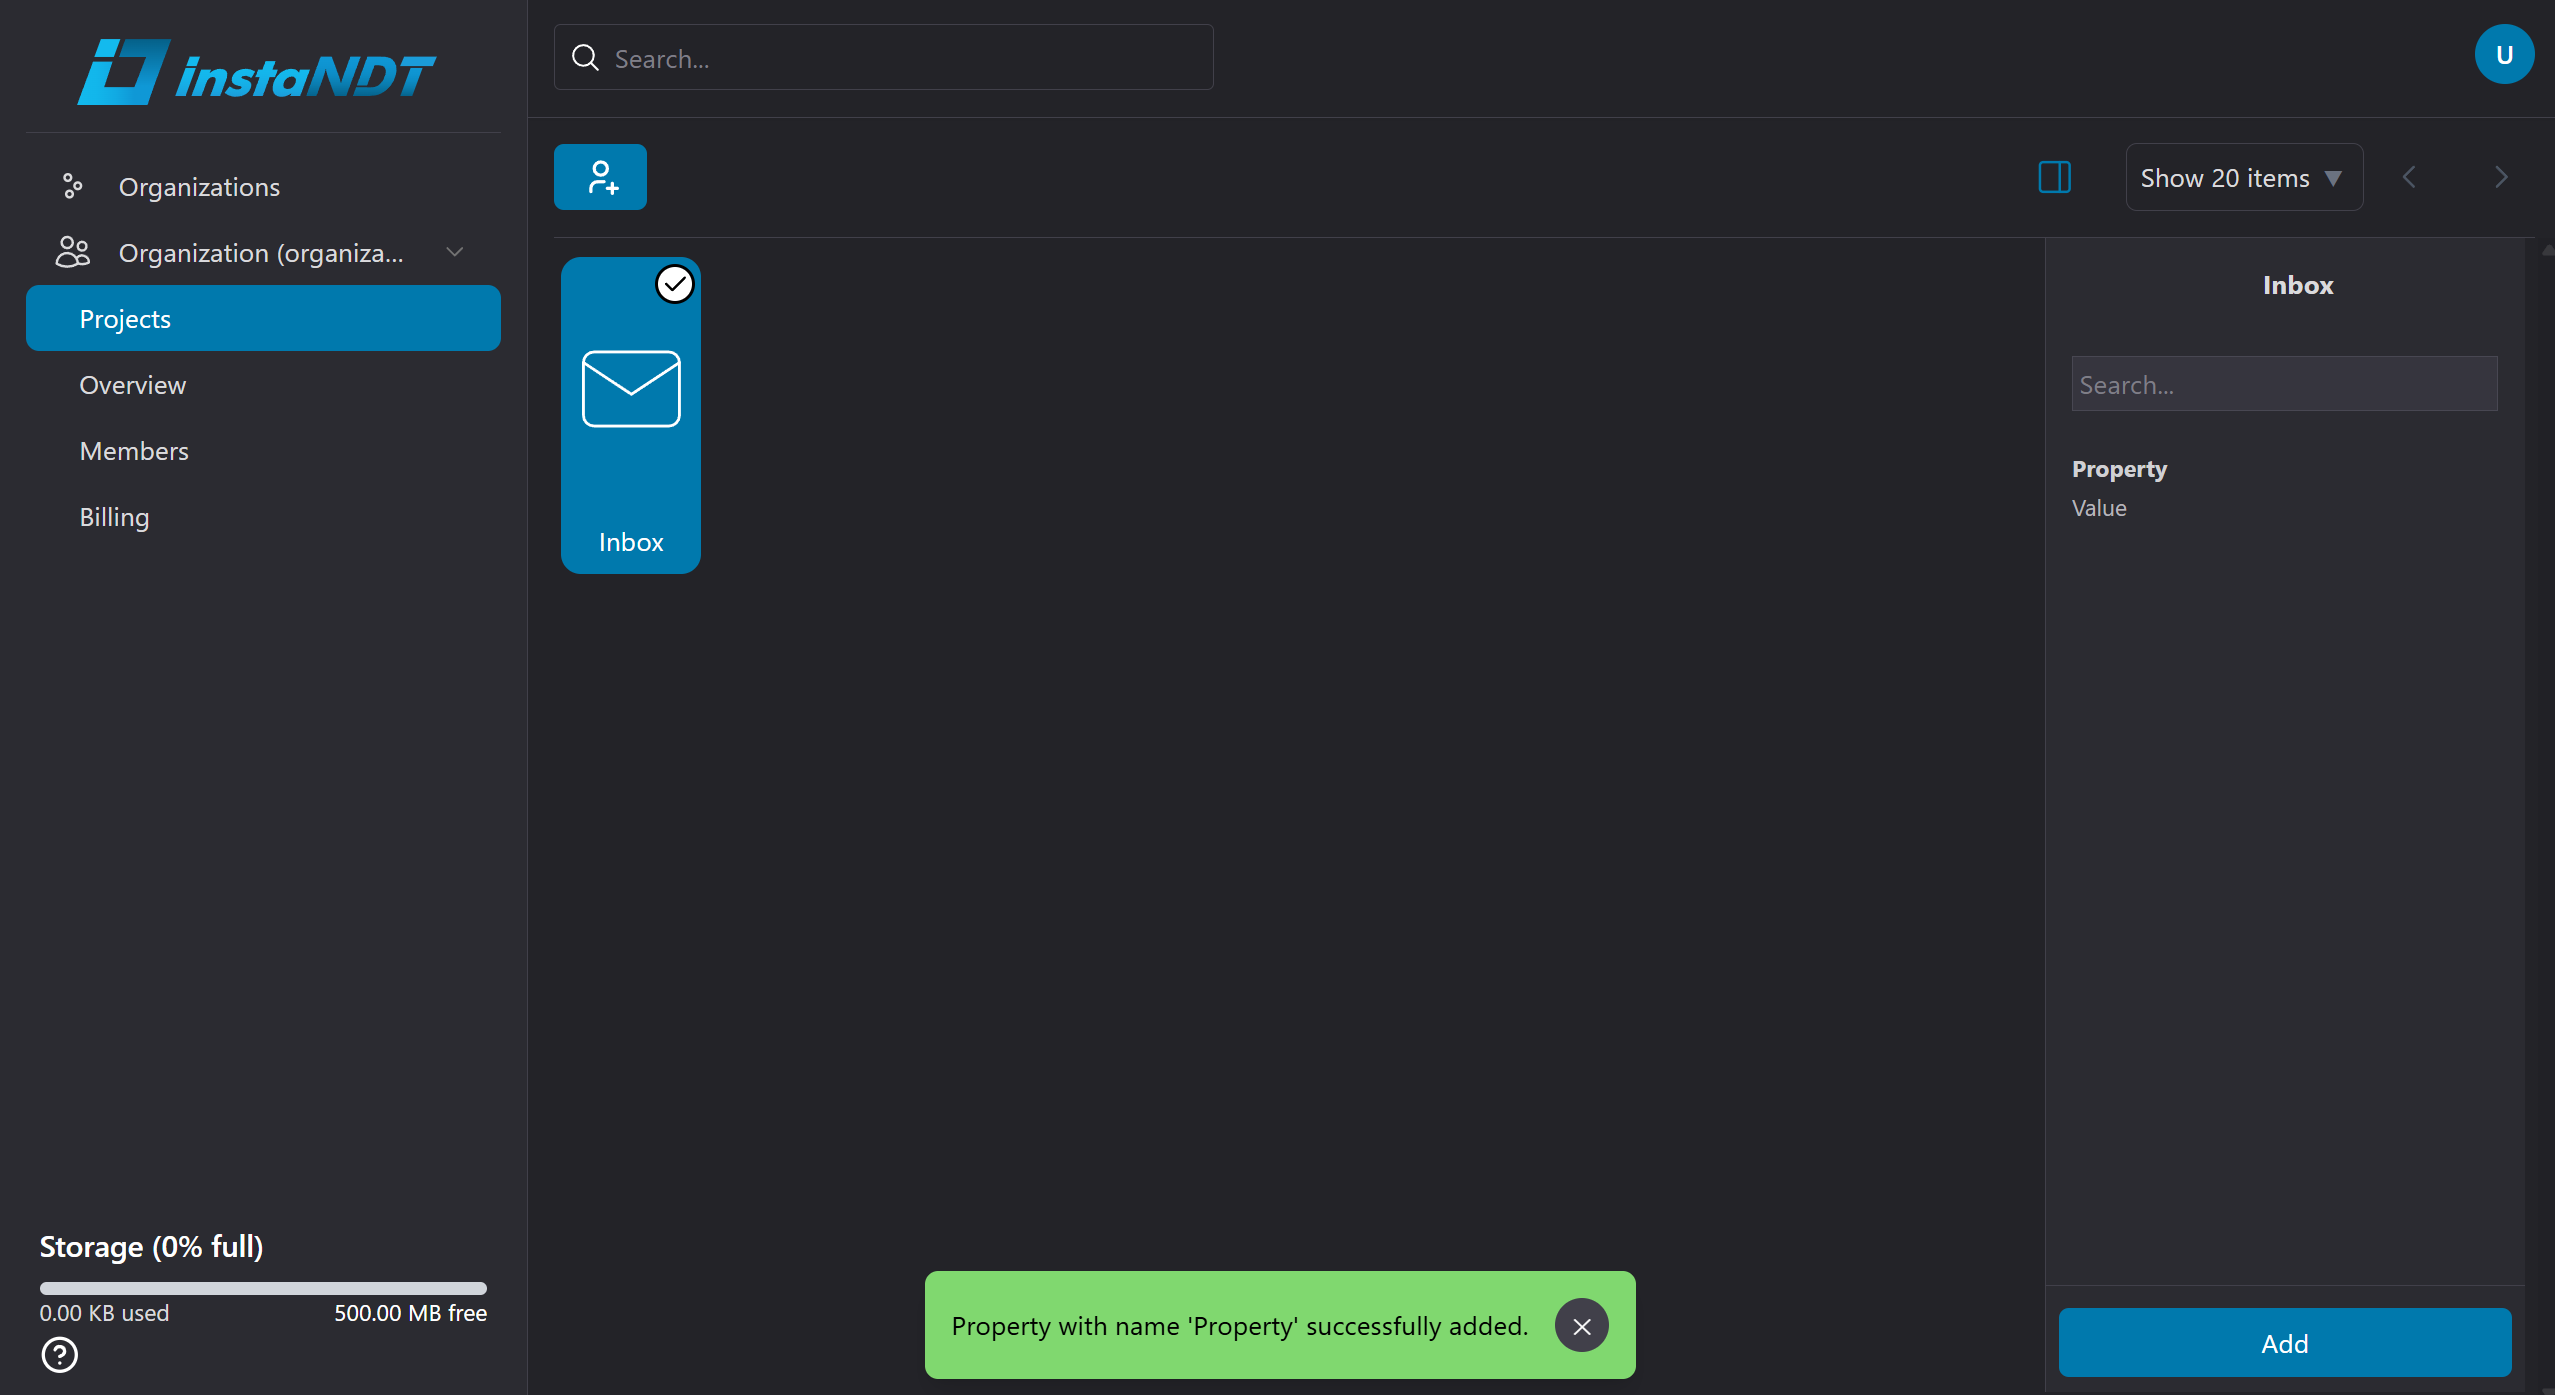
Figures 1-4. Adding metadata to project.
- Navigate to the desired Project.
- Click the ✔ (Select) icon.
- Click the sidebar icon.
- Click Add
- Enter the required metadata values.
- Click Ok.
The metadata is now associated with the selected project.
Adding Metadata to a Folder
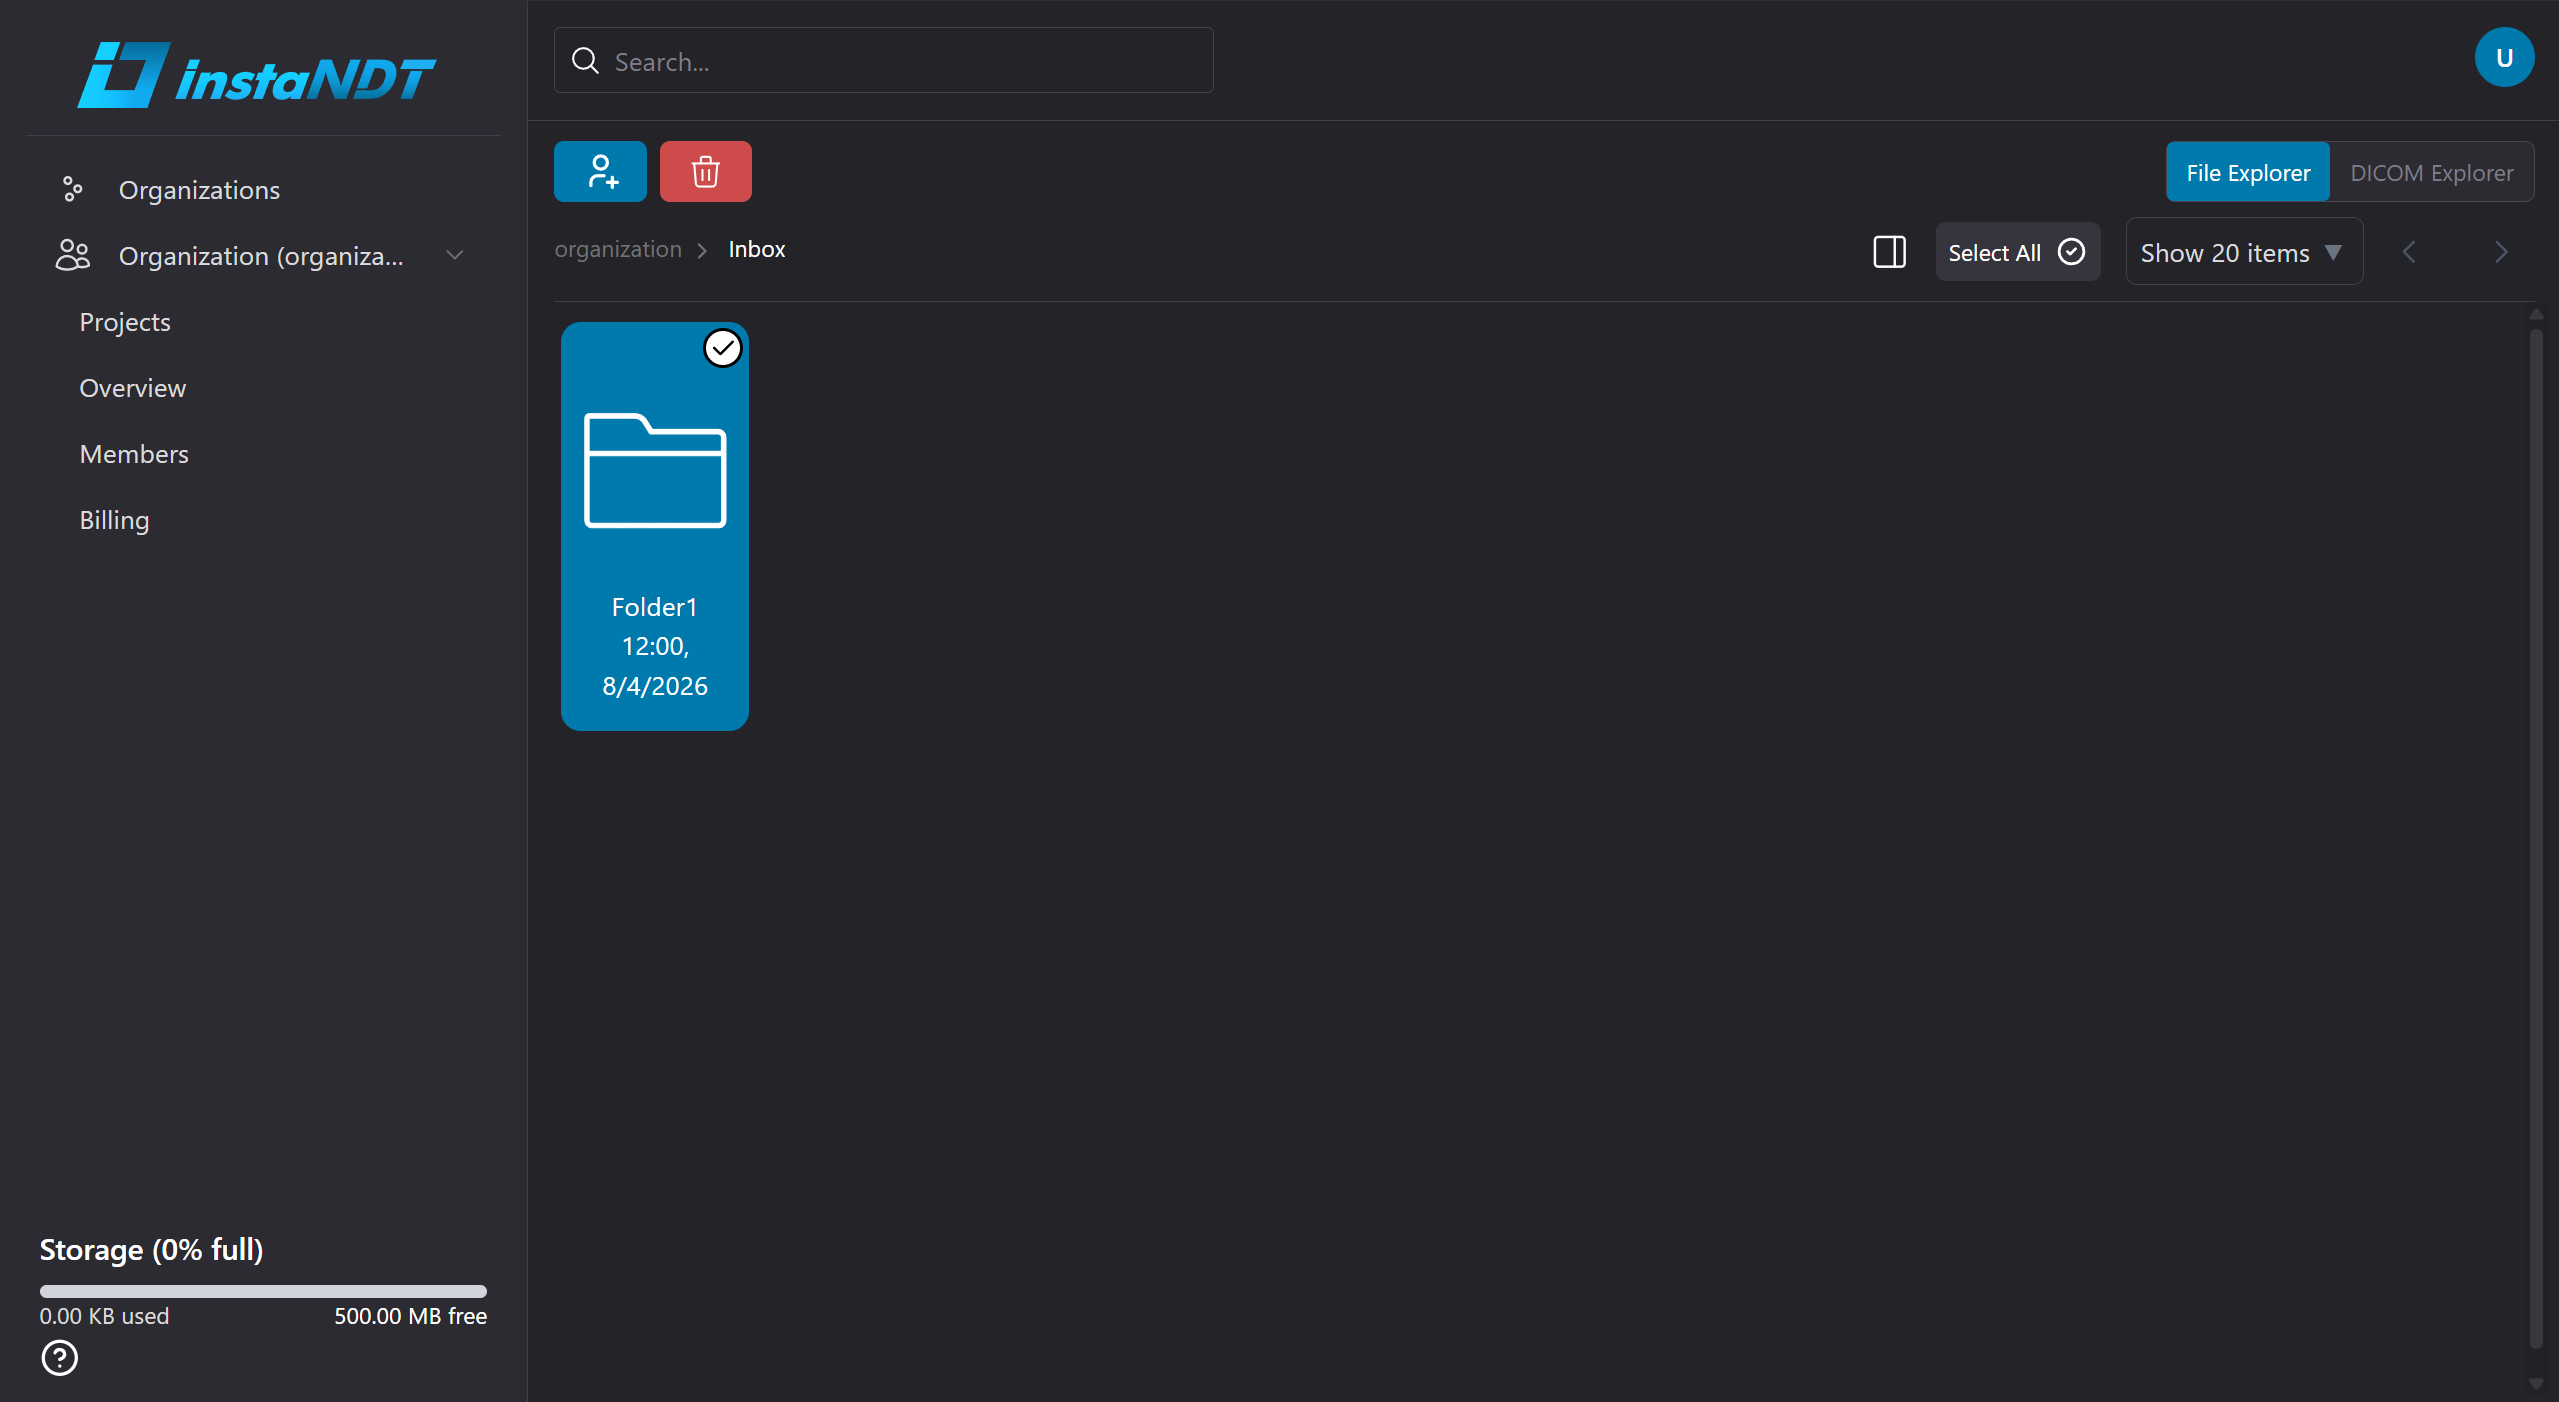
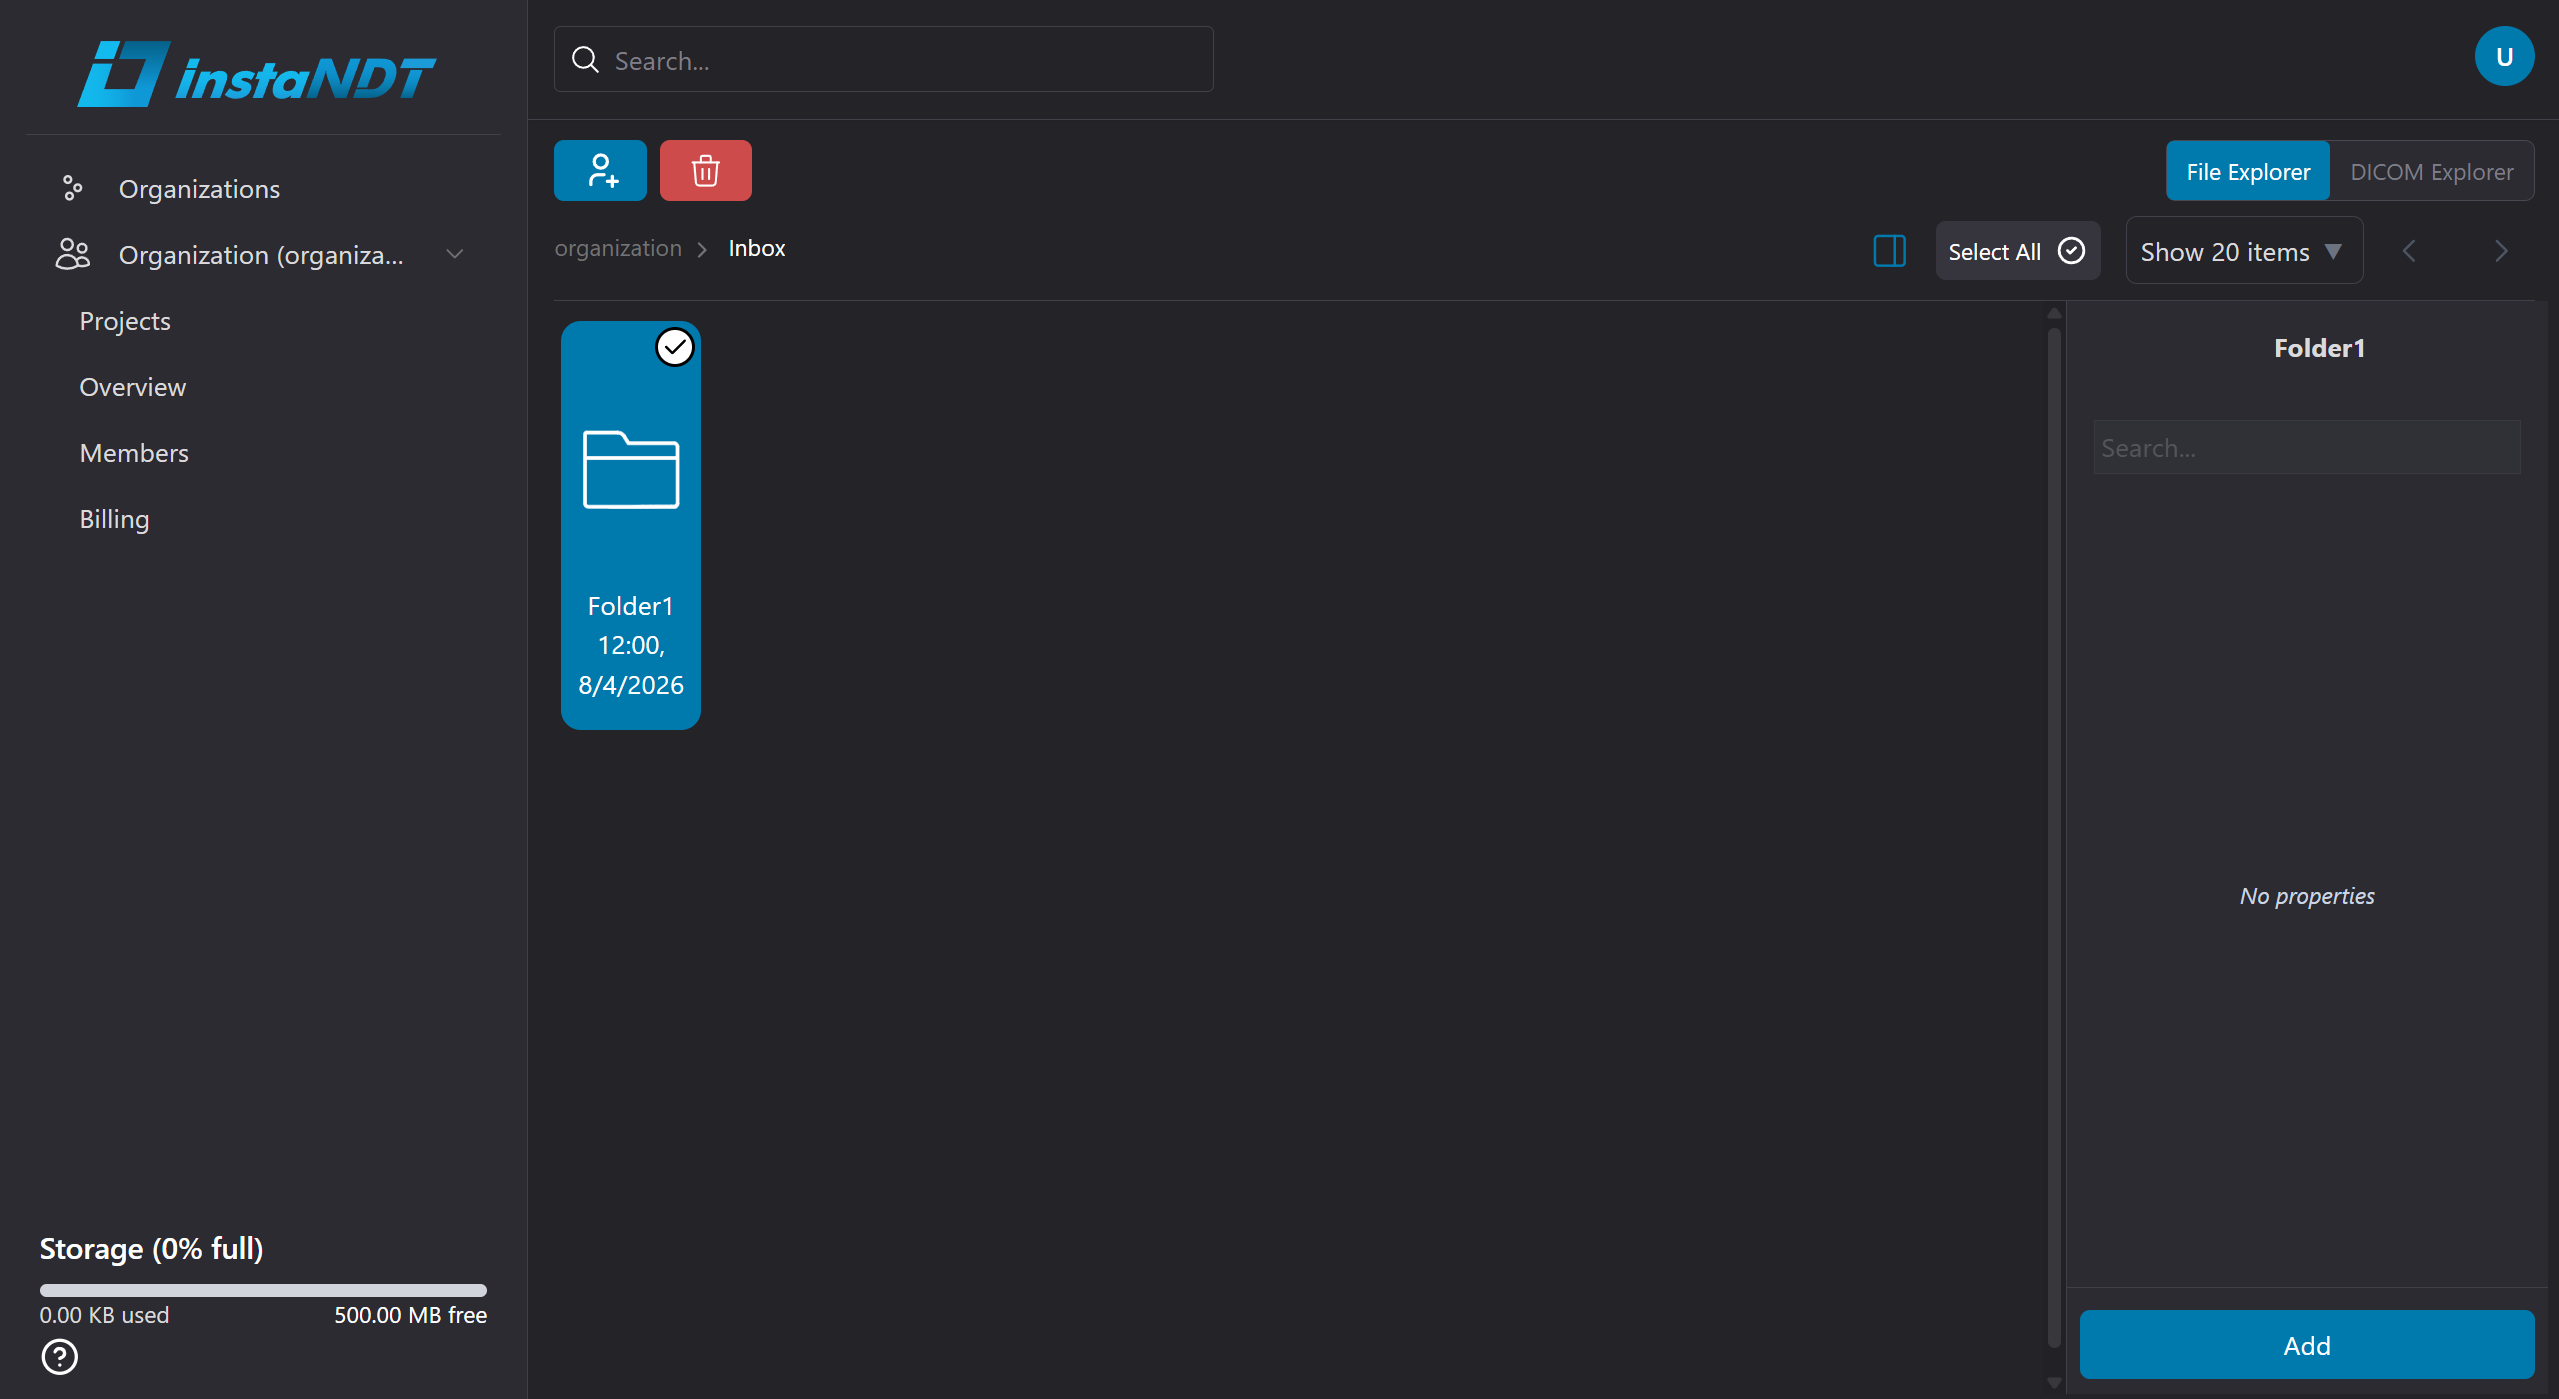
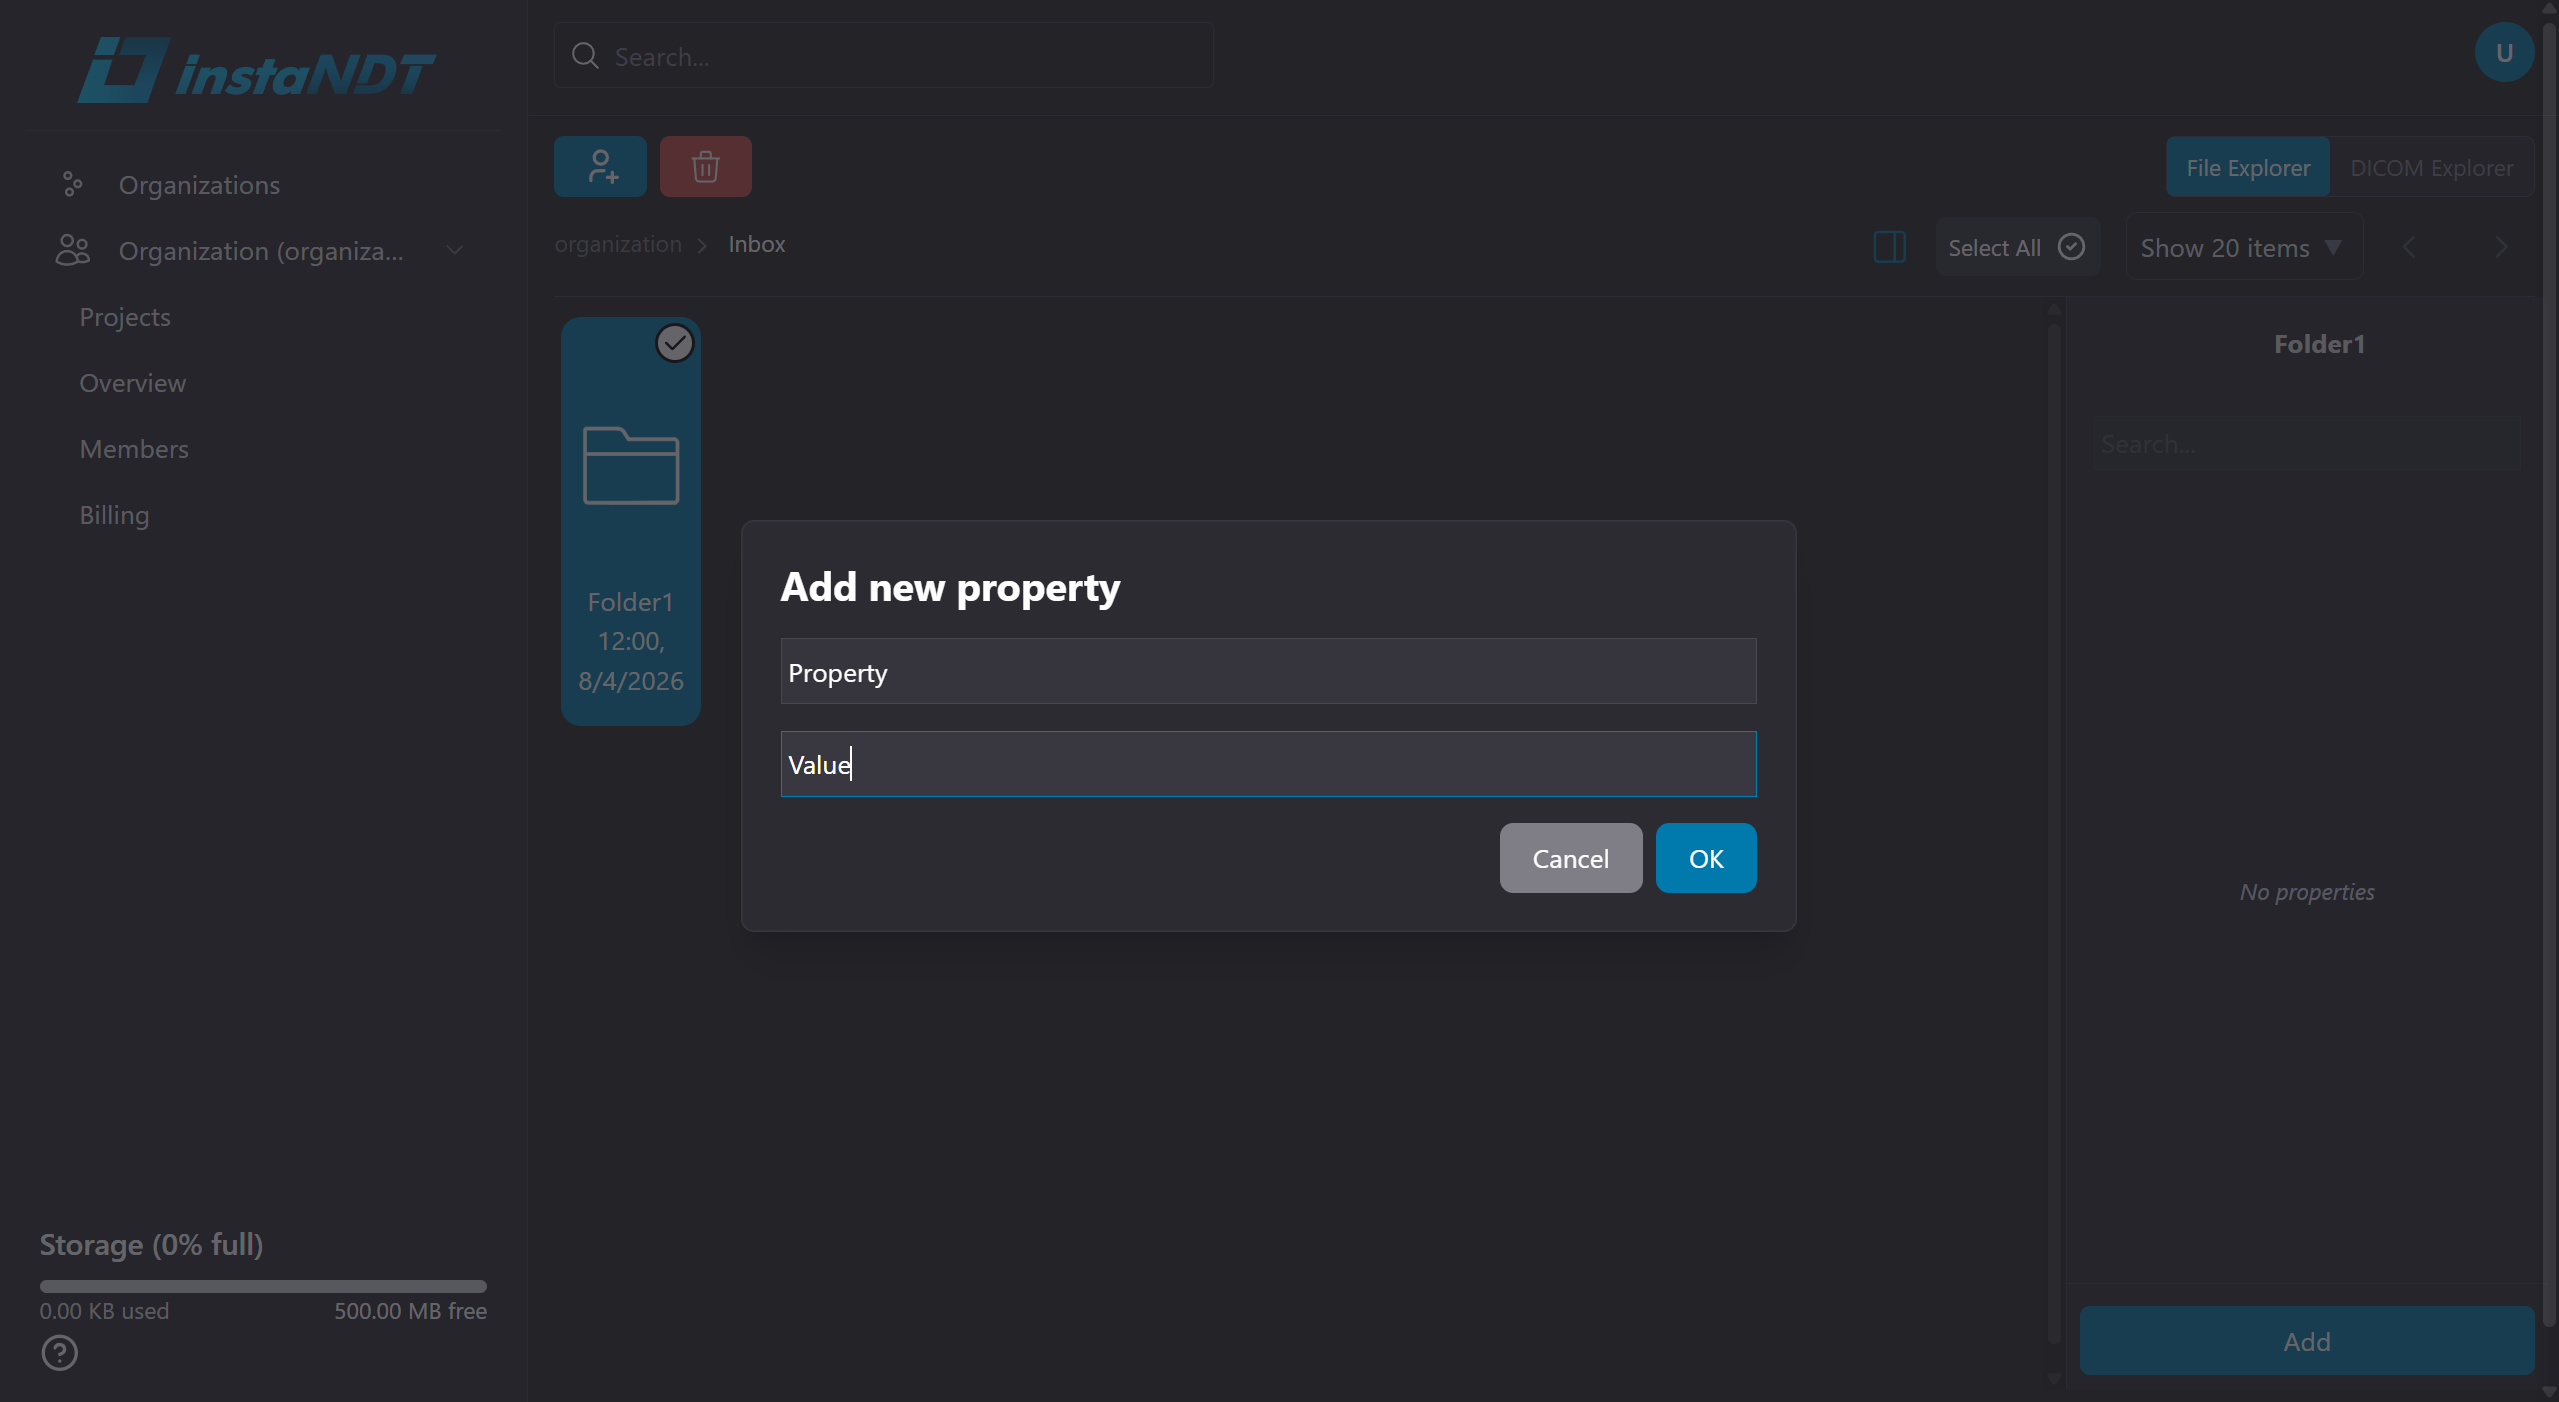
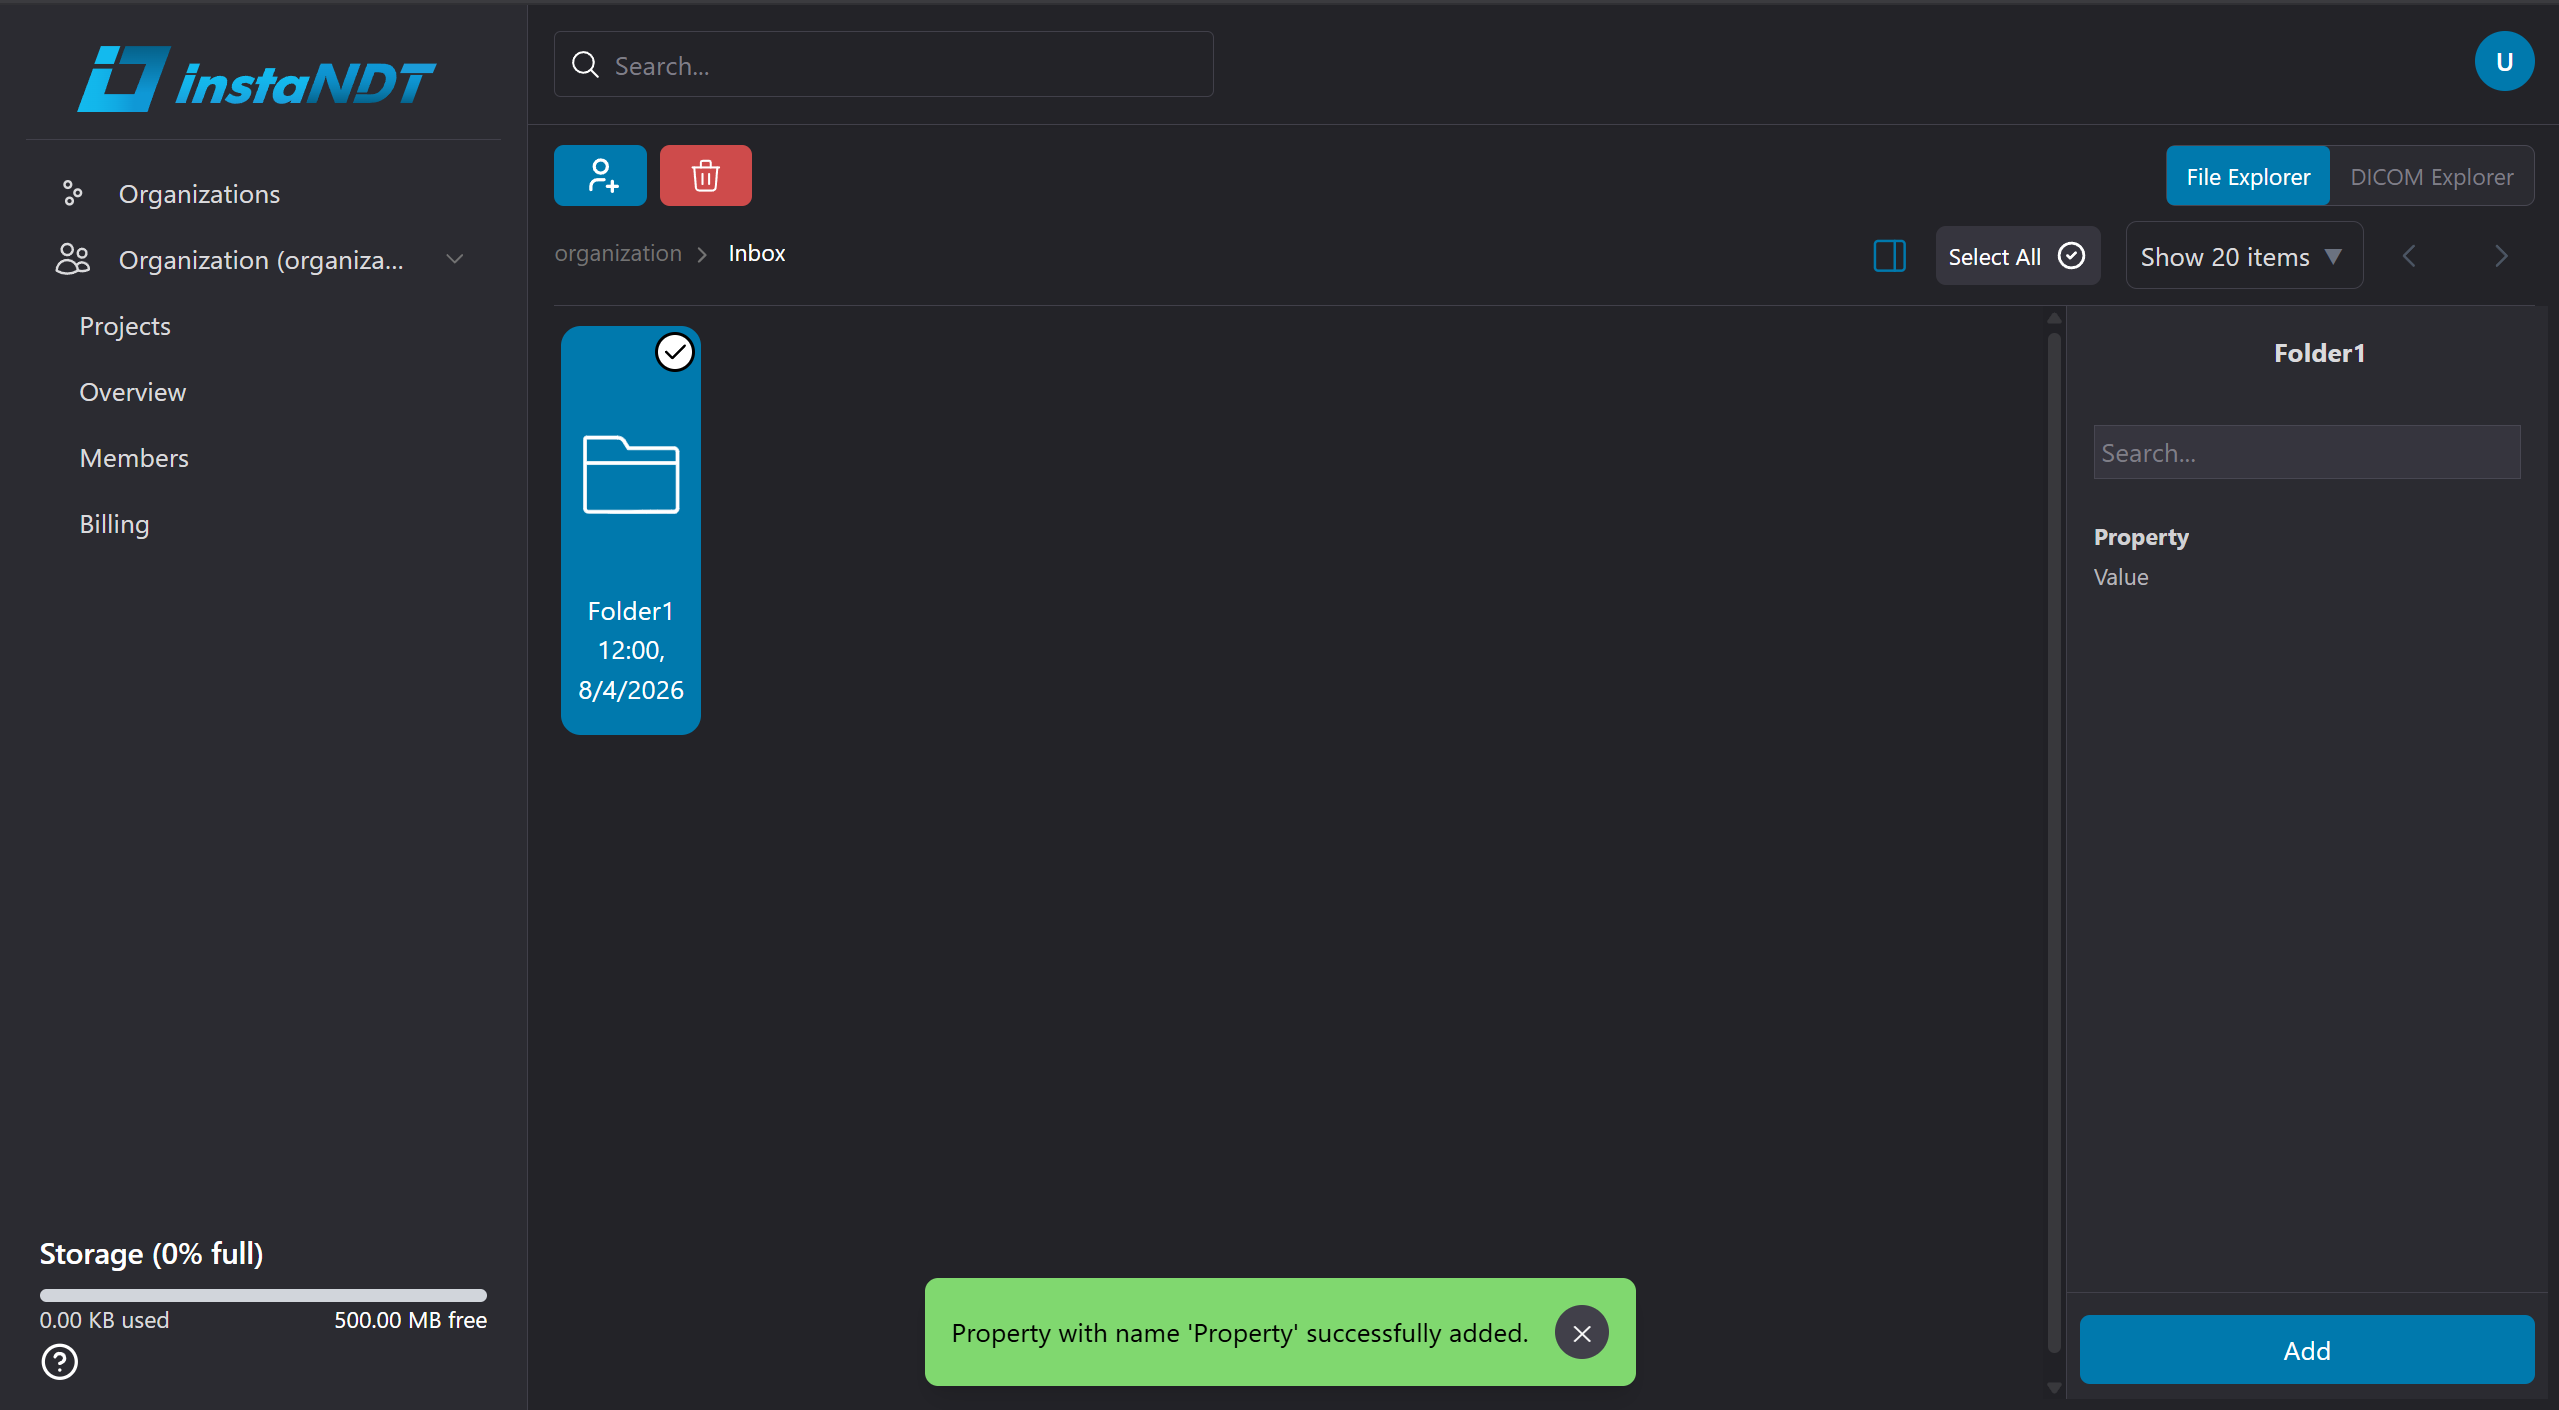
Figures 5-8. Adding metadata to folder.
- Open the project containing the folder.
- Navigate to the desired Folder.
- Click the ✔ (Select) icon.
- Click the sidebar icon.
- Click Add
- Enter the required metadata values.
- Click Ok.
The metadata is now associated with the selected folder.
Editing Existing Metadata
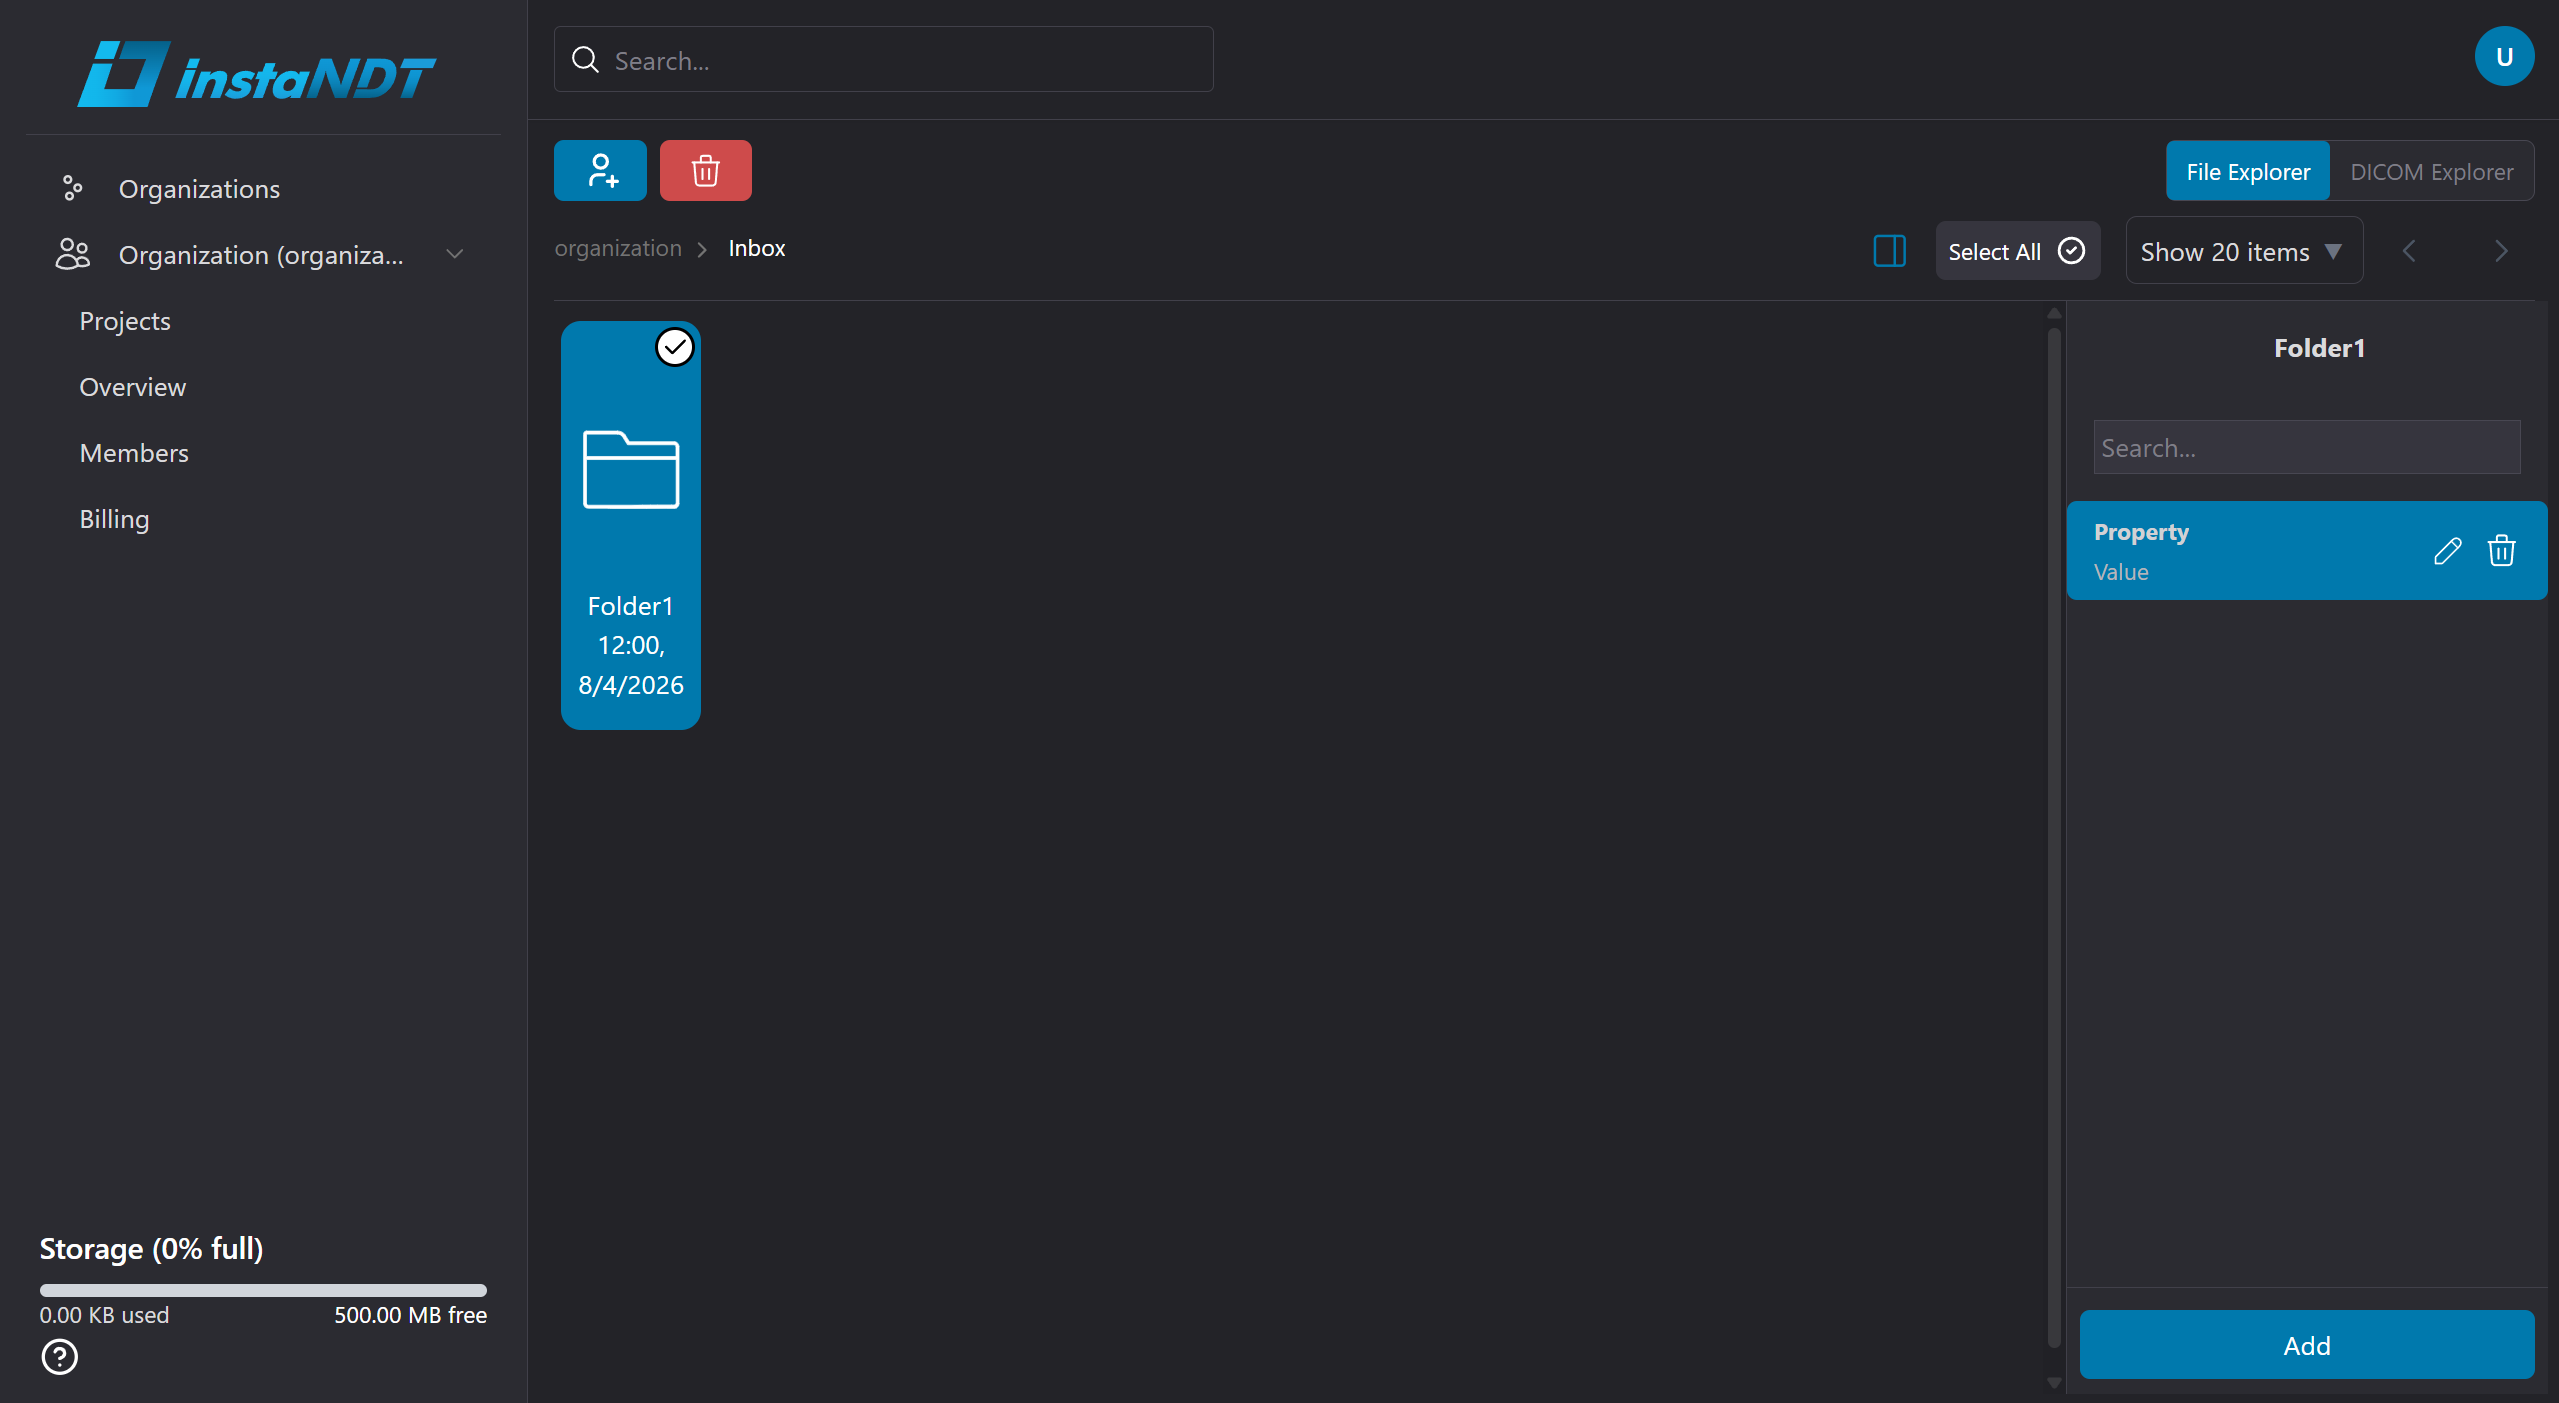
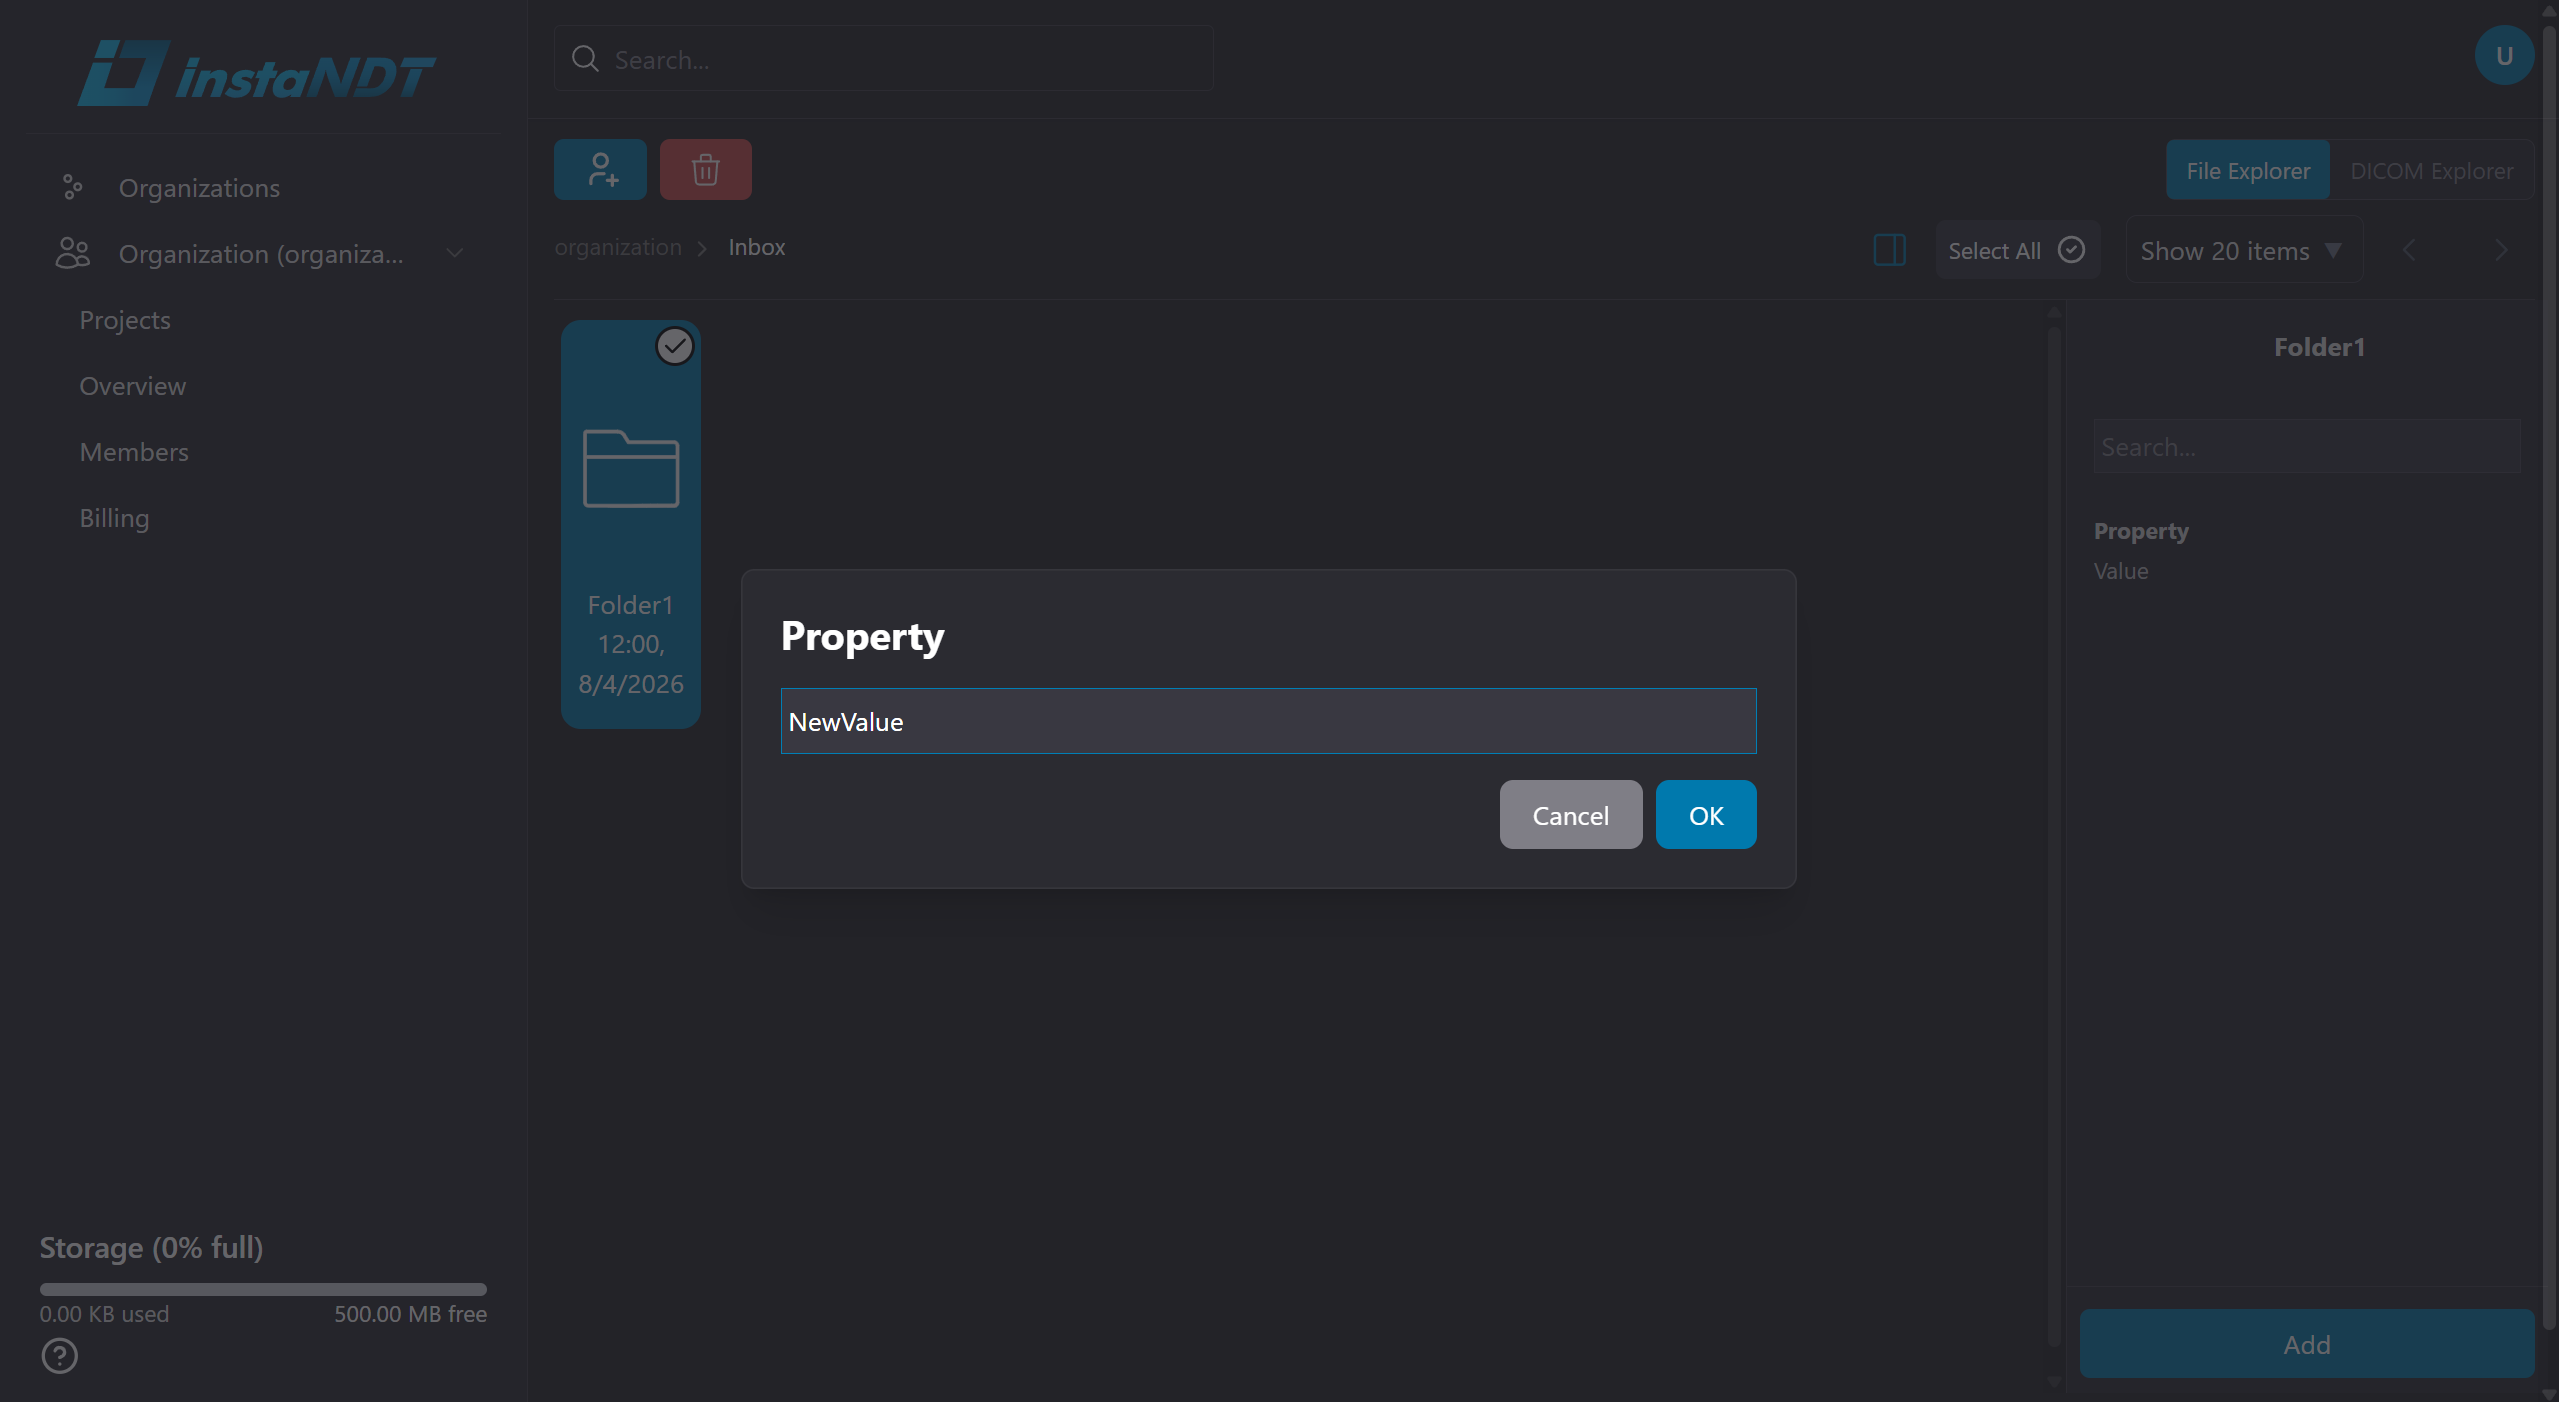
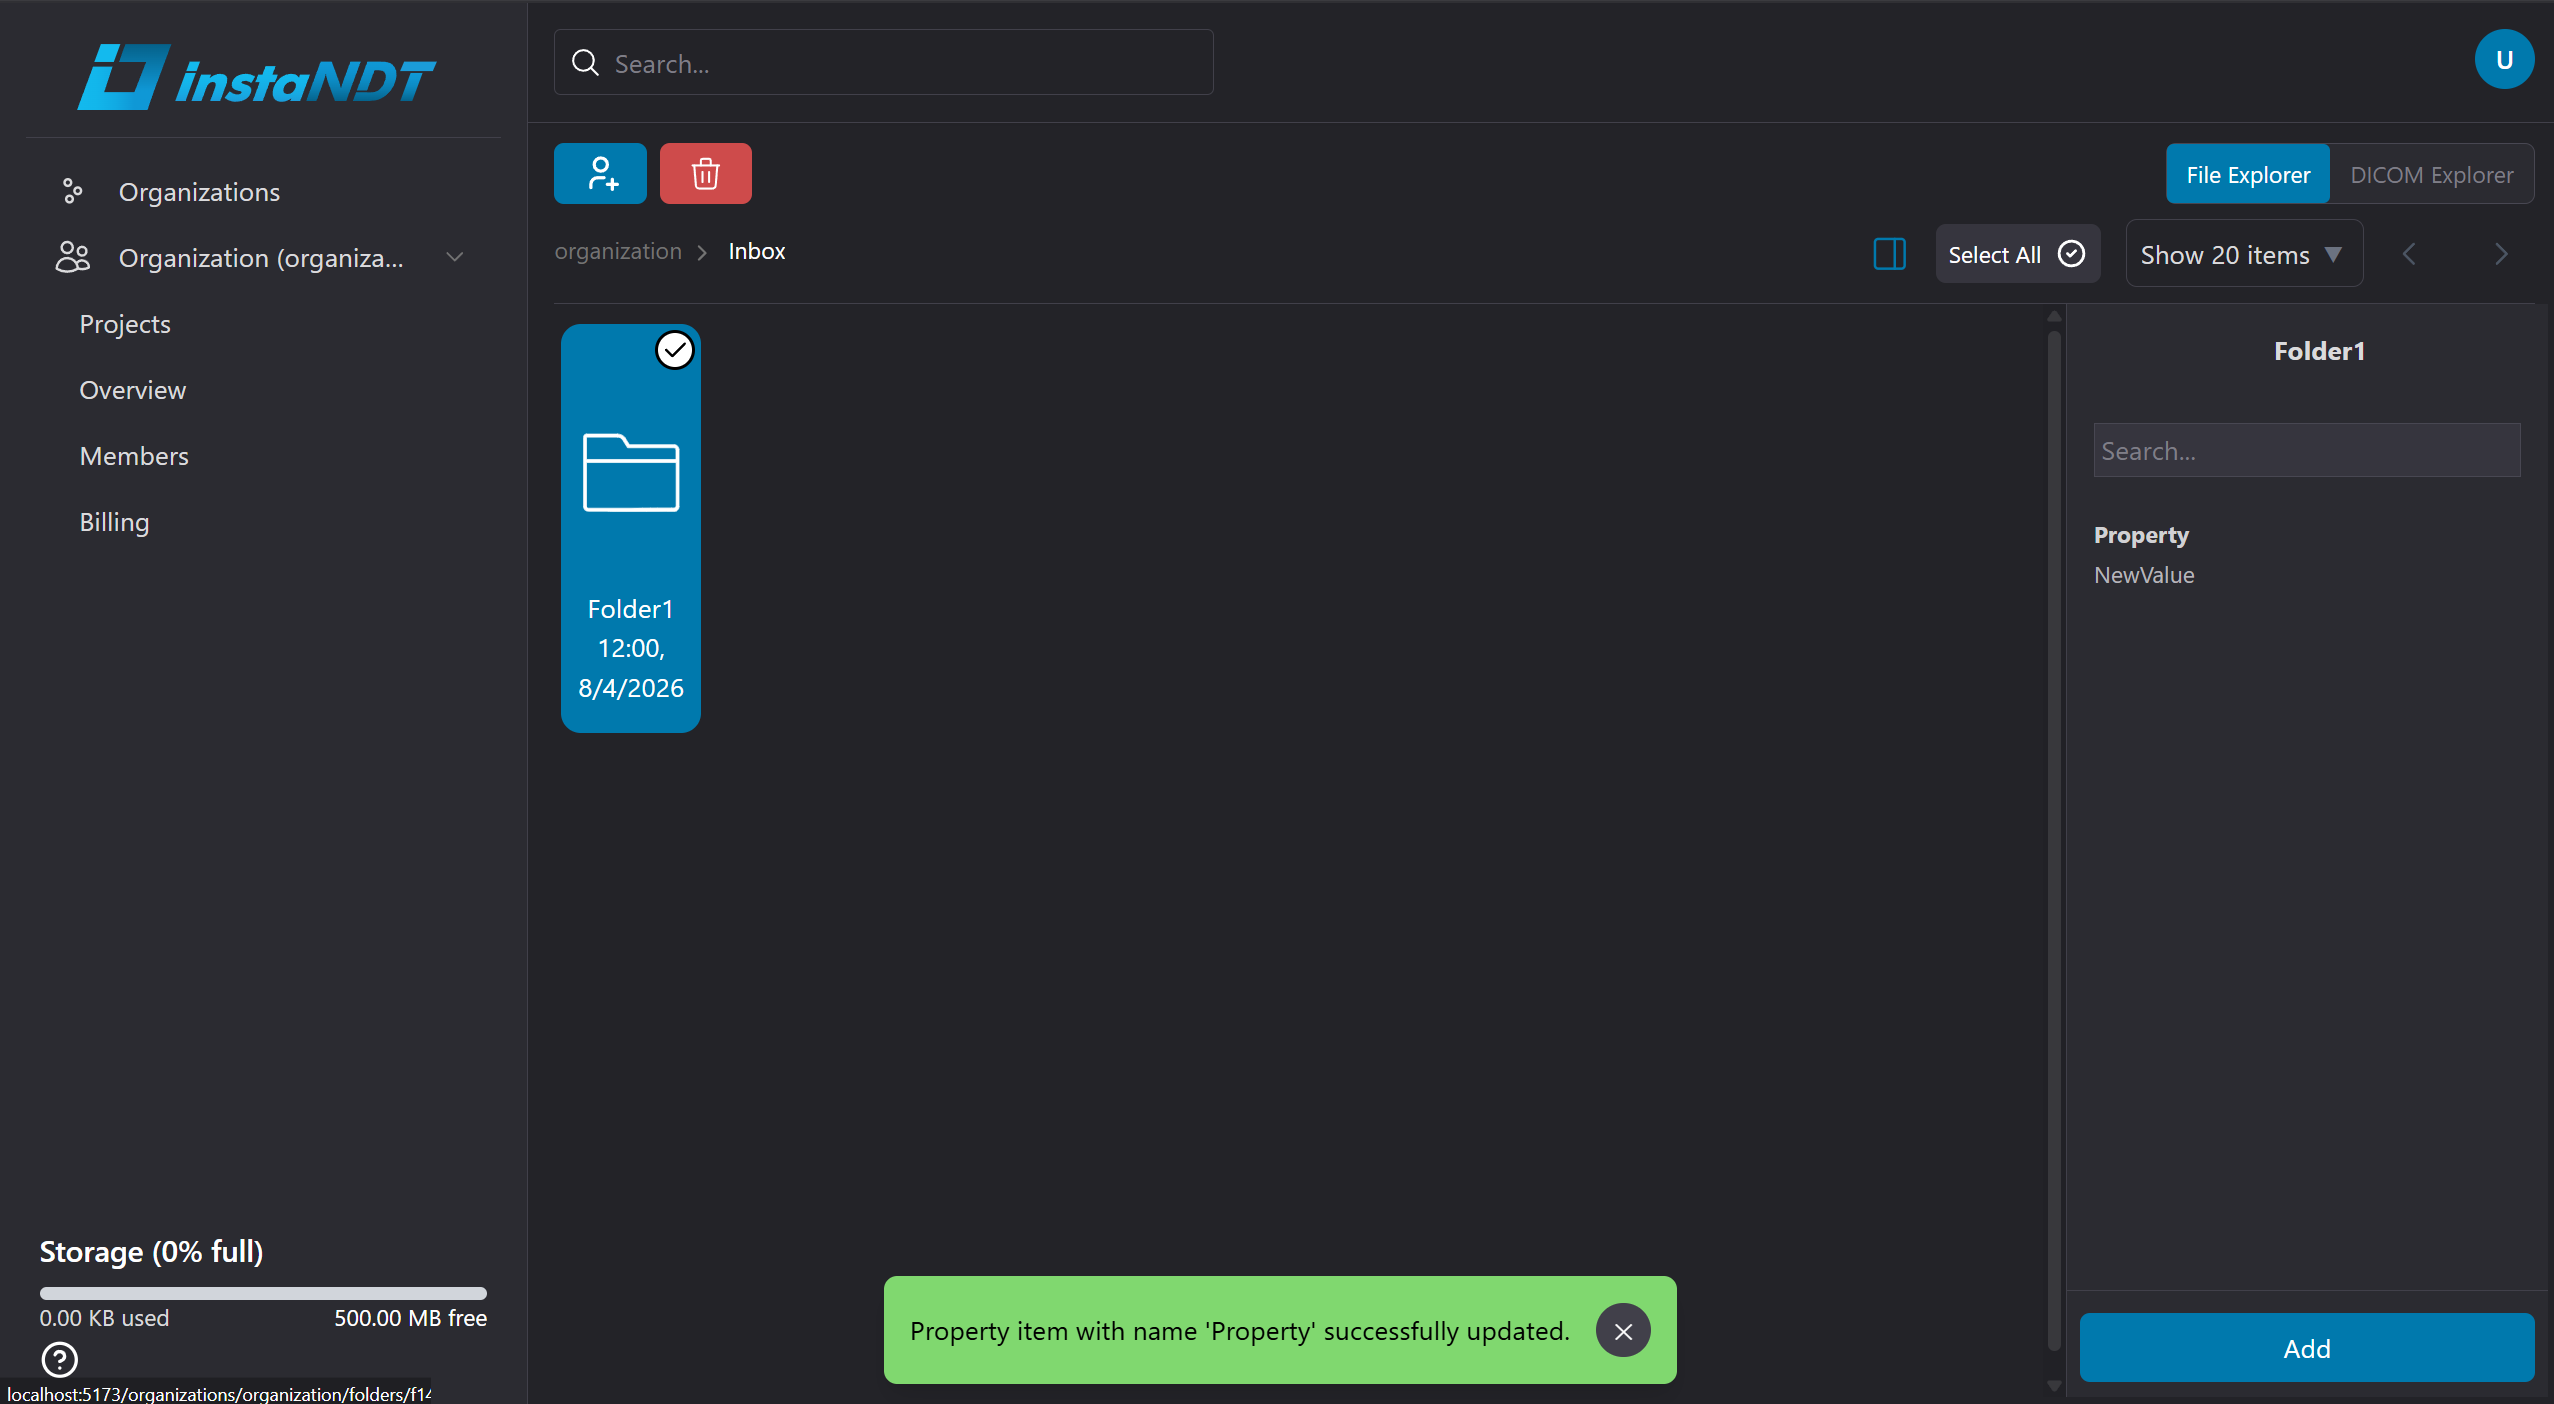
Figures 9-11. Editing metadata for a folder.
- Open the Project or Folder.
- Click the sidebar icon.
- Click on the edit icon for the desired metadata.
- Update and save your changes.
Removing Metadata
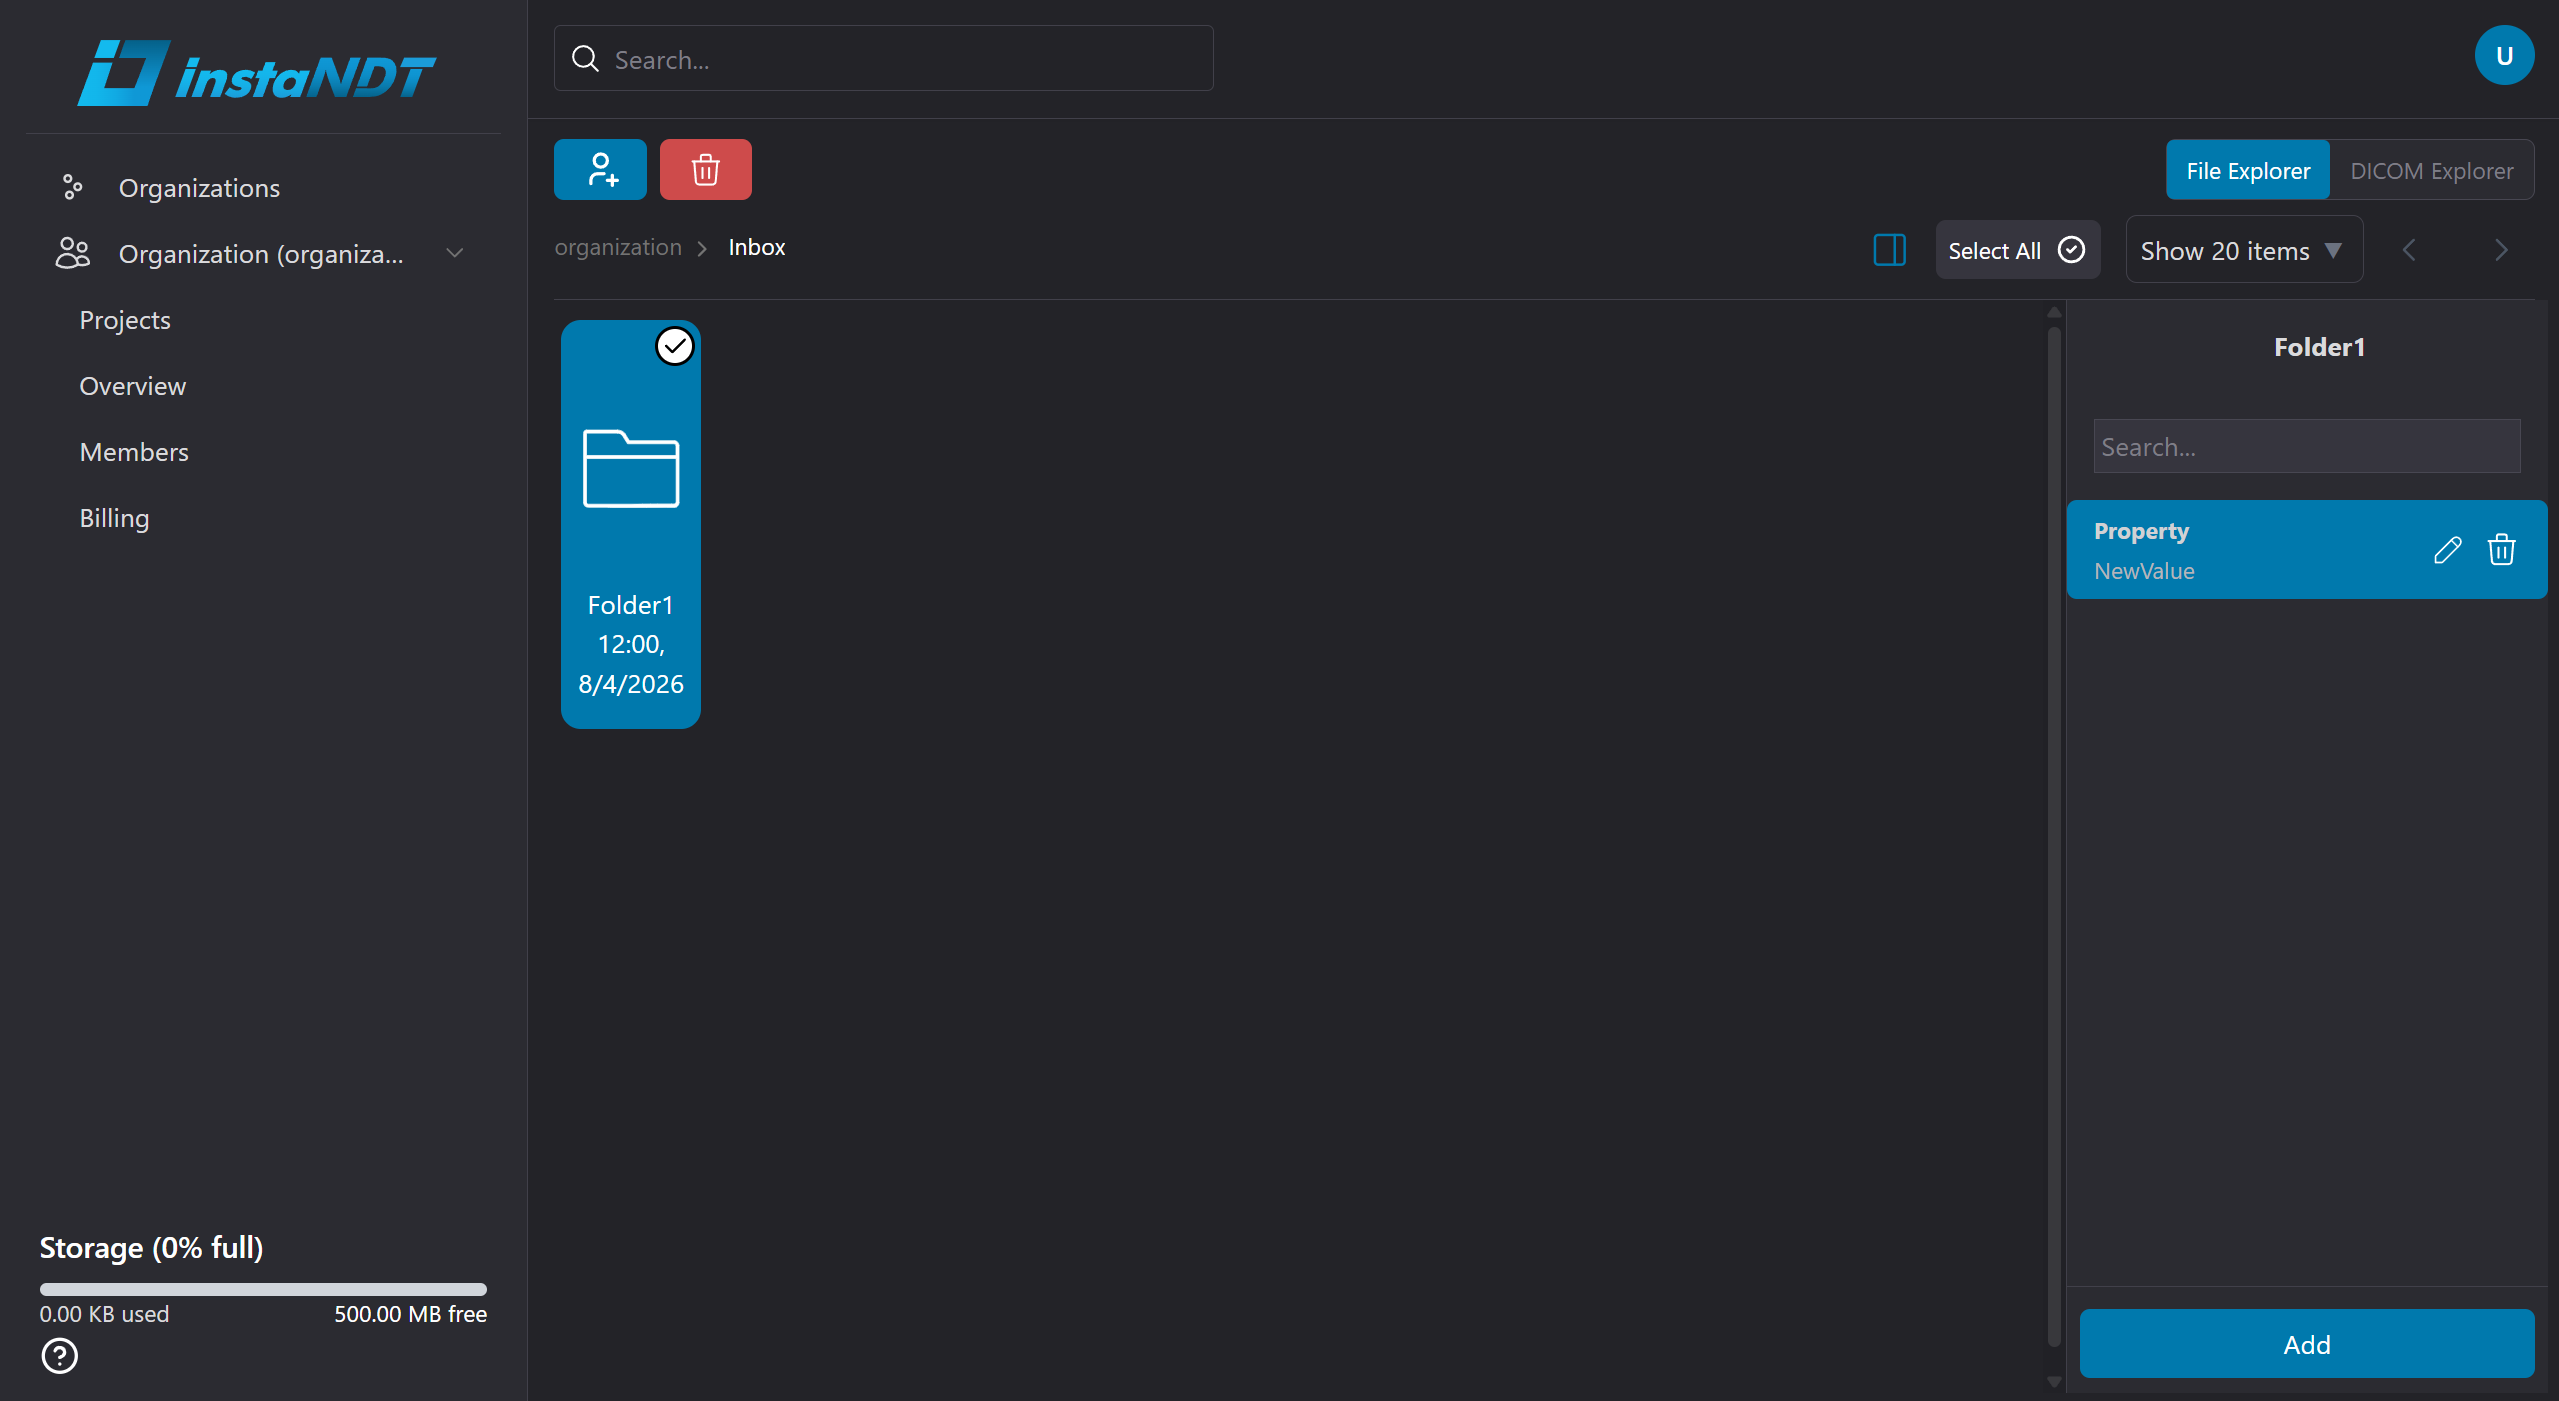
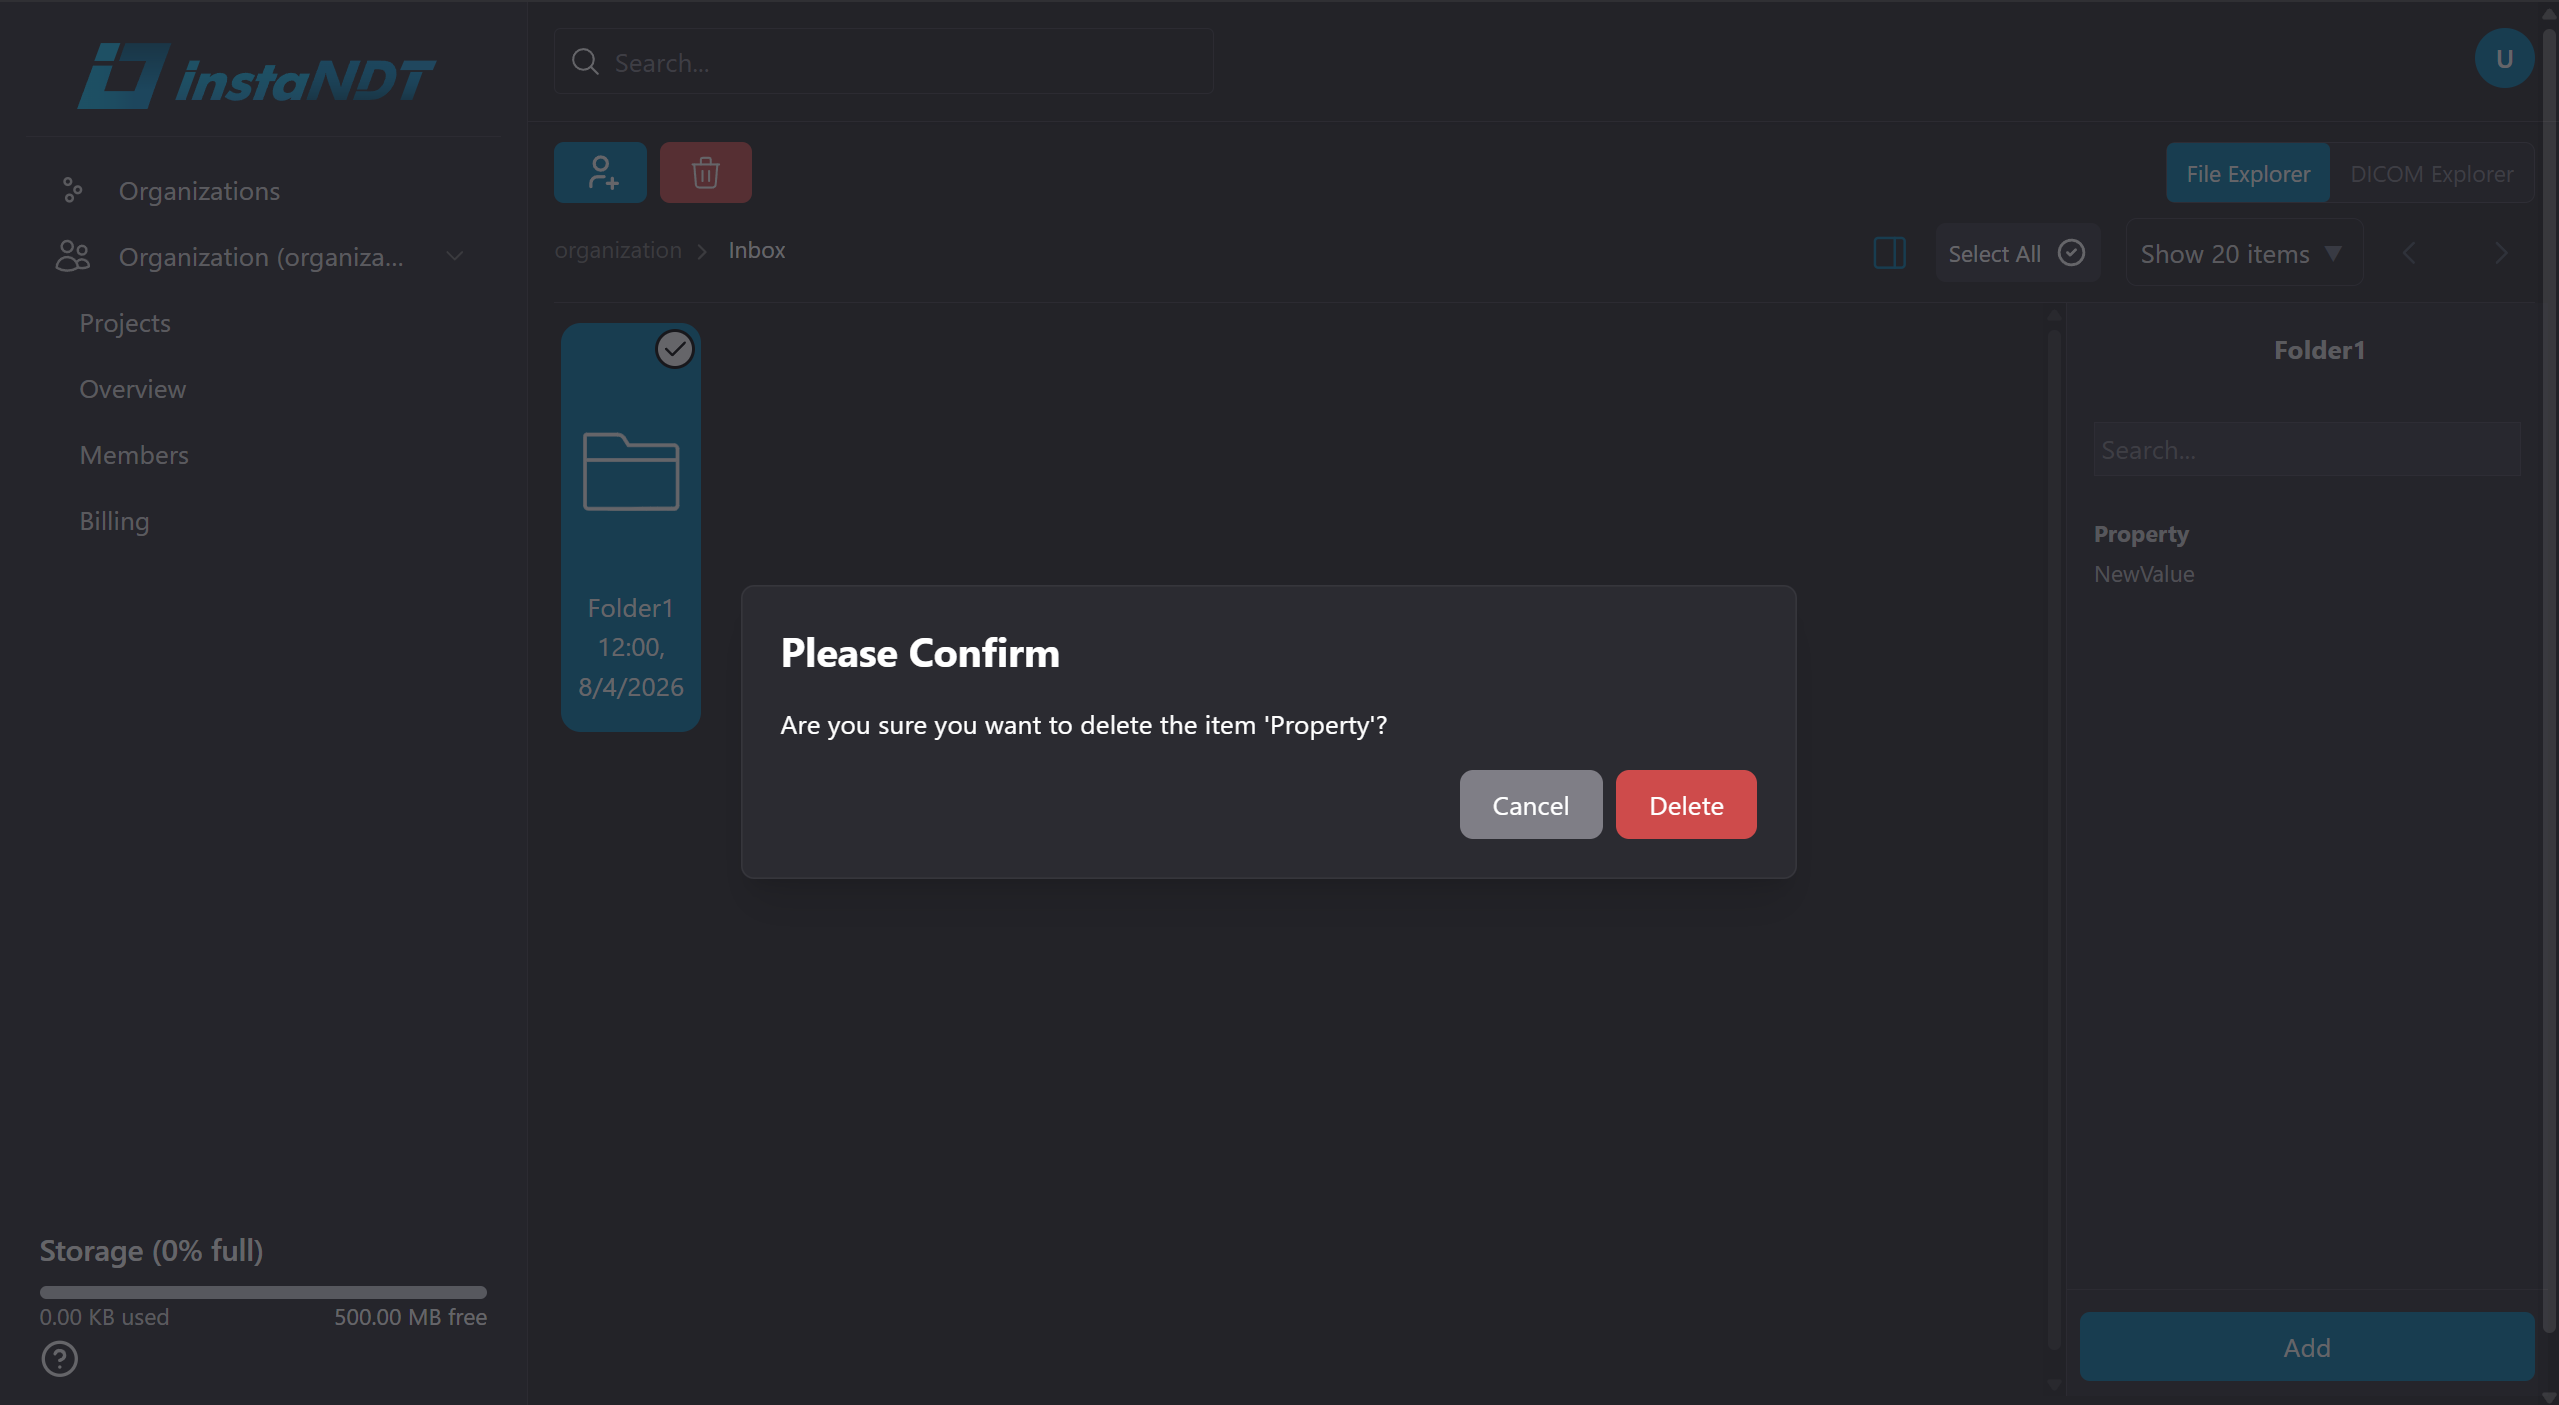
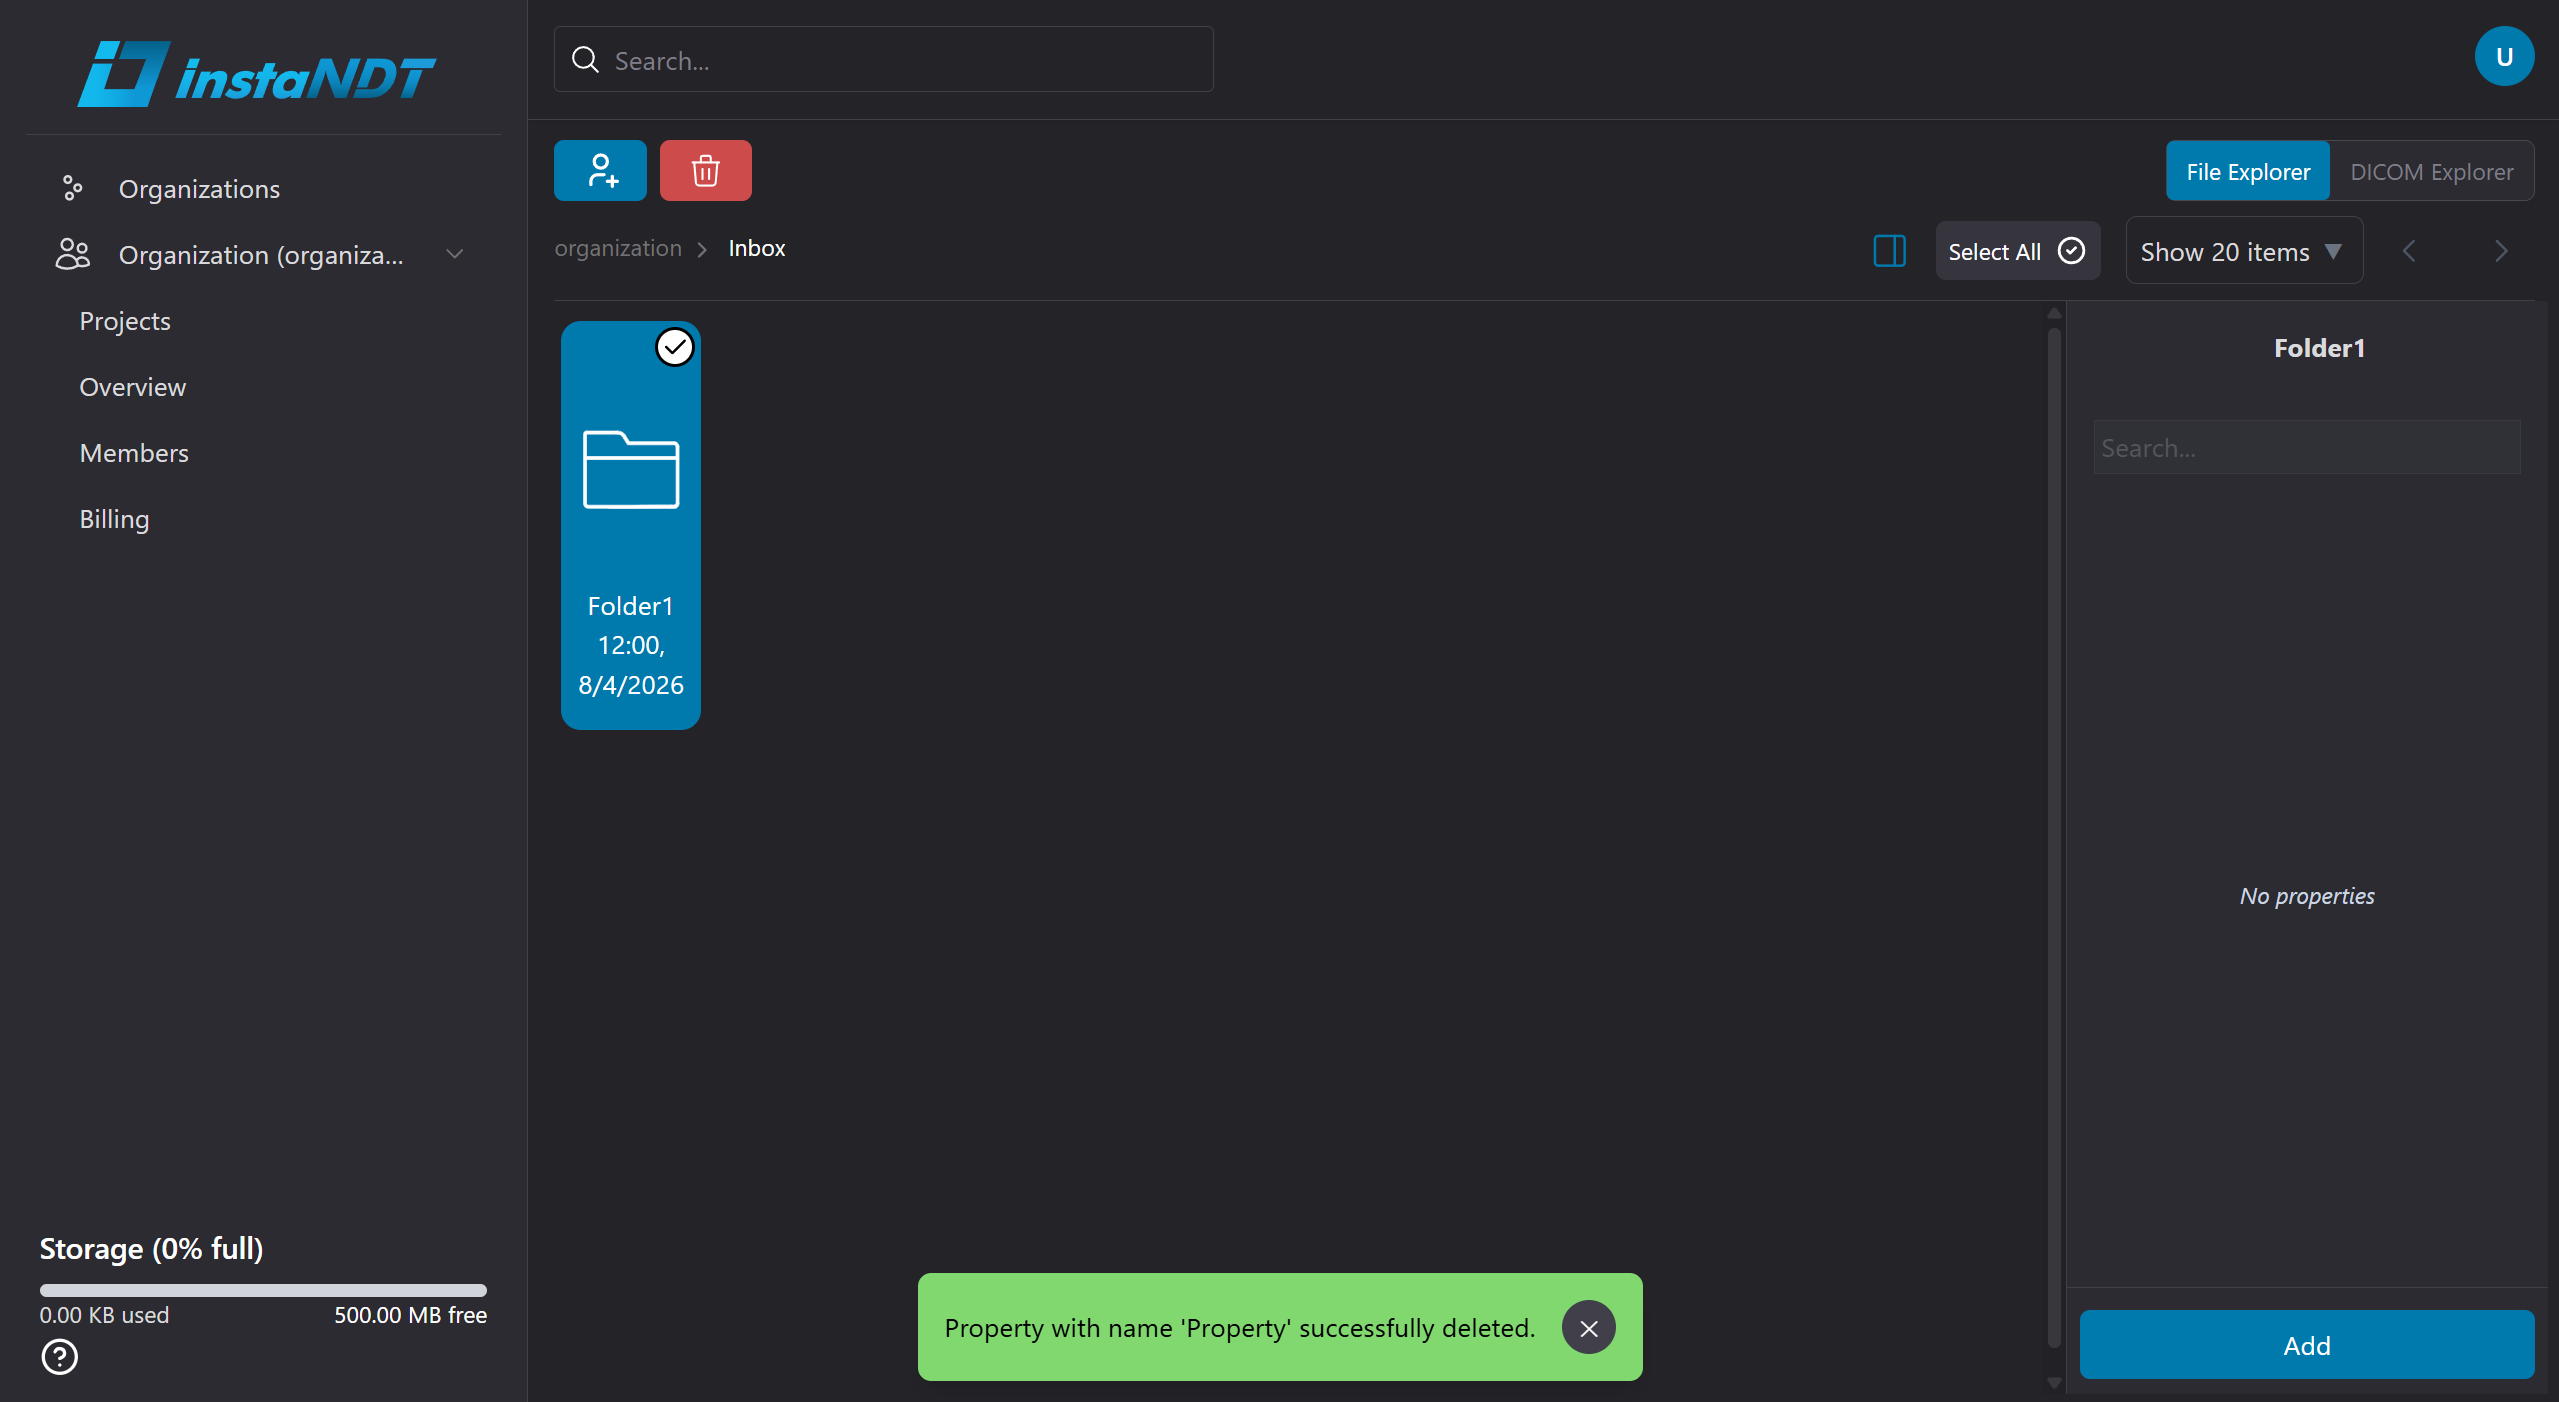
Figures 12-14. Removing metadata for a folder.
- Open the Project or Folder.
- Click the sidebar icon.
- Click the trash can icon.
- Click Ok when prompted.
DICOM Explorer
DICOM Explorer Mode provides a structured view of DICOM (.dcm) files using the standard DICOM hierarchy within each project. Only DICOM files that you have permission to access are displayed.
Accessing DICOM Explorer
To open DICOM Explorer, navigate to a project or folder and select the DICOM Explorer toggle in the top-right corner.
The hierarchy is organized as follows:
Using DICOM Explorer Mode, you can:
- Browse DICOM files using the familiar Study → Series → Instance hierarchy.
- View only the DICOM files you have permission to access.
- Open DICOM instances directly in the built-in DICOM viewer.
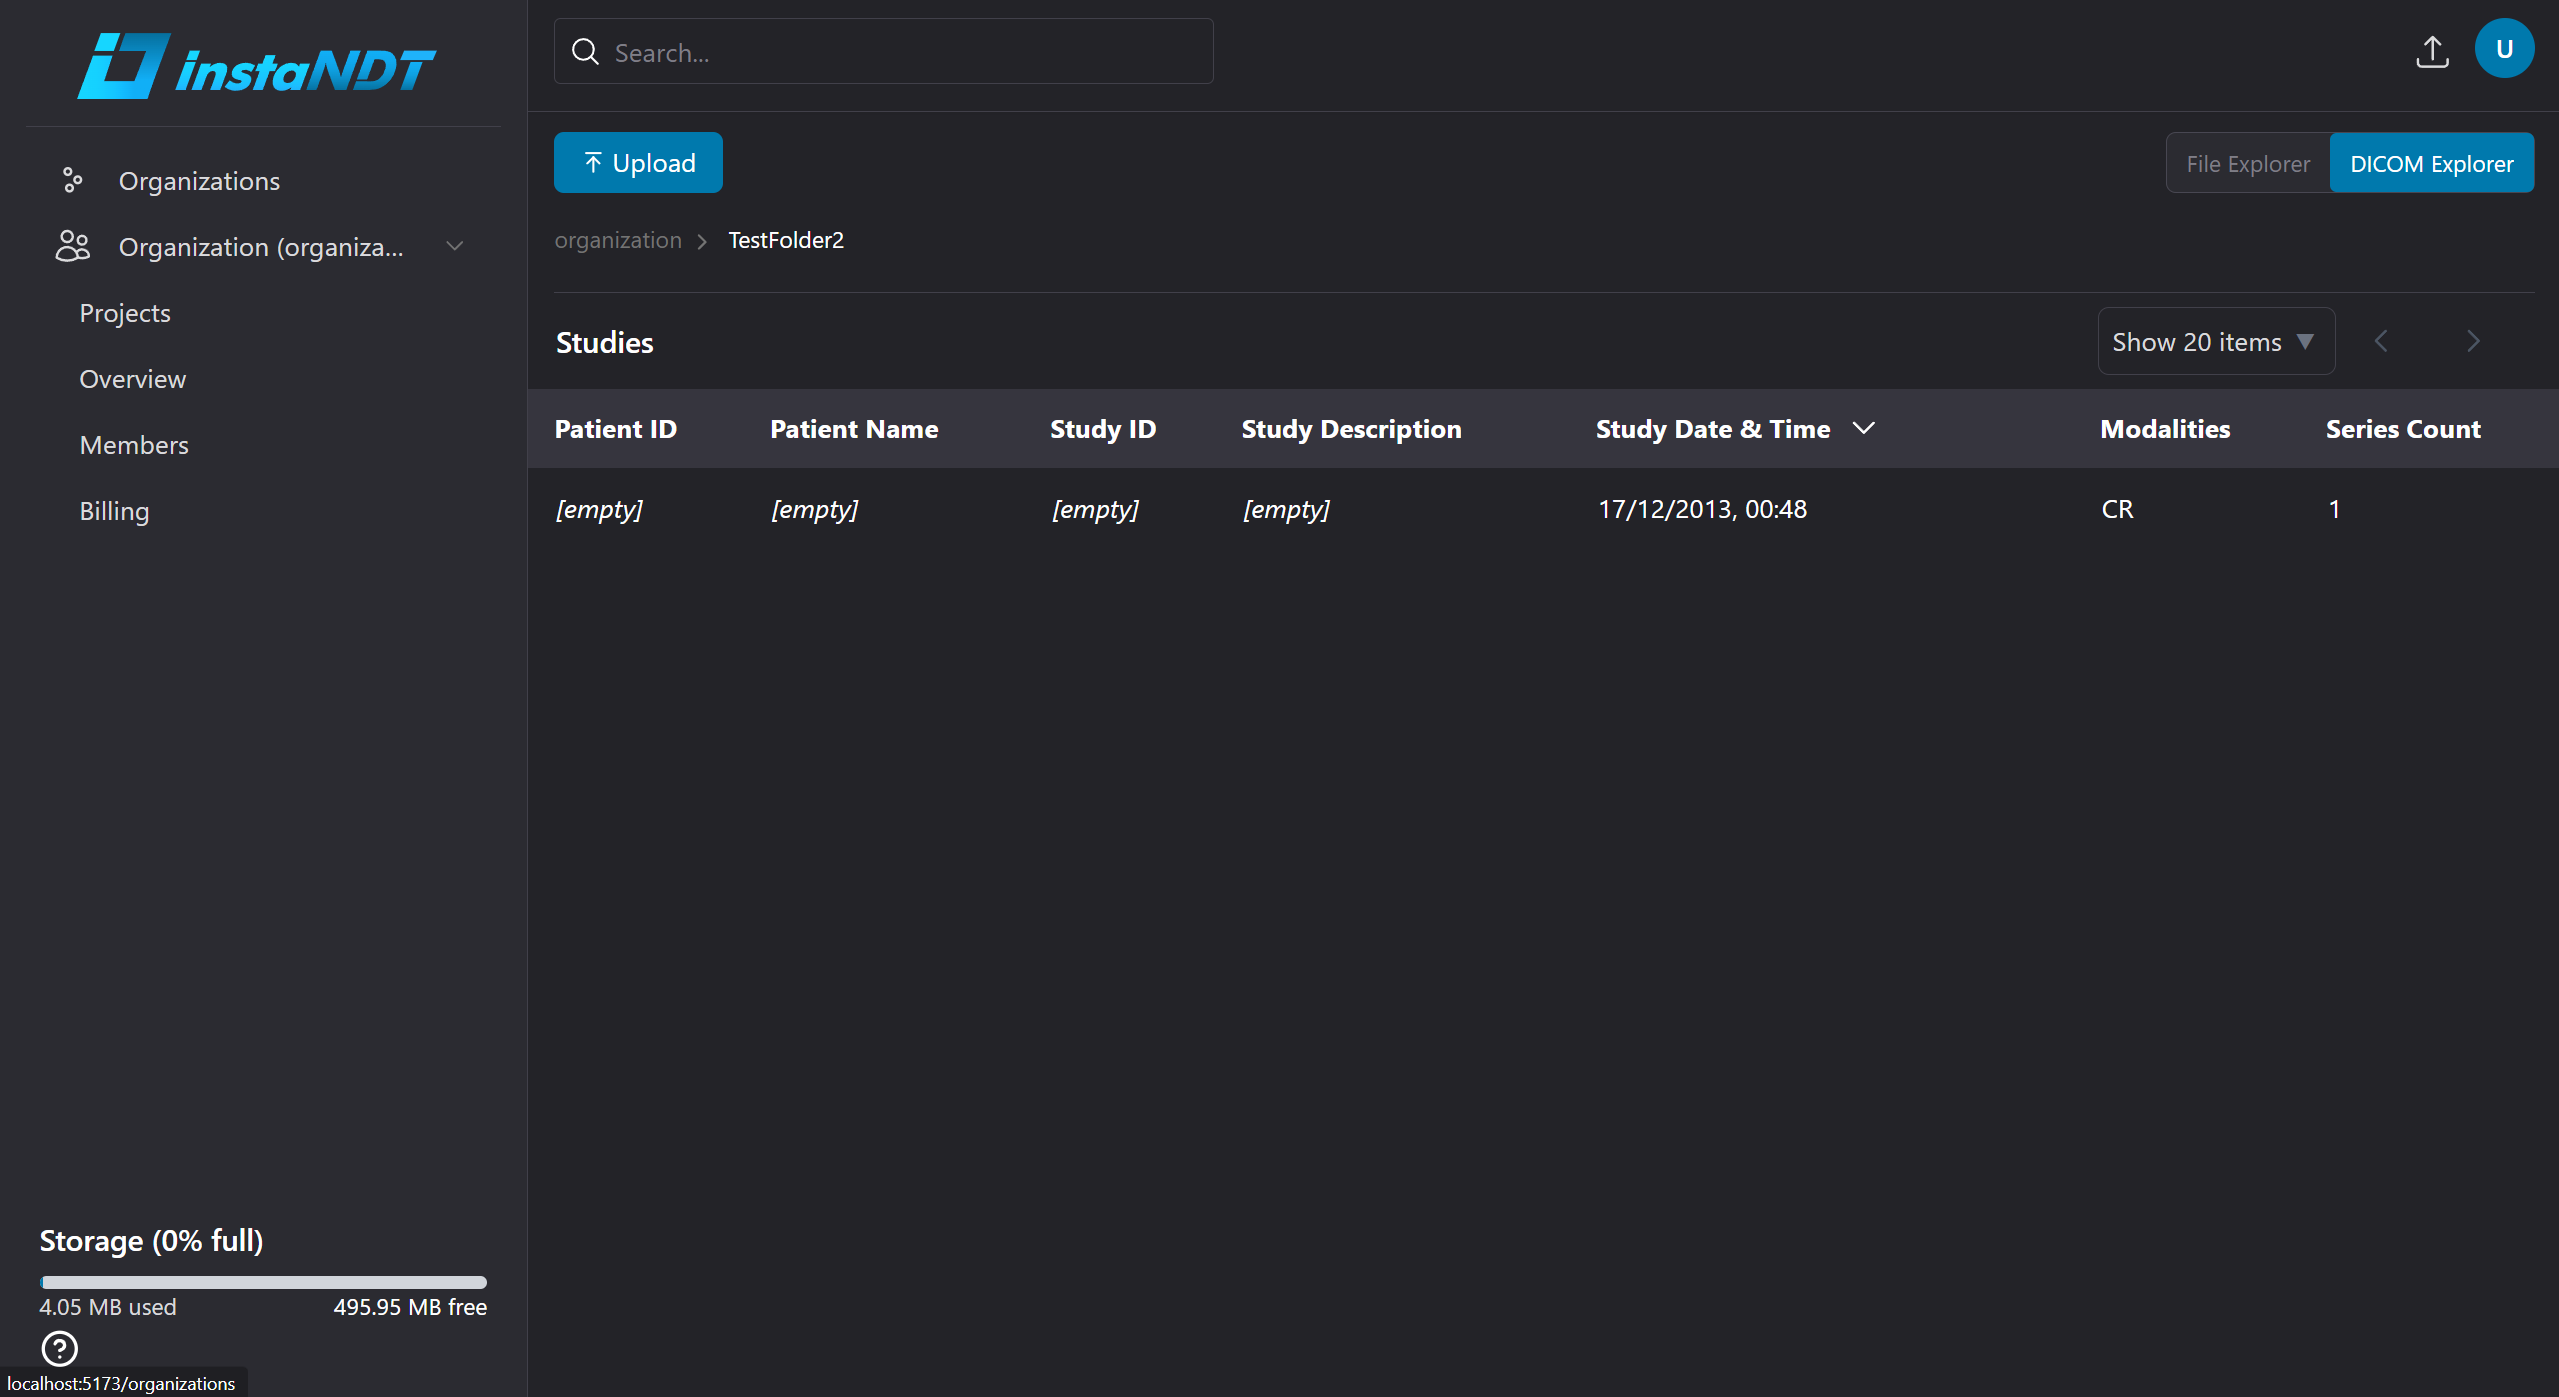
Figure 1. DICOM Explorer Mode displaying the Organization → Project → Study → Series → Instance hierarchy.
Roles and Permissions
instaNDT uses Role-Based Access Control (RBAC) to manage access within an organization. Each user is assigned a role, and each role consists of a set of permissions that determine the actions the user can perform.
Organization Roles
Owner
The creator of an organization is automatically assigned the Owner role.
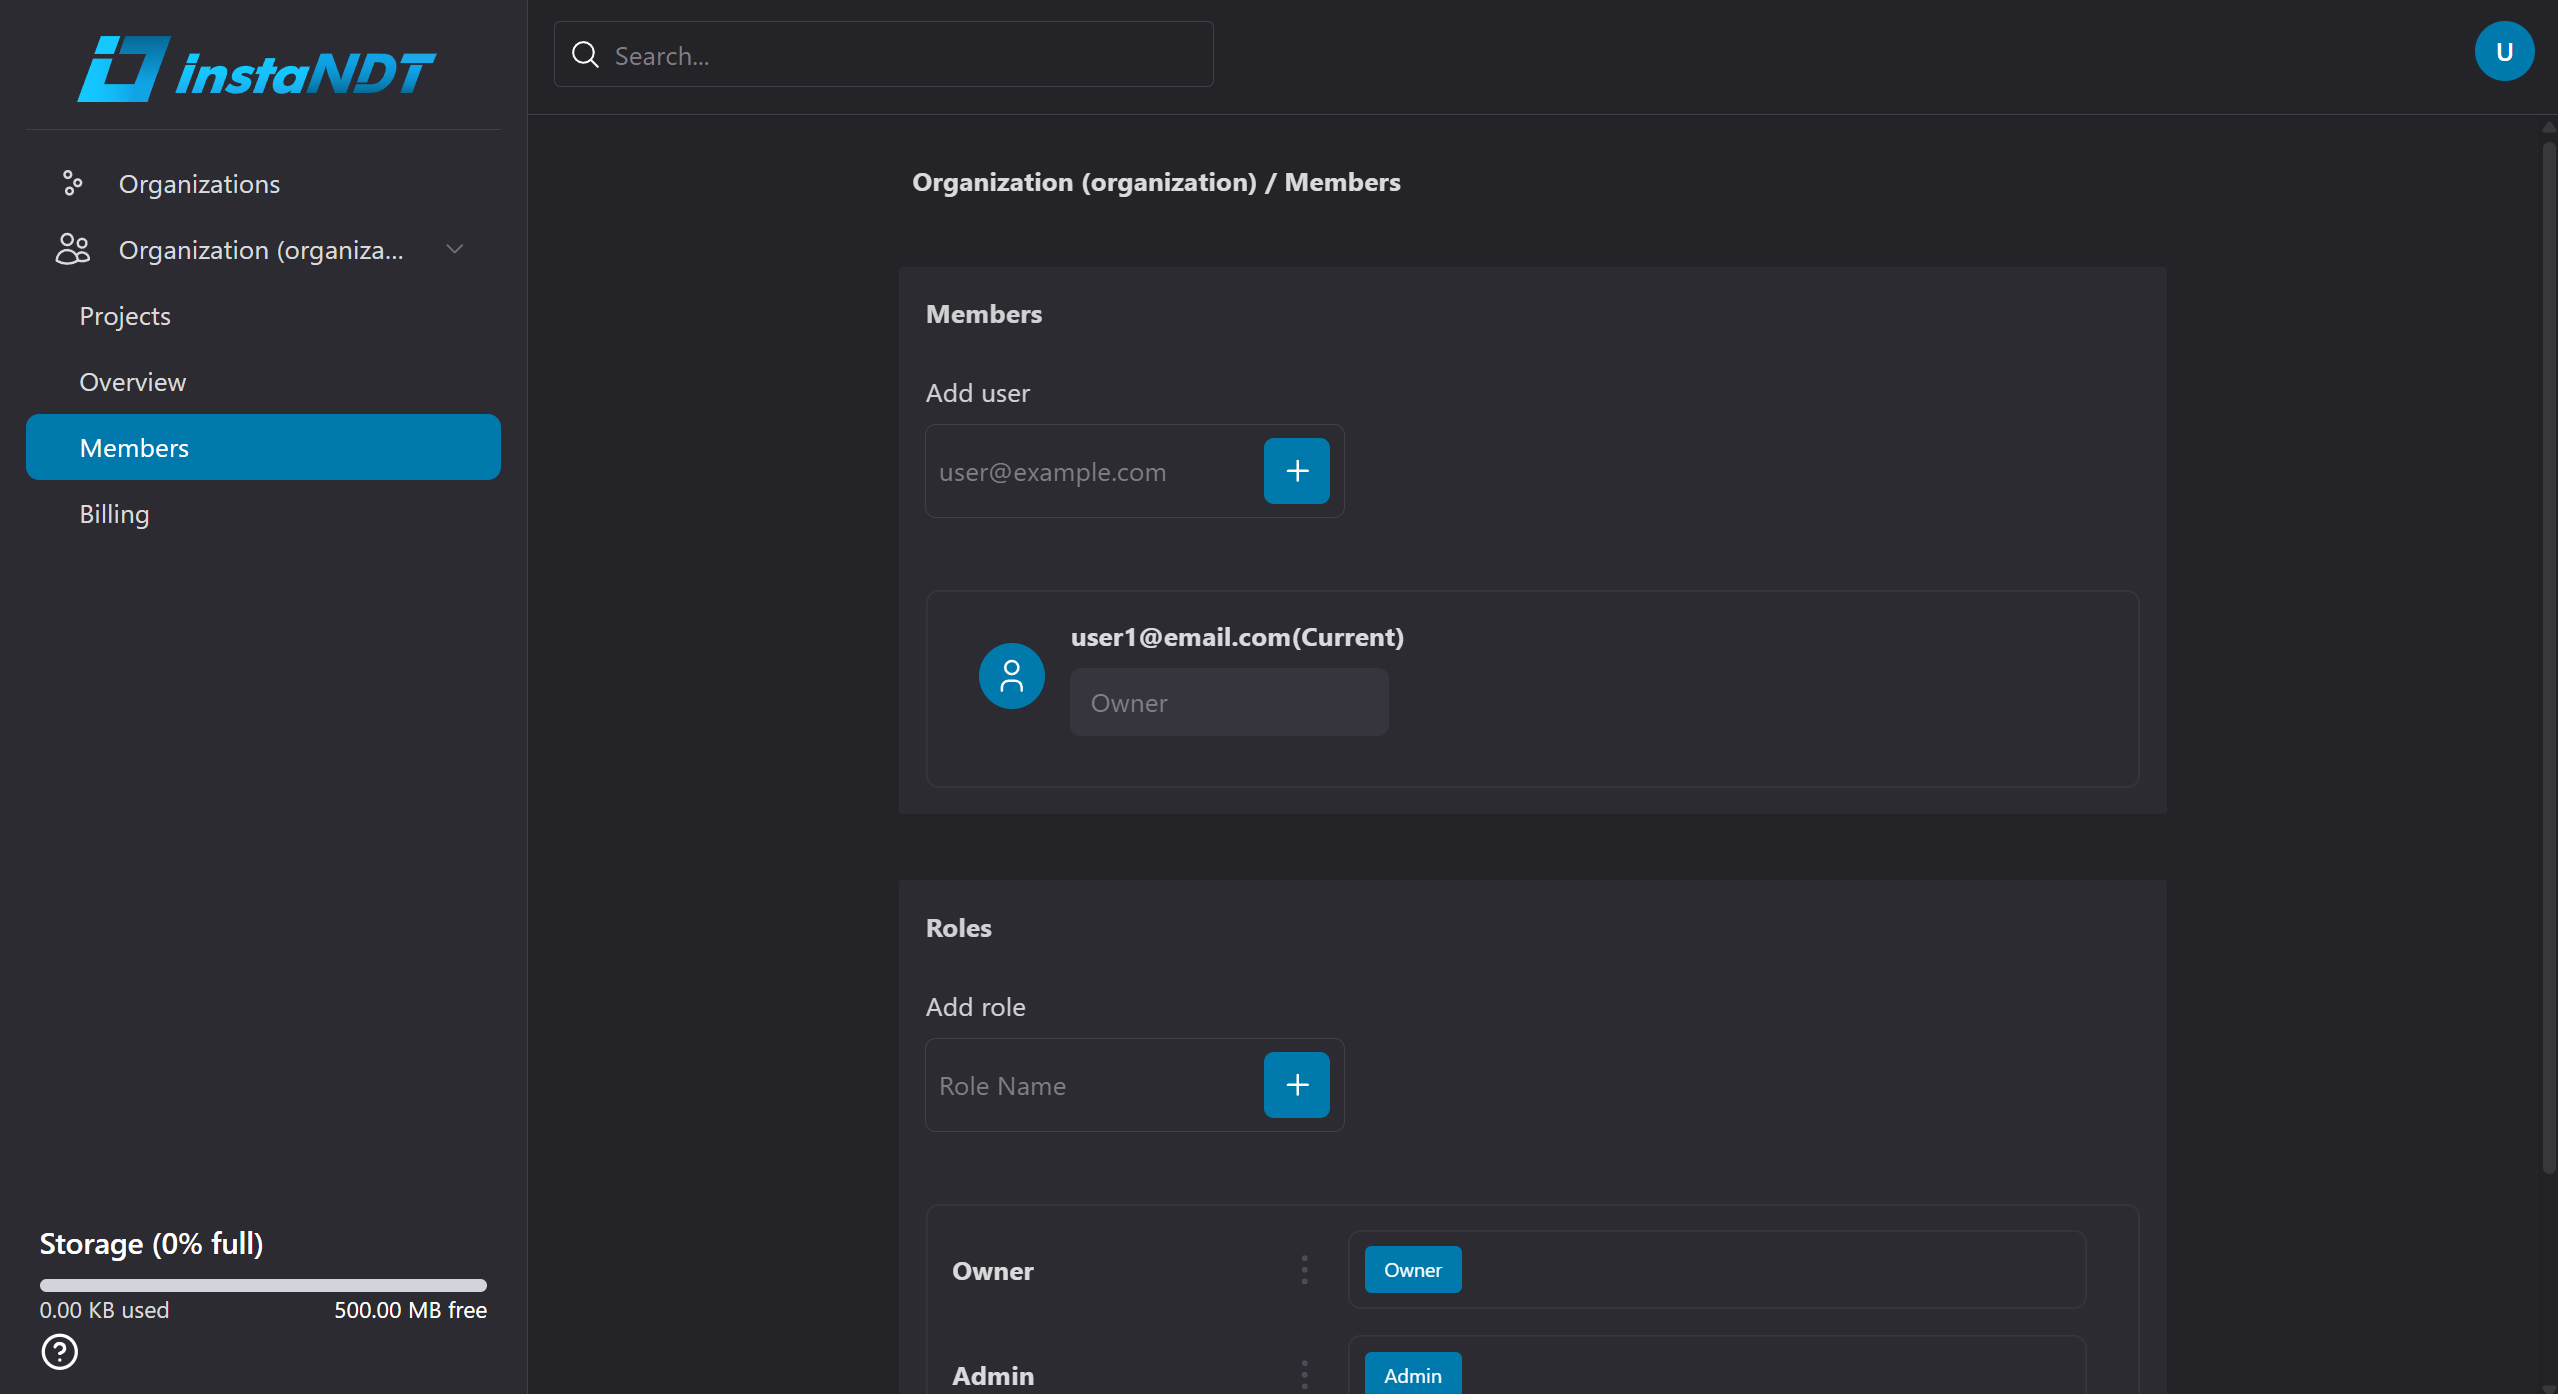
Figure 1 shows the logged in user (user1@email.com) as having the Owner role.
The Owner has unrestricted access to the organization, including:
- Managing organization settings.
- Managing projects and members.
- Creating and assigning roles.
- Deleting the organization.
- Managing administrators.
There can only be one Owner for an organization.
Admin
Administrators have nearly all organization permissions, including managing members, roles, and organization settings.
However, an Admin cannot:
- Delete the organization.
- Modify or supersede the Owner's permissions or ownership.
Permissions
| Permission | Description |
|---|---|
| Read Access | Grants access to all view-related actions within the organization. |
| Edit Organization | Modify organization information. |
| Delete Organization | Permanently delete the organization. (Owner only) |
| View User Roles | View available organization roles and their permissions. |
| Assign User Roles | Assign existing roles to organization members. |
| Create User Roles | Create custom organization roles. |
| Edit User Roles | Modify existing custom roles. |
| Delete User Roles | Remove custom roles. |
| View Organization Members | View all members of the organization. |
| Add Organization Members | Invite users to the organization. |
| Remove Organization Members | Remove users from the organization. |
| View File | View projects, folders, and media |
| Create File | Create projects, folders, and upload media |
| Delete File | Delete projects, folders, and media |
| View Project Members | View users who have access to the project. |
| Add Project Members | Grant users access to the project. |
| Edit Project Permissions | Modify a member's project permissions. |
| Remove Project Members | Remove a user's access from the project. |
Note: Users with Read Access automatically have permission to perform all view-related actions.
Example
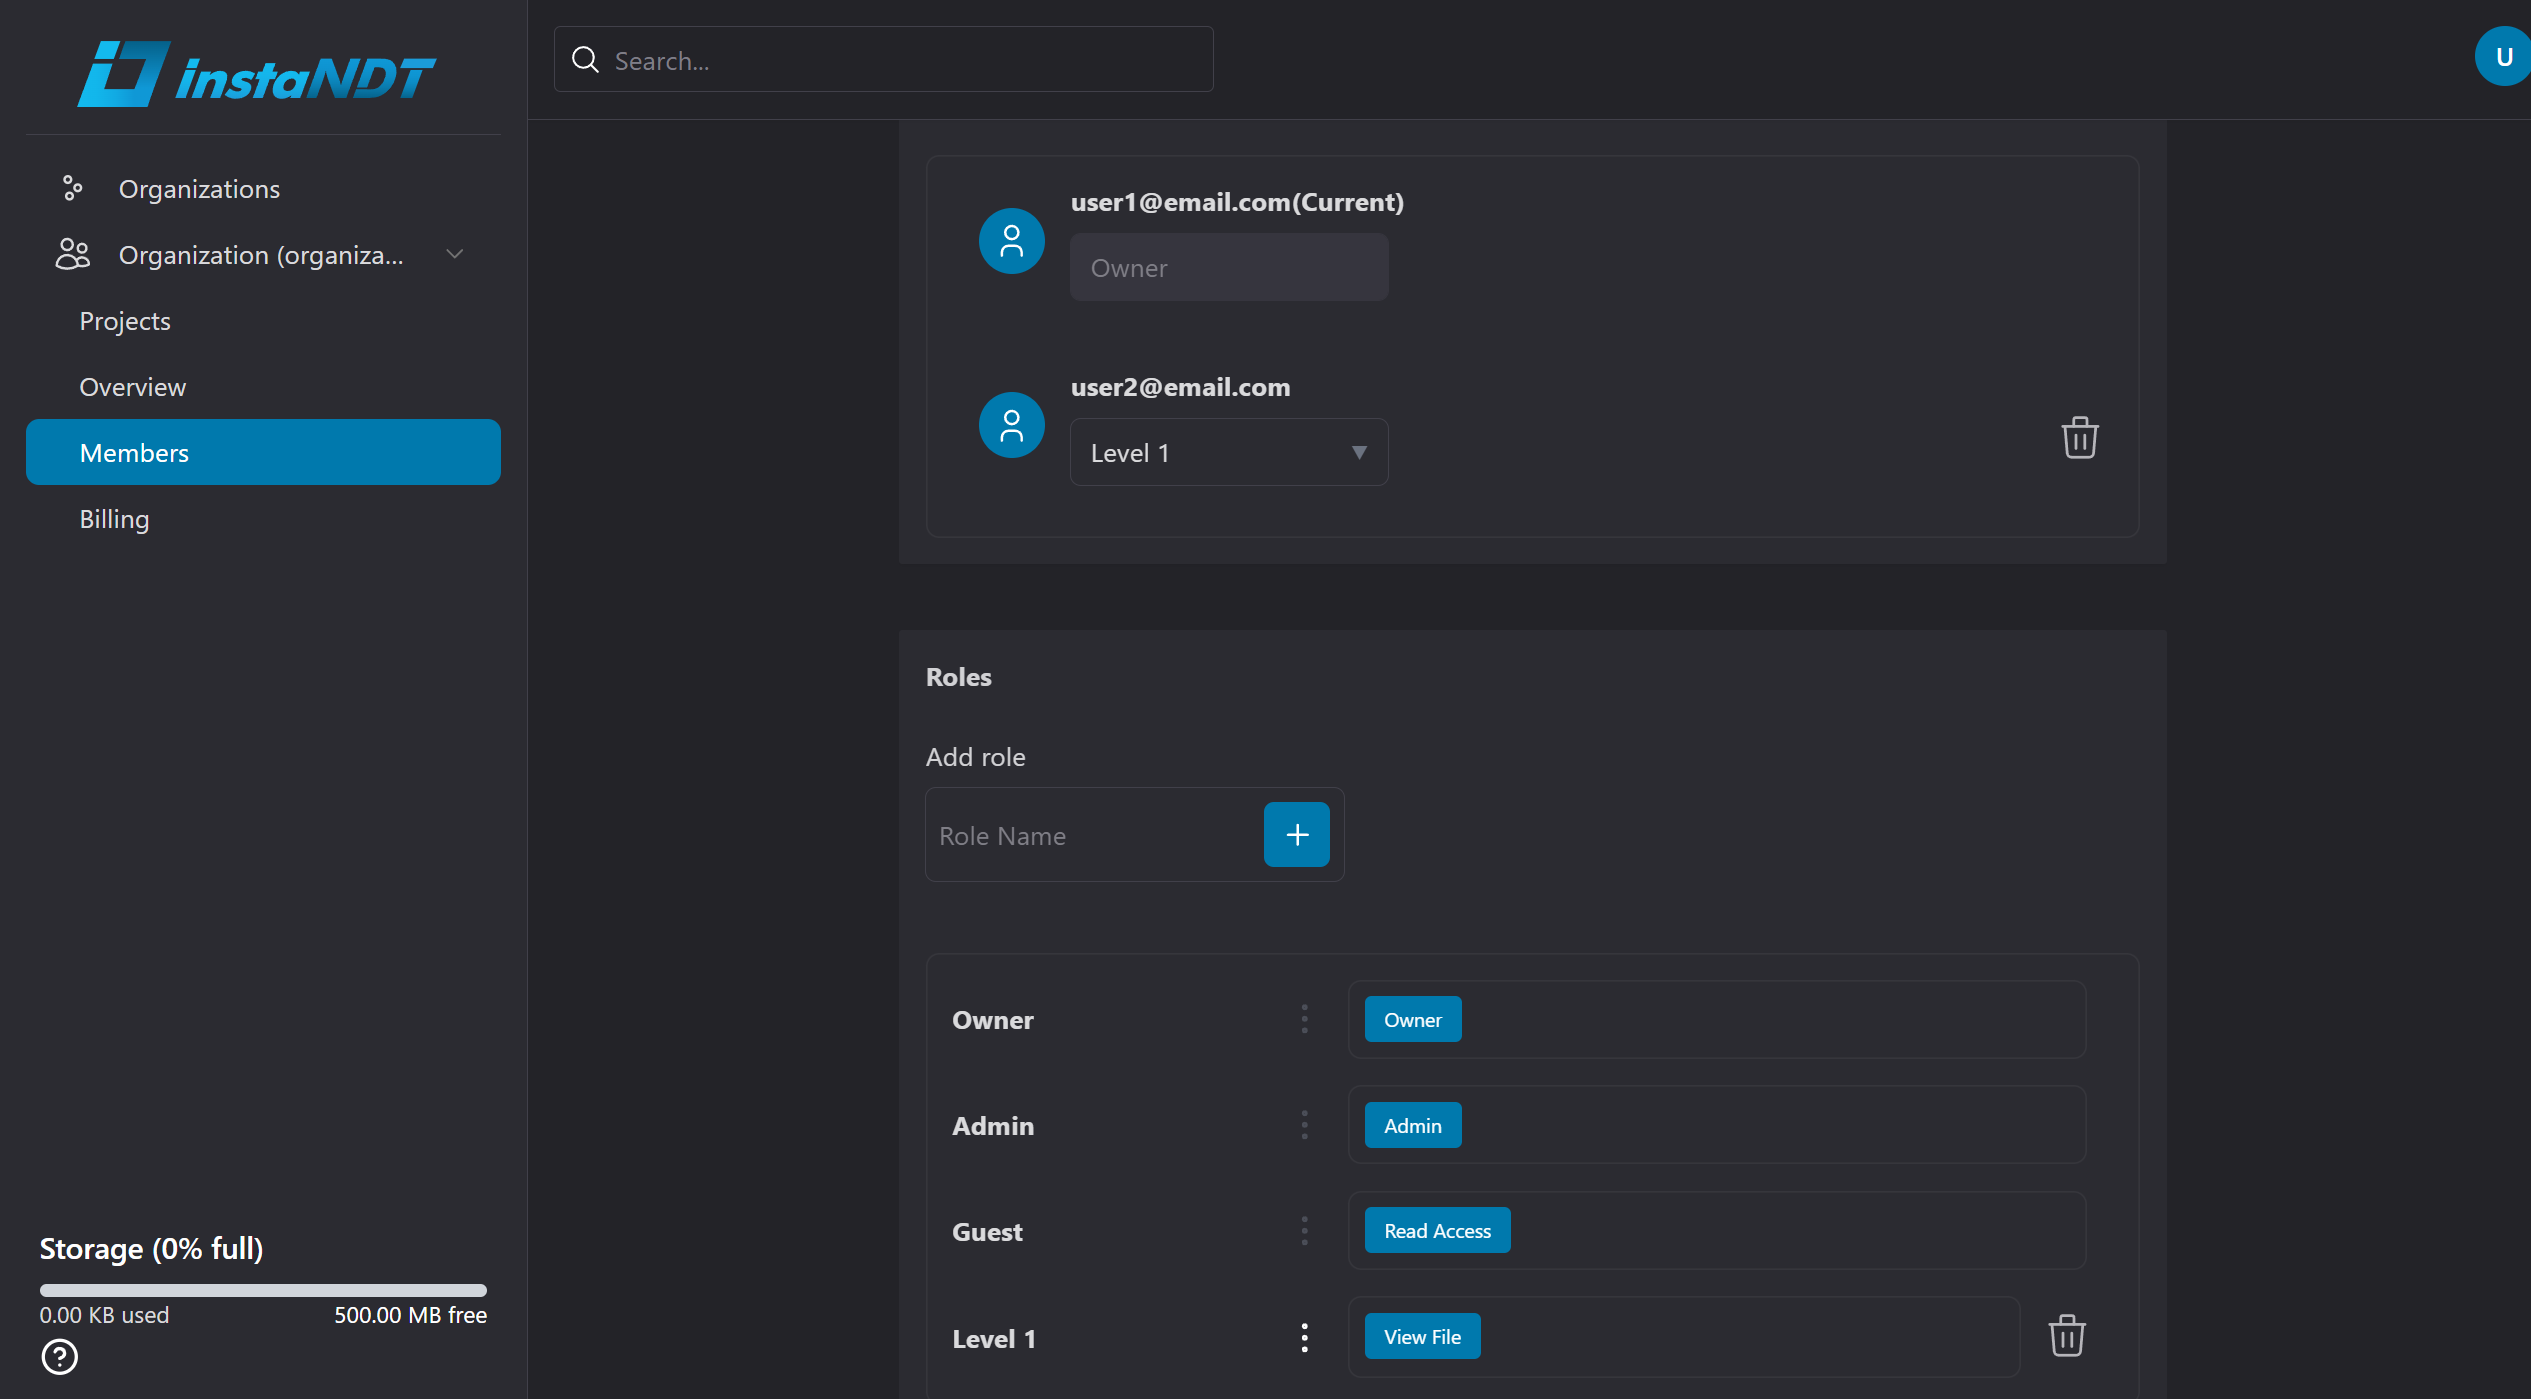
Figure 2 shows that user2@email.com has been assigned the Level 1 custom role, which includes the custom View File permission.
As a result, when user2@email.com attempts to view a media file, access is granted.
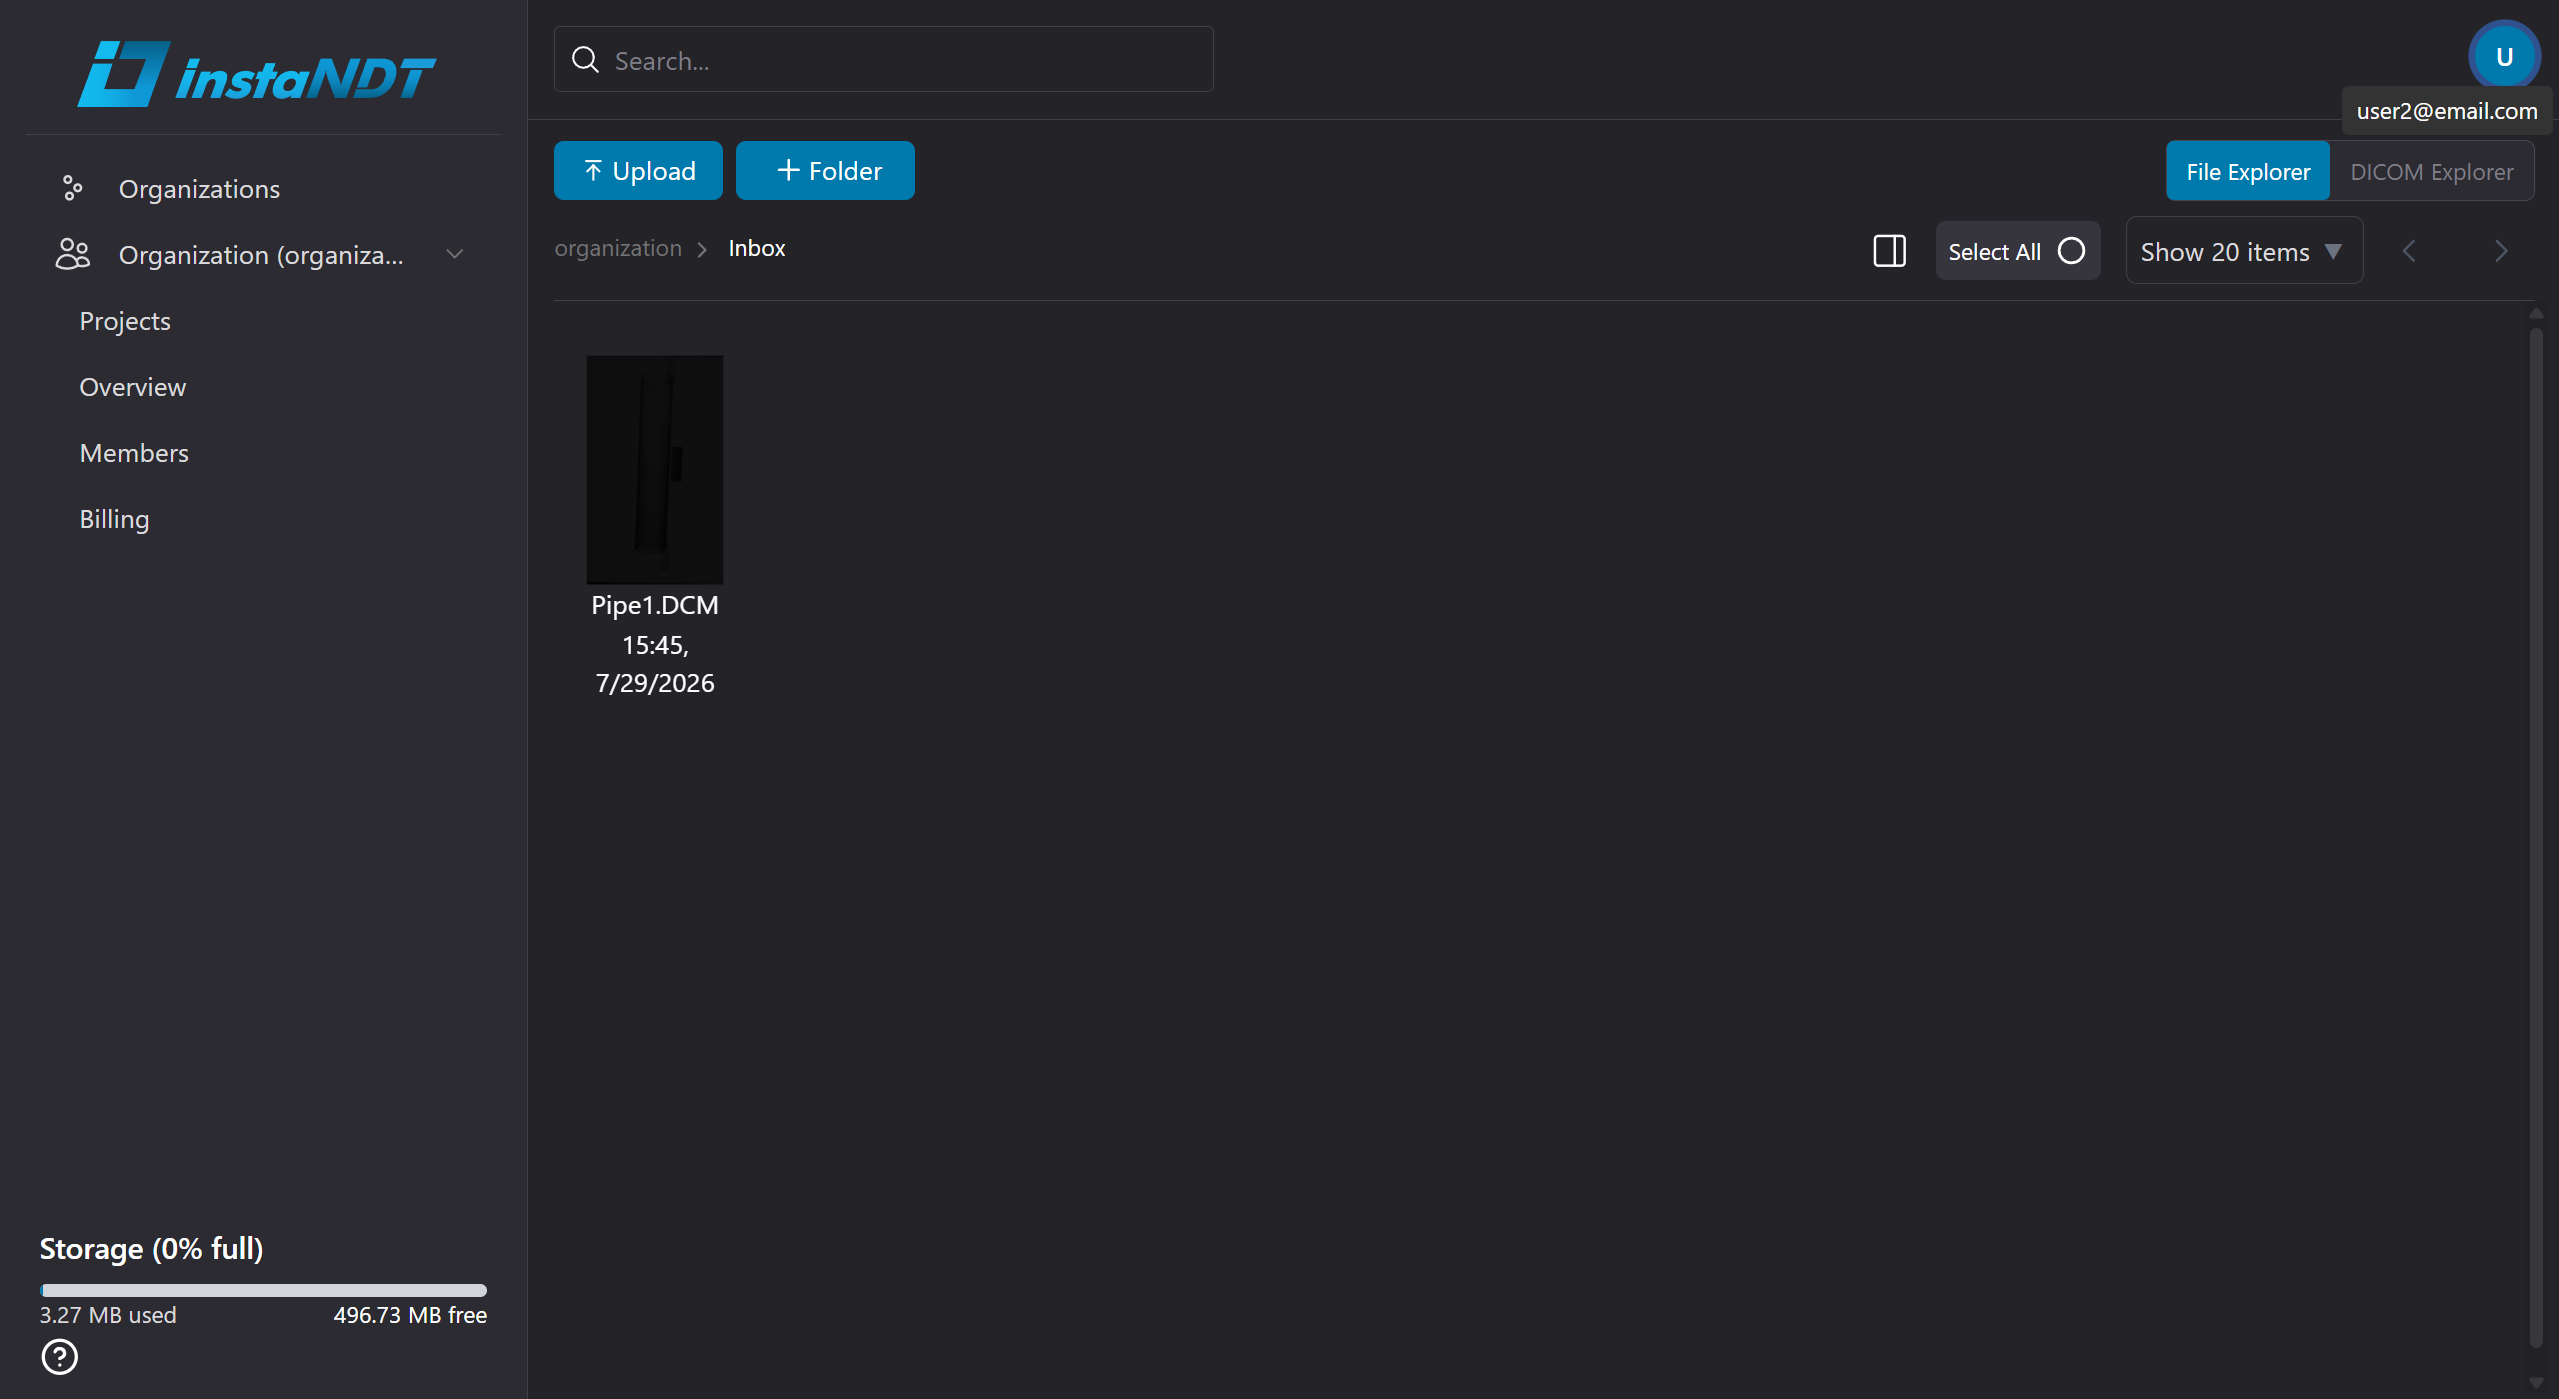
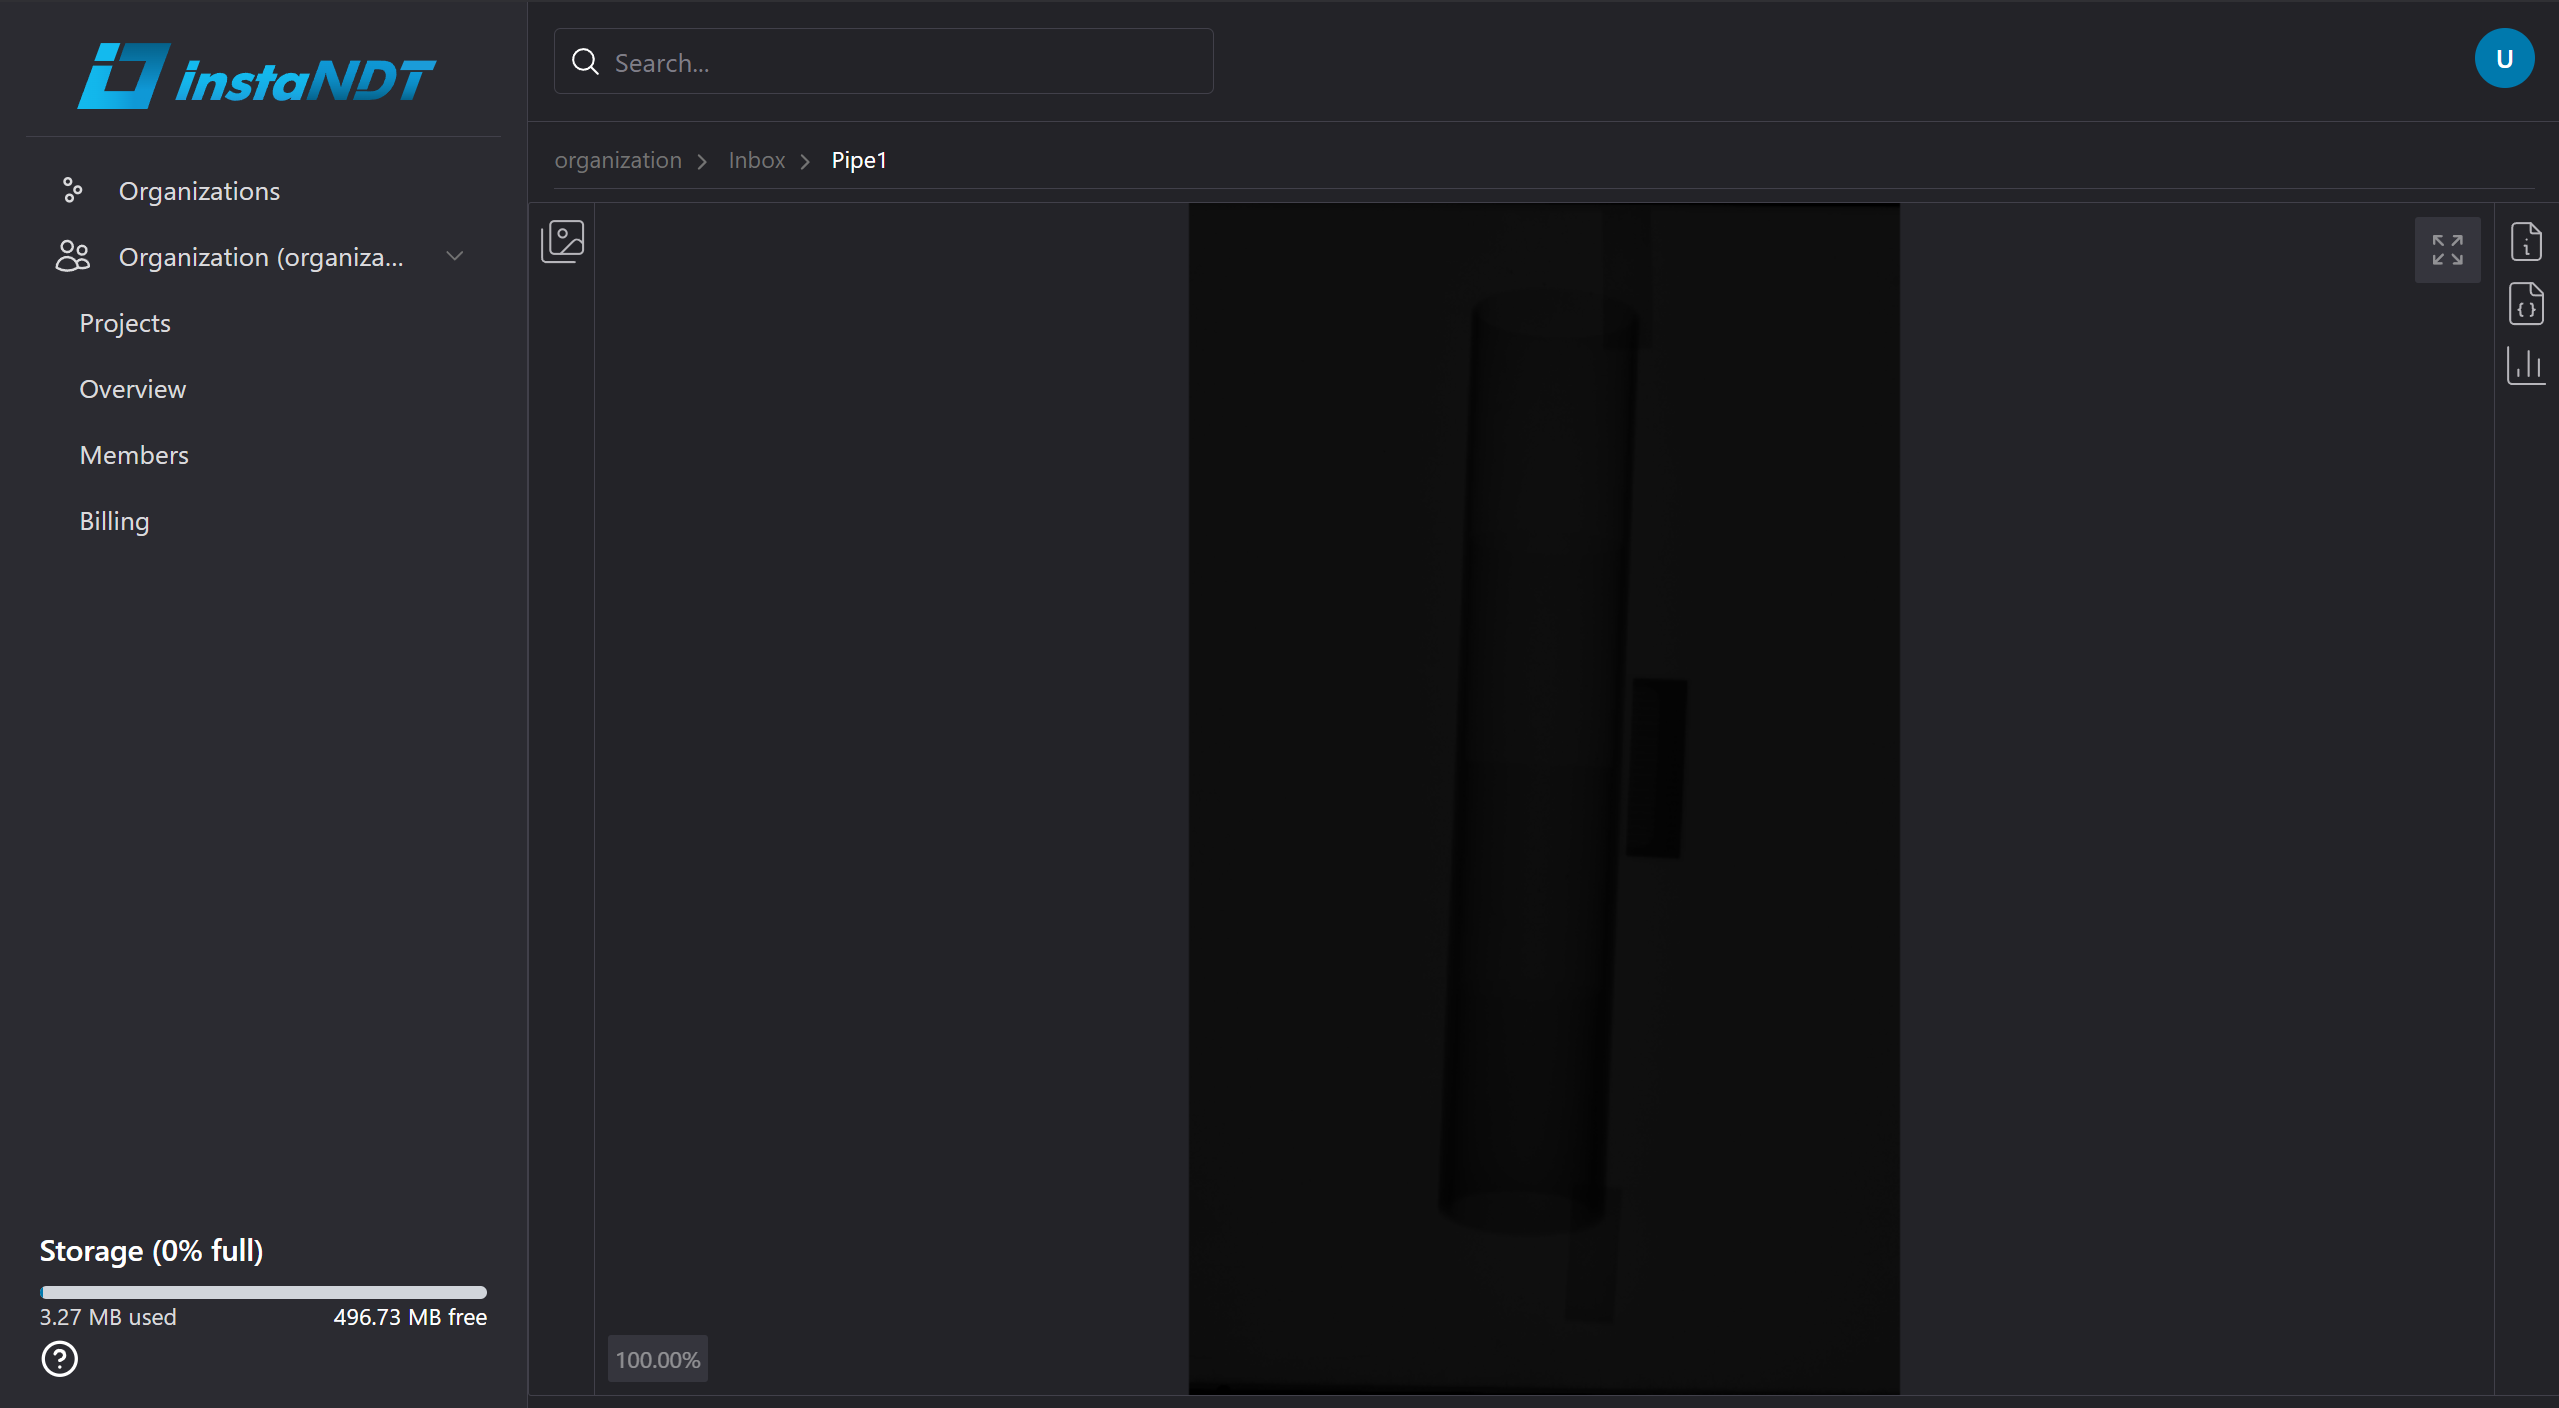
Figures 3 and 4, user2@email.com can view the media within the project or folder because the assigned custom role includes the required View File permission.
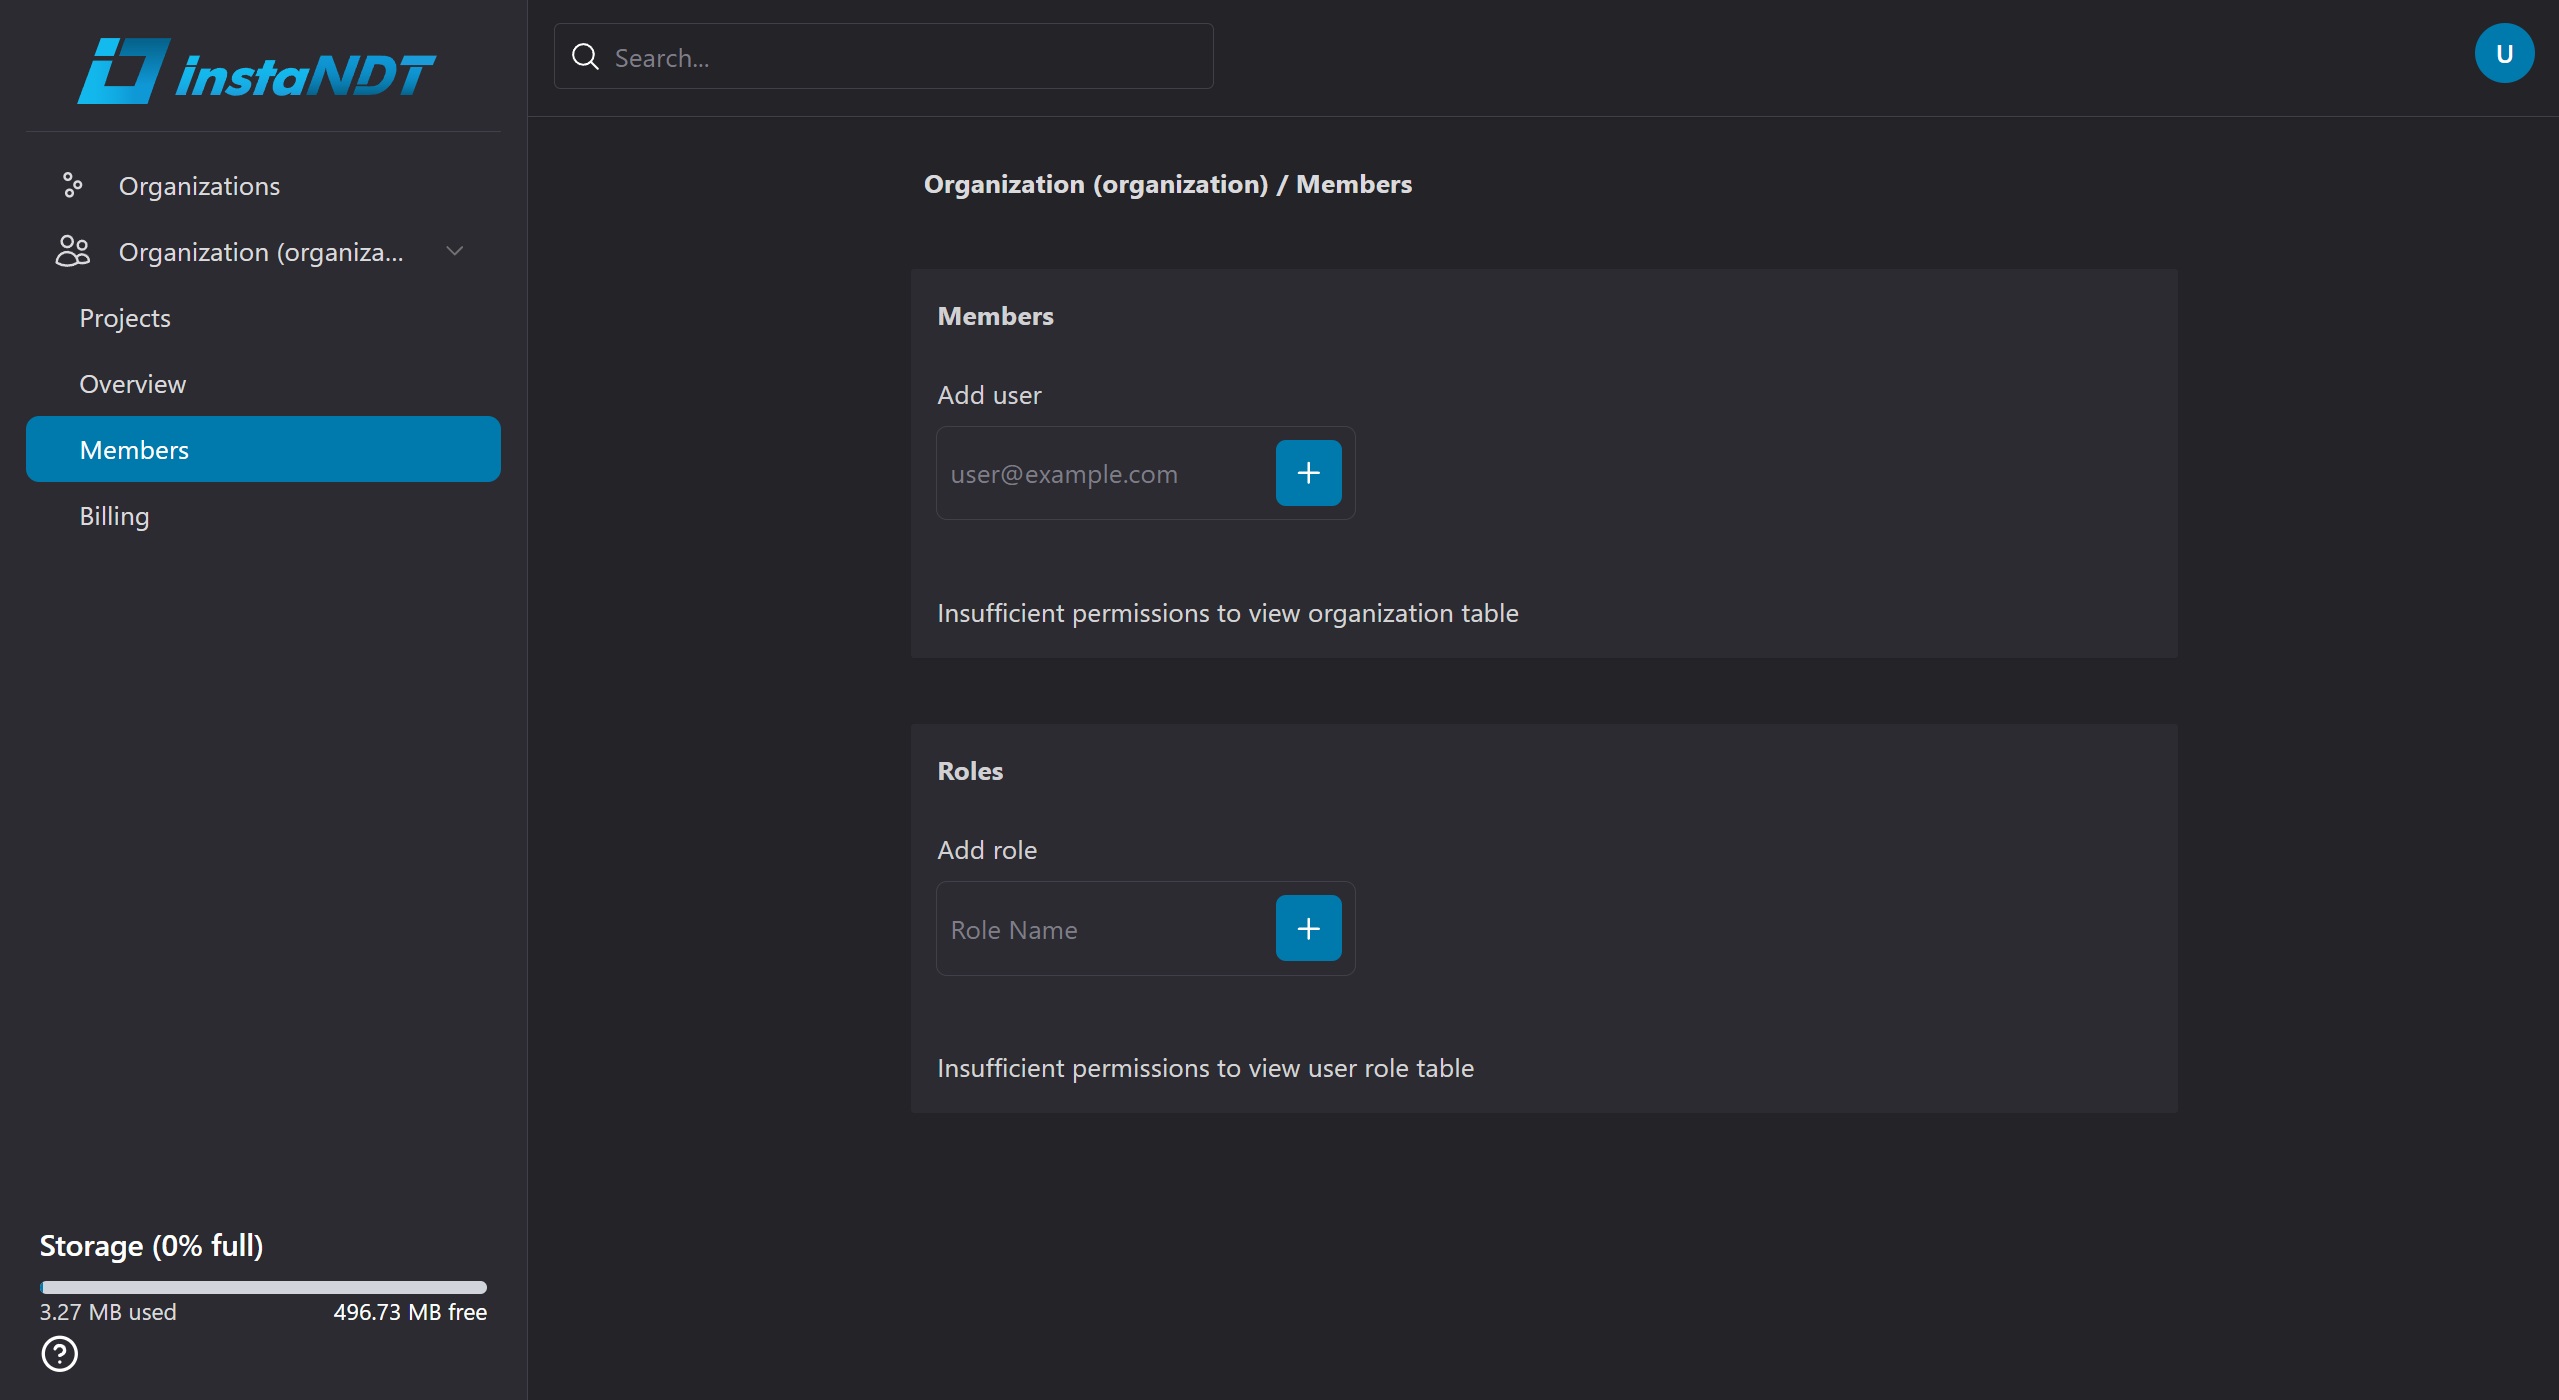
Figure 5, user2@email.com cannot view anything relating to the organization because the custom role does not include permissions pertaining to the organization.
Permission Inheritance
Permissions in instaNDT are evaluated hierarchically. By default, child resources inherit permissions from their parent. However, when permissions are explicitly assigned to a child resource, the more specific permission takes precedence.
This allows access to be granted or restricted at a finer level without affecting the rest of the hierarchy.
Example
Consider the following structure:
A user has:
- No
View Filepermission on Project A. View Filepermission on Folder A.
Although the user cannot access Project A in general, they can access Folder A and view the media contained within it because the permission assigned directly to the folder overrides the inherited permission from the parent project.
Permission Resolution
When determining whether a user can perform an action, the system evaluates permissions in the following order:
- The permission assigned directly to the resource (most specific).
- If no explicit permission exists, inherit the permission from the parent resource.
- Continue traversing up the hierarchy until a permission is found or the root is reached.
Because the closest permission always takes precedence, you can safely grant access to a specific folder or file without granting access to the entire project.
Operations
Deployment
This page outlines the deployment process for self-hosted instaNDT customers. It covers architecture, environment options, and configuration prerequisites required to run instaNDT securely on your own infrastructure (either on-premise or within a private cloud account).
Core Container Architecture
The application is distributed as three distinct, modular container images. Each container fulfills a specific lifecycle or runtime role:
- DB Migration: Runs once per release to update the database schema
- Backend: Exposes API services and interacts with the database
- Frontend: Web interface serving UI for users to interact with the application
Deployment Methodologies
Option A: On-Premise Deployment
- Target Environment: Local enterprise servers, internal physical hardware, or single-node private virtual machines.
- Orchestration Tool: Docker and Docker Compose.
- Workflow Summary:
- Pull the release images from the provided GitLab container registry
- Configure environment variables inside a .env file (database credentials, secrets, ports)
- Execute the migration container to prep the database state
- Spin up the frontend and backend containers
Option B: Private Cloud Deployment
- Target Environment: Customer-owned cloud accounts (i.e.: AWS, Azure, GCP, etc.).
- Orchestration Tool: Cloud-native orchestrators (i.e.: AWS ECS, Azure Container Instances, etc.).
- Workflow Summary:
- Push or pull images to your private cloud container registry (i.e.: ECR or ACR)
- Provision underlying networking (VPCs, subnets, security groups) and databases (i.e.: AWS RDS PostgreSQL or Azure Database for PostgreSQL).
- Deploy the database migration job
- Deploy the backend and frontend services using container services with internal/external load balancer(s)
Regardless of where the application is deployed, certain environment variables must be set. Refer to this section for details on the required environment variables.
Detailed Guidance: For step-by-step setup, check the Infrastructure section.
Infrastructure as Code
To simplify provisioning on cloud platforms, we provide a sample OpenTofu configuration. OpenTofu allows you to declaratively define and manage all required cloud networking, compute instances, security groups, and managed databases. Refer to the Automation with OpenTofu section on how we make use of OpenTofu and refer to the Infrastructure section of a specific cloud on how to deploy those resources.
Environment Variables
Regardless of where the application is deployed, these are the available environment variables for the different target scopes:
| Variable Name | Requirement Status | Target Scope | Platform | Default Value | Description |
|---|---|---|---|---|---|
| POSTGRES_HOST | Required | DB Migration | All | None | Hostname or IP address of the database instance |
| POSTGRES_PASSWORD | Required | DB Migration | All | None | Password to connect to the database instance |
| POSTGRES_USERNAME | Required | DB Migration | All | None | Username to connect to the database instance |
| OTEL_OTLP_USER_ID | Conditional | DB Migration | All | None | If OTEL_OTLP_ENDPOINT is set, then define the user name or ID to authenticate to the remote OpenTelemetry collector to push the logs |
| OTEL_OTLP_TOKEN | Conditional | DB Migration | All | None | If OTEL_OTLP_ENDPOINT is set, then define the token to authenticate the remote OpenTelemetry collector to push the logs |
| CI_ENVIRONMENT_SLUG | Required | Backend and Frontend | All | None | Current environment, mainly used for logging |
| DEFAULT_STORAGE_SIZE_LIMIT_BYTES | Optional | Backend and Frontend | All | 524288000 |
Default storage size limit (in bytes) for storing all the uploaded files |
| EMAIL_SENDER | Required | Backend | All | None | Source email address for sending out email |
| EMAIL_TOKEN_EXPIRY_DURATION_SECS | Required | Backend | All | None | Duration of validity of any tokens sent by email |
| JWT_PAT_SECRET_KEY | Required | Backend and Frontend | All | None | Secret key to decode SON Web Token (JWT) personal access token |
| JWT_SECRET_KEY | Required | Backend and Frontend | All | None | Secret key to decode SON Web Token (JWT) auth access token |
| ORIGIN | Required | Backend and Frontend | All | None | Origin URL of the application |
| POSTGRES_CONNECTION_STRING | Required | Backend | AWS and On-Prem | None | Connection string for the app to connect to the database in the format of Server=<db-instance-hostname-or-ip>;Database=<db-name>;Port=<db-port>;Userid=<db-user>;Password=<db-password> |
| PUBLIC_COOKIE_DOMAIN | Required | Backend and Frontend | All | None | Define the scope of the cookies. It dictates which domains and subdomains can access or receive the cookie during HTTP requests |
| PUBLIC_MAX_FILE_UPLOAD_SIZE_MiB | Required | Backend and Frontend | All | None | Max file size (in MiB) allowed for the upload |
| S3_BUCKET | Conditional | Backend | AWS | None | If STORAGE_MODE is S3, then this points to the s3 bucket to store the uploaded files |
| STORAGE_MODE | Optional | Backend | All | FILESYSTEM |
Set the storage to either S3 (for s3 bucket), FILESYSTEM (for local filesystem) or AZURE (for blob storage) |
| VERIFY_EMAIL_TOKEN_EXPIRY_DURATION_SECS | Optional | Backend | All | 300 |
Duration of validity (in seconds) of email verification token |
| EMAIL_SERVICE_PROVIDER | Optional | Backend | All | SES |
Set the email service to be used to send out emails. Currently accepts ACS,SES or SMTP |
| SMTP_HOST | Conditional | Backend | All | None | If EMAIL_SERVICE_PROVIDER is SMTP, then set this variable to the SMTP hostname or domain |
| SMTP_USERNAME | Conditional | Backend | All | None | If EMAIL_SERVICE_PROVIDER is SMTP, then set this variable to the SMTP username |
| SMTP_PASSWORD | Conditional | Backend | All | None | If EMAIL_SERVICE_PROVIDER is SMTP, then set this variable to the SMTP password for the given username |
| SMTP_PORT | Optional | Backend | All | 587 |
If EMAIL_SERVICE_PROVIDER is SMTP, then set this variable to the SMTP port to connect |
| SMTP_INSECURE_CONNECTION | Optional | Backend | All | false |
If EMAIL_SERVICE_PROVIDER is SMTP, then set this variable to true or false |
| DEV_ACCOUNT_EMAIL | Required | Backend and DB Migration | All | None | Dev account to be seeded for the first time into the database. If the email already exists, then that account will be upgraded to a dev account |
| OTEL_USE_GRPC | Optional | Backend and Frontend | All | false |
Use OTLP/GRPC instead of OTLP/HTTP (Protobuf) as an exporter protocol for OpenTelemetry |
| OTEL_OTLP_ENDPOINT | Optional | All | All | None | Set the OpenTelemetry exporter endpoint URL (with port number) to push the observability data |
| AZURE_COMMUNICATION_SERVICE_CONNECTION_STRING | Conditional | Backend | Azure | None | Required if EMAIL_SERVICE_PROVIDER is set as ACS. This value can be retrieved from the Azure Communication Services page under the Keys section |
| PUBLIC_ENDPOINT | Required | Frontend | All | None | URL of the app's backend endpoint |
| PUBLIC_INTERNAL_ENDPOINT | Required | Frontend | All | None | Internal (private) URL of the app's backend endpoint. This application uses a backend for frontend architecture and SSR, meaning that the frontend has it's own backend. This URL points the backend of the frontend to the API backend when in the private network. |
| PUBLIC_GRAFANA_FARO_COLLECTOR_URL | Optional | Frontend | All | None | For frontend observability, if you plan to use Grafana Faro, set the collector URL generated from Grafana settings page |
| PUBLIC_GRAFANA_FARO_SAMPLING_RATE | Optional | Frontend | All | 1 |
Set the sampling rate for Grafana Faro, decimal value between 0 and 1 |
| IMAGE_STORAGE_PATH | Conditional | Backend | All | None | If STORAGE_MODE is FILESYSTEM, then set the path in the system to store the uploads |
| JWT_ACCESS_TOKEN_EXPIRY_DURATION_SECS | Optional | Backend | All | 300 |
Sets the lifetime (time-to-live) of a JSON Web Token (JWT) in seconds before it becomes invalid. Once this duration has elapsed after a token is issued, the server will reject it, requiring the user to either log in again or use a refresh token to obtain a new access token |
| JWT_REFRESH_TOKEN_EXPIRY_DURATION_SECS | Optional | Backend | All | 3600 |
Set the lifetime (time-to-live) of a JSON Web Token (JWT) refresh token in seconds. Because refresh tokens are meant to keep a user logged in across sessions or app restarts, this duration is typically much longer than an JWT_ACCESS_TOKEN_EXPIRY_DURATION_SECS lifespan |
| DEFAULT_STORAGE_GRACE_PERCENTAGE | Optional | Backend | All | 5 |
Set the default buffet limit (in percentage) that lets users to upload files that go slightly over the storage quota, as long as the extra usage stays under this limit |
| MIN_LOGGING_LEVEL | Optional | Backend | All | Warning |
Define the minimum logging level by setting one of the values: Verbose, Debug, Info, Warning, Error, or Fatal |
| PUBLIC_FT_DISABLE_SEND_EMAIL_VERIFICATION | Optional | Backend and Frontend | All | false |
Feature toggle to disable sending of email verification when a new user signs up |
| PUBLIC_FT_DISABLE_USER_SIGN_UP | Optional | Backend and Frontend | All | false |
Feature toggle to disable any new user sign ups |
| PUBLIC_FT_DISABLE_CONTACT_REQUEST | Optional | Backend and Frontend | All | false |
Feature toggle to disable contact request for instaNDT service/subscription |
| PUBLIC_FT_ENABLE_AZURE_SSO | Optional | Backend and Frontend | All | false |
Feature toggle to enable Azure SSO login button for the users |
| PUBLIC_AZURE_SSO_AUTHORITY | Conditional | Backend and Frontend | All | None | If PUBLIC_FT_ENABLE_AZURE_SSO is set to true, then set the endpoint address (ex: https://login.microsoftonline.com/ |
| PUBLIC_AZURE_SSO_TENANT | Conditional | Backend and Frontend | All | None | If PUBLIC_FT_ENABLE_AZURE_SSO is set to true, then set Microsoft Entra tenant ID (Directory ID), which is a unique 36-character GUID including hyphens (e.g., 12345678-abcd-1234-abcd-123456789abc), used to configure the SSO in Microsoft Entra ID |
| PUBLIC_AZURE_SSO_CLIENT_ID | Conditional | Backend and Frontend | All | None | If PUBLIC_FT_ENABLE_AZURE_SSO is set to true, then set the client ID (also known as application ID) as per the configuration in Microsoft Entra ID |
| PUBLIC_AZURE_SSO_REDIRECT_URI | Conditional | Backend and Frontend | All | None | If PUBLIC_FT_ENABLE_AZURE_SSO is set to true, then set the reply URL, which is the exact security endpoint where Microsoft Entra ID sends the authentication token after a user successfully signs in |
| OTEL_AUTH | Optional | Backend and Frontend | All | None | If the remote OpenTelemetry collector requires authentication, set the authorization token for the OTLP request header (ex: Bearer <Token>) |
| CONTACT_REQUEST_EMAIL | Conditional | Backend | All | None | If PUBLIC_FT_DISABLE_CONTACT_REQUEST is set to false, then define a valid email address as a contact point for instaNDT service/subscription requests |
| PUBLIC_APP_ENVIRONMENT | Optional | Backend and Frontend | All | None | Set this to the current deployment environment, which will be used to label the deployment environment tag for observability |
| AZURE_POSTGRESQL_CONNECTIONSTRING | Required | Backend | Azure | None | Connection string for the app to connect to the database in the format of Server=<db-instance-hostname-or-ip>;Database=<db-name>;Port=<db-port>;Userid=<db-user>;Password=<db-password> |
| AZURE_STORAGE_ACCOUNT_NAME | Conditional | Backend | Azure | None | If STORAGE_MODE is set to azure, then define the globally unique name of your Azure Storage account |
| AZURE_CONTAINER_NAME | Conditional | Backend | Azure | None | If STORAGE_MODE is set to azure, then set the specific bucket or folder partition inside the Azure Storage Account to where the files are uplaode |
| DEFAULT_USER_LIMIT | Optional | Backend | All | 5 |
Set the default system-wide quota for total number of users that can be created |
Automation with OpenTofu
OpenTofu is an OSS tool for building, changing, and versioning infrastructure safely and efficiently. OpenTofu can manage existing and popular service providers (AWS, Azure, Google Cloud, etc.) as well as custom in-house solutions.
The key features of OpenTofu are:
- Infrastructure as Code: Infrastructure is described using a high-level configuration syntax. This allows a blueprint of your datacenter to be versioned and treated as you would any other code. Additionally, infrastructure can be shared and re-used.
- Execution Plans: OpenTofu has a "planning" step where it generates an execution plan. The execution plan shows what OpenTofu will do when you call apply. This lets you avoid any surprises when OpenTofu manipulates infrastructure.
- Resource Graph: OpenTofu builds a graph of all your resources, and parallelizes the creation and modification of any non-dependent resources. Because of this, OpenTofu builds infrastructure as efficiently as possible, and operators get insight into dependencies in their infrastructure.
- Change Automation: Complex changesets can be applied to your infrastructure with minimal human interaction. With the previously mentioned execution plan and resource graph, you know exactly what OpenTofu will change and in what order, avoiding many possible human errors.
OpenTofu Features
Backend for state and lock
The backend defines where OpenTofu stores its state data files. And some of the backend types support locking of the state file as well to avoid multiple process (or multiple people) making changes to the state file at the same time. Available backends are listed on the OpenTofu documentation
OpenTofu CLI
Some of the most used tofu commands are listed below.
Init
Plan
To save the output of the plan command:
Apply
For auto approval:
If the outplan of the plan command was previously saved, it can be passed to the apply command:
Destroy
To destroy/remove all the provisioned resources:
Infrastructure
AWS
instaNDT Architecture in AWS
Quick Architecture Overview

Detailed Overview
ECS
instaNDT will be running inside the ECS cluster as a service and the containers will be running inside autoscaled EC2 instances. There are 2 type of ECS services deployed namely frontend and backend. And there is an ECS task that is deployed for database migration. Every time there is a database migration task, we need to trigger the migration task (either manually or through automation script) and once completed, it’ll quit the container successfully.
Customers will also be given an access token (that should be stored in their respective parameter store or secrets manager). This access token is used to authenticate the specific Gitlab repo that contains the docker images to pull. This access token needs to be referenced in ECR (if the container images are stored in there) or when creating the ECS task definition, so that it could pull the docker image from GitLab without any authentication issues.
CloudFront + WAF
To reduce latency for users accessing from different regions, we enabled CloudFront which is the CDN and for the firewall, we have configured WAF's web ACL rule.
RDS
For the database, we are using RDS with high availability (multi AZ). For the initial stage, d3.t3.micro instance can be used but for higher workload, we can move to db.m5.large etc.
S3
Standard S3 bucket is where the uploaded DICOM images will be stored. This S3 bucket is private to prevent public access by unauthenticated users.
Secrets Manager
Secrets Manager is needed to store the GitLab access token as mentioned before. Any other credentials, secret or certificates will also be stored here. If necessary, secret rotations can be enabled in the future, for let’s say database connection, as Secrets Manager provides the option to rotate them with very few steps (either automatically or using Lambda).
SSM
Sessions Manager
Instead of using ssh to bastion host, we opted for Sessions Manager to connect to bastion host which has only private IP. Either AWS UI or cli can be used to connect to the bastion host(s).
Parameter Store
There is only one parameter as of now in Parameter Store, which indicates the app version to be deployed. ECS task definition in tofu will refer to this variable before deploying the container.
AWS Infrastructure Automation
IaC with OpenTofu
We will be automating most of the infrastructure provisioning with OpenTofu. Refer to Automation with OpenTofu for more information.
Note
Although we were able to automate most of the tasks with OpenTofu, there are still some manual tasks that needs to be handled. Refer to the manual task section in AWS Setup Guide
OpenTofu Modules for AWS
Coming soon...
AWS Setup Guide
Some of these steps are focused on running on a local GNU/Linux environment, but most of it is also relevant to Windows OS as well.
Steps to automate AWS infrastructure
1. Get OpenTofu CLI
Retrieve the cli from GitHub release page by running:
Verity that tofu is detected by running:
which will output the tofu version v1.9.0.
2. Clone git repo
Clone the git repo that has been communicated to you using the specific GitLab access token:
3. Set Up Tofu Code
3.1 Use terraform.tfvars
Copy the existing terraform.tfvars.example to terraform.tfvars and make changes to the variables in that file. Make sure to modify the GitLab user and GitLab access token there with those credentials provided to you. Basically, you'll have 2 sets of tokens. This access token is separate from the other token mentioned in the previous section which is used to clone the repo. The current token is used to pull the containers from the GitLab registry.
3.2 Tofu Init
Before initializing tofu, make sure to login to your AWS SSO through the CLI:
and setup the sso config locally. And finally, initialize tofu with:
3.3 Tofu Plan / Apply
To view the resources that will be created, run:
and once that is completed, you should apply the changes
which will actually create the resources in AWS.
Manual Steps
These manual steps can be done either through AWS UI or cli. However for now, we will cover AWS UI only.
App Version in Parameter Store
Make changes to app version parameter only on the first time you deploy this resource. On later deploys, tofu will take care of updating this parameter. This will be the app version that ECS Task Definition from tofu uses to deploy the application (frontend, backend and db migration images).
Azure
instaNDT Architecture in Azure
Quick Architecture Overview
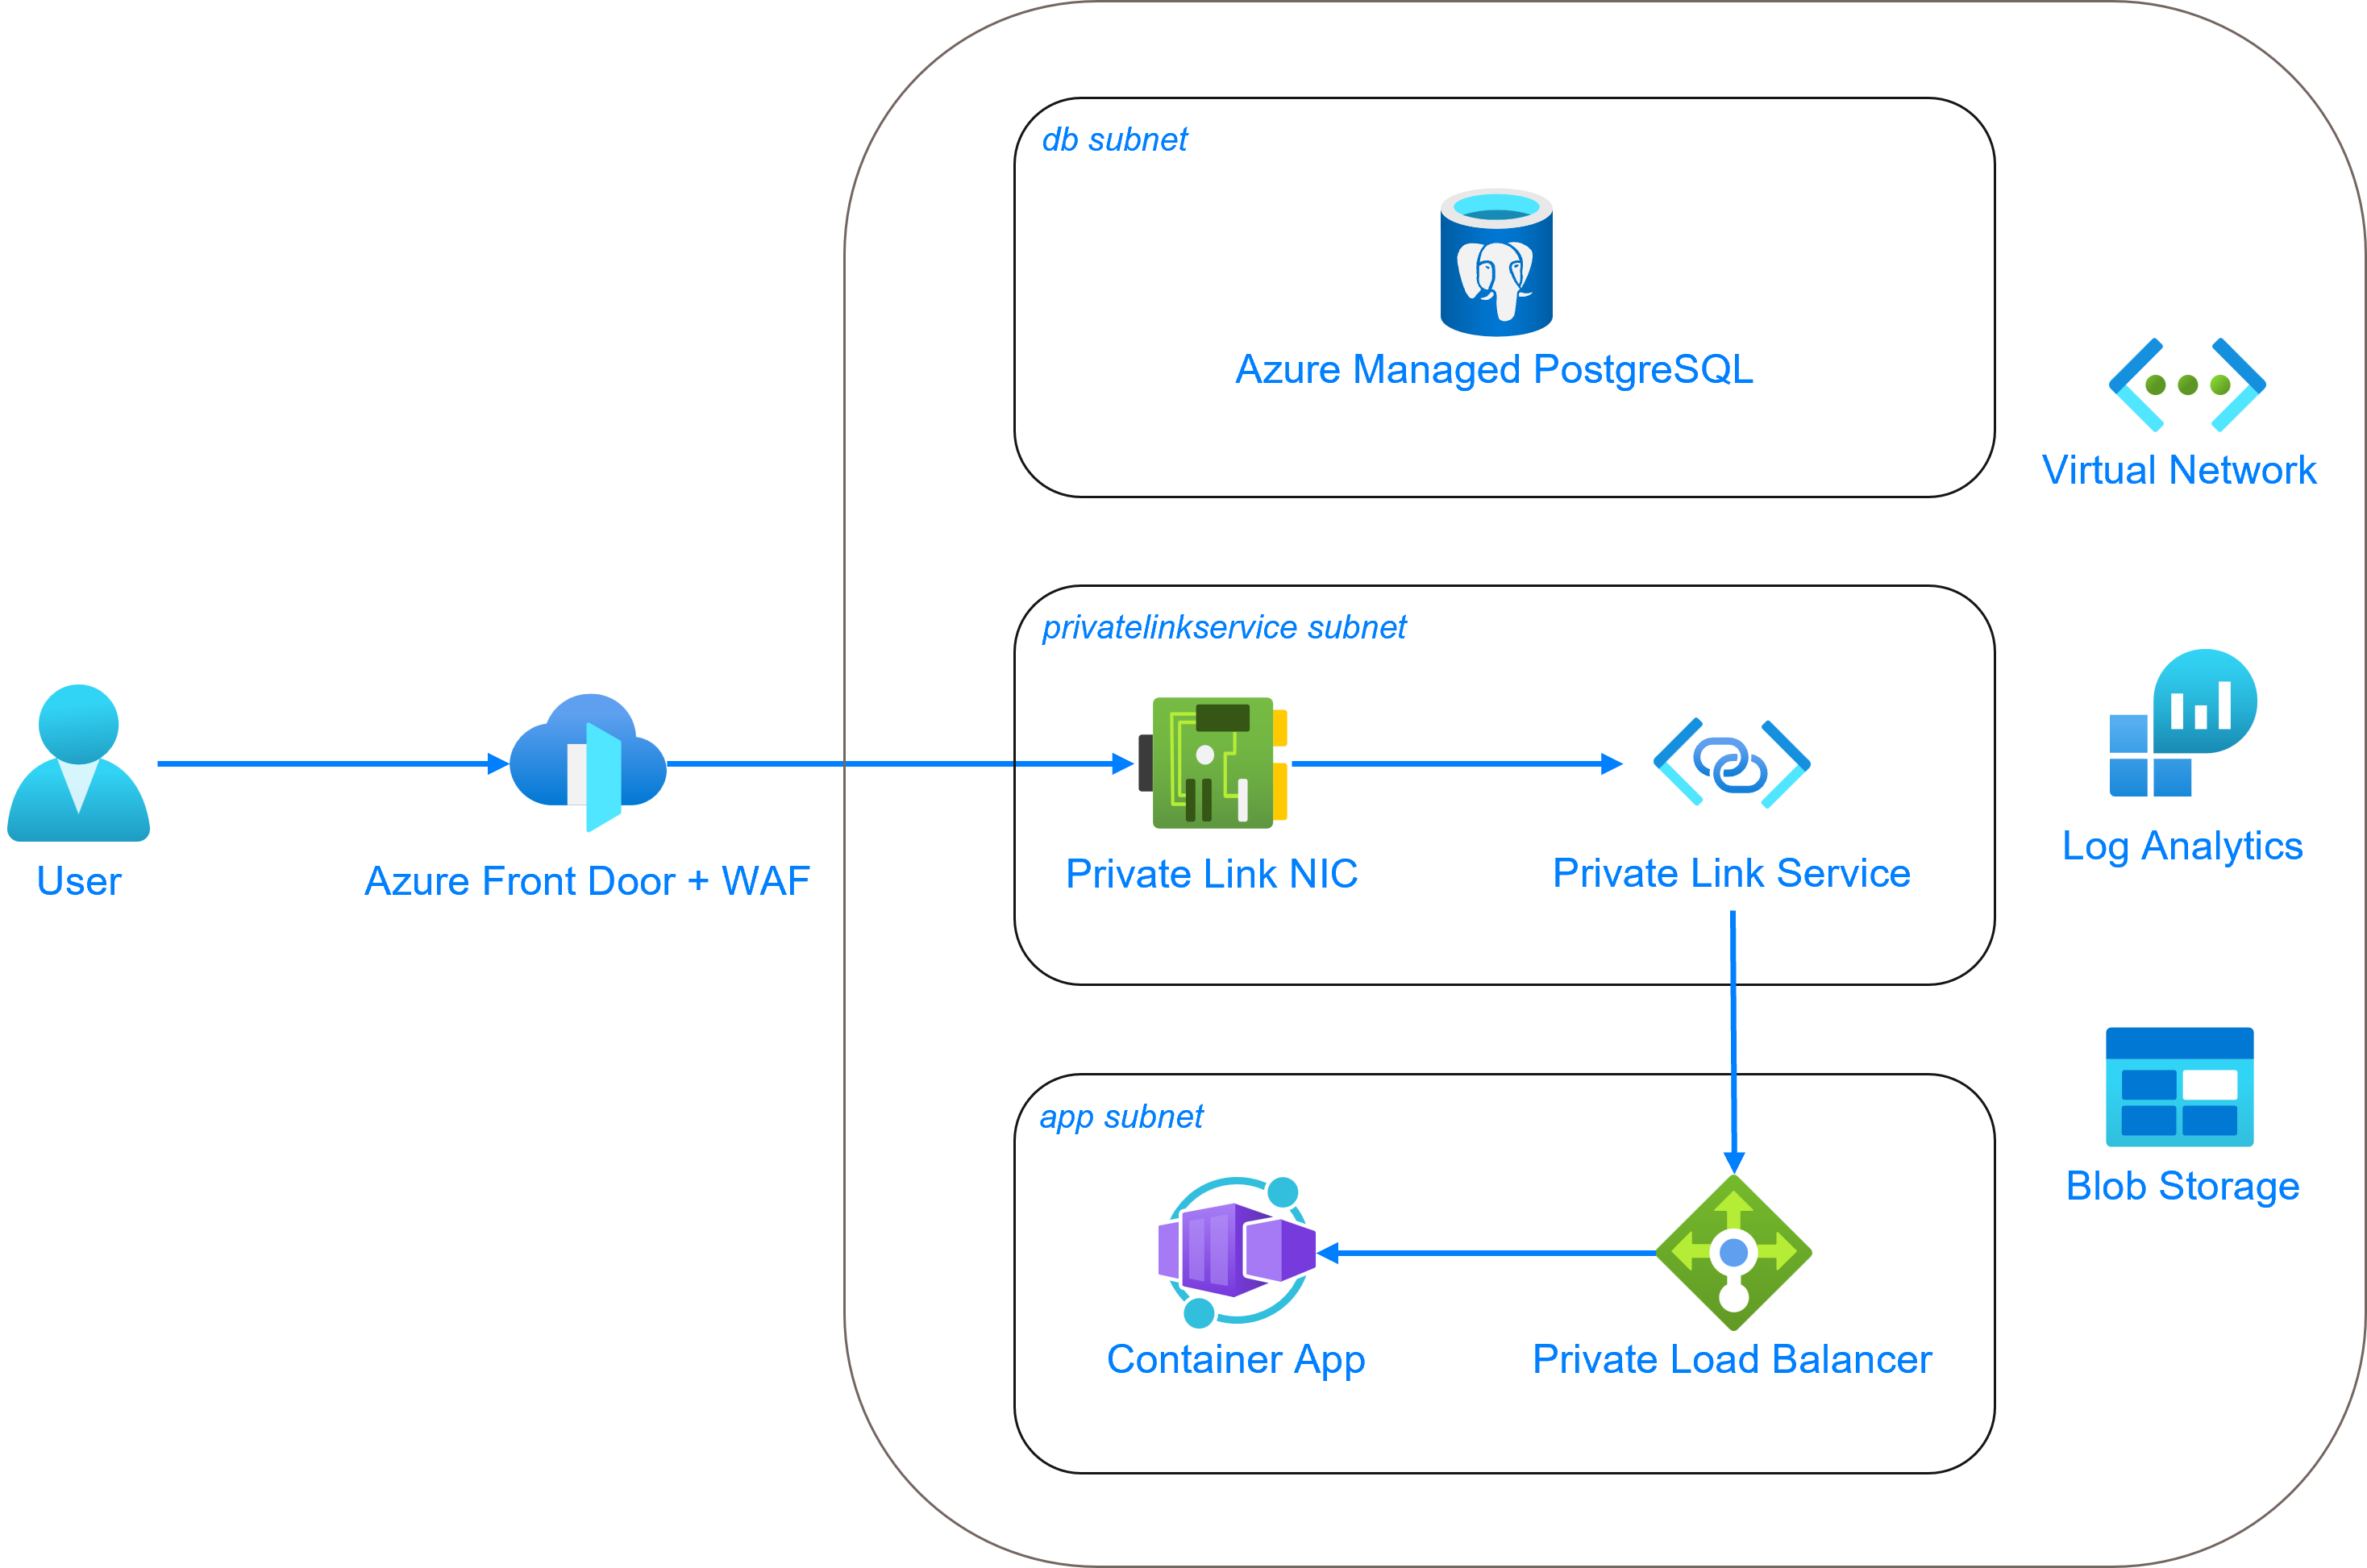
Detailed Overview
Container App
instaNDT will be running inside the Azure Container Environment inside a private subnet. There are 2 container apps deployed namely frontend and backend. And there is a container app job that is deployed for database migration. Every time there is a database migration task, we need to trigger the job and once completed, it’ll quit the container successfully.
Customers will also be given an access token (that should be stored in their respective key vault). This access token is used to authenticate the specific Gitlab repo that contains the docker images to pull. This access token needs to be referenced when creating the container app, so that it could pull the docker image from GitLab without any authentication issues.
CDN / FrontDoor
Each of the container app has ingress exposed internal which means that it would not be directly exposed to public network (a.k.a Internet). We will be using the Azure FrontDoor to both expose the frontend (and backend) and to be used as a firewall (WAF) to protect against unauthorized access to the resources in Azure. But to be able to link the FrontDoor and the container app’s load balancer, we need to have a private link (service) enabled and running in its own subnet.
DNS Zone
Once CDN is configured, it’s recommended to configure DNS zone and the necessary records to point to the CDN URL for ease of use.
Database
Azure (managed) database for postgreSQL instance tiers:
- Burstable (1-20 vCores) - Best for workloads that don’t need the full CPU continuously
- General Purpose (2-96 vCores) - Balanced configuration for most common workloads
- Memory Optimized (2-96 vCores) - Best for workloads that require a high memory to CPU ratio
We are currently using General Purpose instances for database for more highly available (and redundant) instance, especially in production. We can avoid memory optimized instances as we don’t have a heavy workload for database. And to run a smaller instance in non-production environment, Burstable instance is more suitable.
As always, the database needs to be in its own subnet and needs to be accessed through the private FQDN.
Blob Storage
A storage account is created, and a container (equivalent of bucket in AWS) is where the uploaded DICOM images will be stored. This blob storage is private as well to prevent public access by unauthenticated user.
For the container app to access (including download, upload, etc.) the items in the blob storage, we have created a user-assigned identity (UAI) that will be attached to the container app to assume when accessing container (bucket) in the blob storage.
Key Vault
Key vault is needed to store the GitLab access token as mentioned before. Any other credentials, secret or certificates will also be stored here. If necessary, secret rotations can be enabled in the future for let’s say database connection as key vault provides the option to rotate them with very few steps.
Entra ID
Microsoft Entra ID (previously Microsoft AD) is cloud-based identity and access management (IAM) and offers authentication and authorization services to various Microsoft services through SSO.
We should enable Entra ID to be used as one of the sign-in option for instaNDT. It could be managed in the same resource group or if there is already a centrally managed Entra ID, we could use that too. After setting up Entra ID for instaNDT, it will generate a tenant ID and client ID strings that we need to inject into the environment variables of container app.
Azure Infrastructure Automation
IaC with OpenTofu
We will be automating most of the infrastructure provisioning with OpenTofu. Refer to Automation with OpenTofu for more information.
Note
Although we were able to automate most of the tasks with OpenTofu, there are still some manual tasks that needs to be handled. Refer to the manual task section in Azure Setup Guide
OpenTofu Modules for Azure
Coming soon...
Creation of Entra ID
Note
The creation of Active Directory (or known as Entra ID) is not covered in this module for now. We will look into that in the future. But if you'd like to automate it, take a look at this azuread provider. This can be implemented in OpenTofu as well.
Azure Setup Guide
Some of these steps are focused on running on a local GNU/Linux environment, but most of it is also relevant to Windows OS as well.
Prerequisites
Create Microsoft Entra ID App Integration
Create a new app integration for instaNDT in Microsoft Entra ID. Take note of the created entra_tenant_id and entra_client_id values displayed on the page, they are required for the terraform.tfvars file later.
Azure Infrastructure Setup
1. Get OpenTofu CLI
Retrieve the cli from GitHub release page by running:
Verity that tofu is detected by running:
which will output the tofu version v1.9.0.
2. Clone git repo
Clone the git repo that has been communicated to you using the specific GitLab access token:
git clone https://<username>:<access-token>@gitlab.com/duerr-ndt/pacs/external/iac-instandt-azure.git
3. Log in to Azure
Log in to your Azure subscription through the CLI:
Take note of the subscription ID, it will need to be replaced in the terraform.tfvars file later.
4. Set Up Tofu Code
4.1 Populate terraform.tfvars variables
Copy the existing terraform.tfvars.example to terraform.tfvars and make changes to the variables in that file.
Take special note of the following variables:
app_version- This is the version of instaNDT app that will be deployed. When a new version of the app is released, theapp_versionvariable interraform.tfvarsneeds to be updated, and the apply command must be rerunazure_subscription_id- Listed after logging in to azure either through UI or CLIdatabase_ha_mode- Refer to the Microsoft documentation here. Take note that not all regions support cross-zone redundancy (ZoneRedundant) or same-zone redundancy (SameZone)entra_client_id- Client ID generated from creating the app integration for instaNDT in Microsoft Tenant IDentra_tenant_id- Tenant ID generated from creating the app integration for instaNDT in Microsoft Tenant IDgitlab_registry_username- This username is used to access the gitlab container registry. This username is not the same as the username used to clone the template infrastructure-as-code repositorygitlab_registry_token- This token is used to access the gitlab container registry. This token is not the same as the token used to clone the template infrastructure-as-code repository
4.2 Tofu Init
Initialize tofu with the following command:
4.3 Tofu Plan / Apply
To view the resources that will be created, run:
and once that is completed, apply the changes:
which will actually create the resources in Azure.
Manual Steps
DNS Record
If you've registered with your DNS registrar other than Azure, add or update the domain's subdomain NS record to point to the DNS servers mentioned in the the created DNS zone. These can be found in the azure UI via DNS Zones > <your.custom.domain> > Overview.
On-Premise
On-Premise Setup Guide
Container Runtime Engine
We distribute the images from docker build step which generates the final container images for frontend, backend and db migration. Although they are OCI-compliant images, we have only tested with docker container runtime. Which means that it might be possible to use these images with other container runtimes (containerd, etc.) but they were not tested, so we can't guarantee that it would run without issue on those container runtimes.
This documentation contains docker cli, assuming that you are using docker engine.
Start The Container
You can either use simple docker command to run the frontend, backend and migration containers and pass the environment variables, or write your own docker-compose.yml (refer to this doc) and use docker compose cli
Changelogs
API Versions
API Versions
This document serves as a reference for all API versions. Please refer to the specific version documentation for details.
Version History:
API Version 2.0
Breaking Changes in Version 2.0
- API Update: The API has been upgraded to Version 2.
- Route: GET
/api/v2/{org-slug}/media/history/info - The response for this route has been updated to include version information for each
MediaHistoryInfoitem.- The oldest media now has version
1, - The second oldest has version
2, and so on.
- The oldest media now has version
- Fix bug where project ID is used instead of the folder ID to retrieve media history.
- Change fetching media history by using folder ID instead of project ID. Example: From
/api/v1/{org-slug}/media/history/info?project={projectId}to/api/v2/{org-slug}/media/history/info?folder-id={folderId} - Route: DELETE
/api/v2/{org-slug}/projects?project={projectId} - Delete projects endpoint no longer has a request body. It has been changed to use a query param instead.